From the moment of its appearance and at the time of writing, all Chevrolet Niva cars were equipped with a single engine model - 2123. This engine is easy to maintain; almost all elements on it can be changed independently with a minimum set of tools. Belt drives are especially easy to adjust. They are installed on the generator and other engine auxiliaries such as air conditioning. Most of them can be changed independently of each other, so the Niva Chevrolet alternator belt with air conditioning can be changed as easily as on a simpler version.
Chevrolet Niva
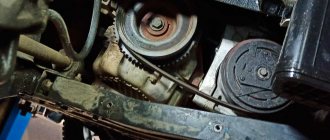
To check the belt tension, press your finger on the belt in the middle between the generator and coolant pump pulleys.
To check the belt tension, press your finger on the belt in the middle between the generator and coolant pump pulleys.
With a pressing force of about 8.0 kgf, the belt deflection should be 12 ± 1 mm.
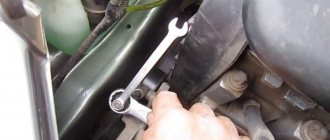
To adjust the belt tension, remove the rubber hoses for supplying air to the throttle assembly.
When to change the alternator belt
Some motorists are guided by the level of wear, others by mileage, and still others pay attention to this unit only when obvious problems arise in the operation of the SUV.
There are several characteristic signs of problems with the belt and alternator unit:
- whistling from under the hood, uncharacteristic noise when starting the engine;
- hot light on the dashboard in the form of a battery;
- Unstable operation of lighting and electrical equipment in the car.
The belt is also checked for traces of oil on the surface, as well as for the degree of tension.
When faced with such phenomena, it is necessary to check the current condition of the belt. Its wear is indicated by cracks, breaks, fraying, cuts, as well as other visually noticeable defects.
If the symptoms clearly indicate a loss of performance characteristics of the drive belt, then there is nothing else left but to replace it with a Chevrolet Niva. You can do this yourself.
But another option cannot be ruled out. This is a belt stretch. That is, it remains intact and suitable for further use, but has stretched a little, or its tension in the knot has weakened. Plus, sometimes when installing a belt, it can be pulled too tight. In both cases, adjustment is required.
Chevrolet Niva
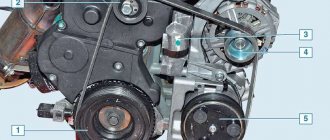
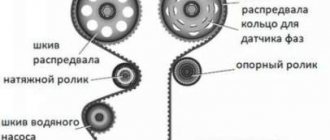
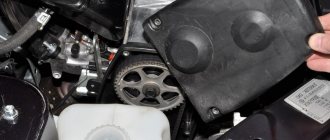
Location of the accessory drive belt and tension roller bracket mounting nuts (for clarity, shown with the engine cooling system radiator removed).
Location of the accessory drive belt and tension roller bracket mounting nuts (for clarity, shown with the engine cooling system radiator removed).
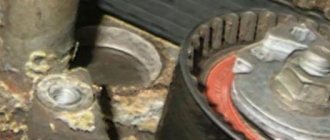
Replacing rollers
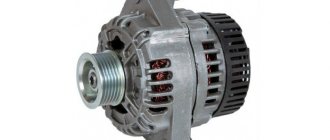
The alternator belt is the connecting component that connects the alternator and the engine. It is thanks to the belt that the generator can generate electricity, powering all consumers in the car.
But there is a roller between the crankshaft and generator pulleys. With its help, the belt is always in the required tension, and also does not leave its place during operation. Over time, the roller may wear out and require replacement. Moreover, you can change the tension roller yourself.
Breakage and premature wear of the tension roller is usually associated with foreign objects getting into the unit, incorrect adjustment, or incorrect belt tension.
The need to replace the rollers is usually indicated by extraneous noise, as well as strong vibrations when the engine is running. You can also detect problems by visual inspection. Problems appear as:
- backlash;
- mechanical damage to the body;
- bearing defects;
- damage to the bracket;
- complex rotation of the shaft.
At the same time, the belt itself is usually inspected for cracks, cuts, and delaminations. Many Chevrolet Niva owners believe that it is best to change the roller and belt at the same time. Although the service life of the roller may be longer. Here you need to act according to the situation.
To change the rollers with your own hands, Chevrolet Niva owners need to do the following:
- Prepare for repairs in advance. To do this, you need to turn off the ignition, remove the negative from the battery and prepare the keys for 10 and 17.
- Now loosen and remove the old belt. To do this, the tension roller is loosened along with the landing pad. There are 3 nuts for 10 keys. Or you can simply loosen the central bolt by turning it with a 17mm wrench.
- After removing the belt, you need to block the crankshaft so that it does not rotate during operation.
- Remove the nut on the roller, then remove the assembly, not forgetting to also remove the spring washer.
- There is a protective cap on the generator roller. It must be removed first.
- Then use a 17mm wrench to remove the central nut. All that remains is to remove the spacer ring, which prevents the roller and motor housing from aligning.
- When installing a new element, the ring is fixed first, followed by a roller.
- Now, using a washer with a spring mechanism, you need to tighten the bolt tightly.
- All that remains is to put on the belt and tighten the tension roller. In this case, the belt should be pressed a maximum of 1 cm from its position.
The Chevrolet Niva operating manual states that the tension roller fastening should be checked at intervals of 30 thousand kilometers. But this can be done more often. The main thing in such a situation is to promptly notice the presence of problems and correct the situation before more serious problems arise.
Chevrolet Niva
Using a 13mm wrench or socket, rotate the adjusting bolt clockwise, tensioning the belt.
Using a 13mm wrench or socket, rotate the adjusting bolt clockwise, tensioning the belt.
Tighten the nuts securing the tension roller bracket. We start the engine, stop it and check the belt tension again.
Attention! Do not overtighten the belt! Excessive belt tension leads to premature failure of the alternator belt and bearings, coolant pump and power steering pump.
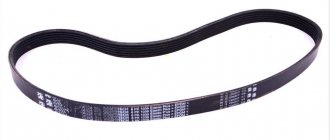
We replace the drive belt for auxiliary units when cracks, ruptures and detachments of rubber from the fabric base are detected on it. On a car with air conditioning, remove the air conditioning compressor drive belt.
Loosen the nuts securing the tension roller bracket (see above) and rotate the adjusting bolt counterclockwise, loosening the belt tension.
Let's sum it up
Taking into account the above information, it becomes clear that the alternator belt on a Chevrolet Niva needs to be changed more often than many car owners believe. It is also important to monitor the general condition of the belt, checking it for wear, cracking, etc. At the same time, it is necessary to evaluate its tension and make adjustments if necessary.
We also recommend reading the article on how to replace the Lada Kalina alternator belt tensioner. From this article you will learn when and why you need to change the Kalina generator belt tensioner, as well as what you need to consider when performing this procedure.
Finally, we note that if the alternator belt is being replaced, it is important to purchase not only a product that matches the markings, but also a high-quality product. In fact, it is better to refuse the expensive original, while it is quite possible to purchase a cheaper, but high-quality analogue from a well-known manufacturer.
As a result, you can count on a fairly long service life of the generator belt, as well as reliable and stable operation of auxiliary equipment (provided there are no other breakdowns, liquids getting on the belt, etc.).
How to repair a generator
If you are an experienced person in such matters, then replacing alternator brushes on a Chevrolet Niva is unlikely to scare you. As well as replacing generator bearings on one of the most popular domestic SUVs, the Chevrolet Niva.
You will first need to remove the element and prepare a repair kit.
It is worth paying tribute to the designers who provided for the use of a repairable generator on Chevrolet Niva cars. That is, its disassembly and troubleshooting can easily be done with your own hands.
The instructions are quite complex and multi-step. Therefore, think in advance whether it is worth taking on such work. If you are confident in your own abilities, then you can start.
For repairs you will need a kit consisting of:
- open-end wrench 10;
- ratchets;
- heads for 8, 10, 13 and 24 mm;
- mounting blade;
- marker;
- controls;
- Phillips and flat screwdrivers;
- bench vice;
- tester or multimeter;
- two-jaw puller;
- caliper;
- torque wrench.
If everything you need is there, then you can start repairing.
Checking installed parts
After this, a final check of all mechanisms is carried out and the elements are collected in the reverse order.
If the belt is tight and the force is not enough to loosen or tighten it, there are several ways:
- You can put the car in 4th gear, put the belt on the roller and push in the direction of rotation of the crankshaft. When it starts to turn, you need to pull the belt onto the generator pulley, and it will fall into place on its own.
- In the same way, you can not push the car, but lift the wheel and spin it, or spin the generator itself.
This makes it easy and quick to replace the Chevrolet Niva generator belt rollers. You should regularly diagnose the moving parts of the car in order to prevent possible breakdowns in time and replace faulty parts.
We recommend replacing the bearings and belt every 40 thousand kilometers.
Dismantling and installation of the generator
The algorithm for dismantling the generating device is as follows:
- Perform standard preparation. That is, turn off the ignition, remove the negative terminal from the battery, and also remove the protection from the engine.
- Now, using a 10mm wrench, loosen the nuts holding the base together with the tension roller. Remove the fasteners completely from their seats.
- Find the adjustment screw and then unscrew it. As soon as the screw rises up the platform, make sure that it can now move freely.
- Remove the belt from the pulleys. The belt can be completely removed. A good reason to replace the consumable if it has been working on the Chevrolet Niva for quite a long time.
- Next, unscrew the bolts that hold the generator itself. Here you will need a key for 13 and 17. There are 2 wires at the back of the generator. One is connected simply by a plug, and the second is held on the head of the bolt. Remove and unscrew them.
- All that remains is to remove the generating device from its seat.
During the installation process, everything must be done in reverse order.
But there are also those who decide not just to change the generator, but try to repair it. If you are familiar with the generator connection diagram, you know the design of the generating device on the Chevrolet Niva, and you have experience in working with car electrical systems, then you can potentially do the repair yourself.
The task is far from simple. Therefore, it is not recommended to carry out repairs without the appropriate experience, skills and understanding of what is happening.