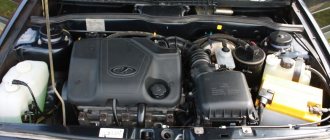
Opening Again we take the ready-made ESP harness and cut it again mercilessly.
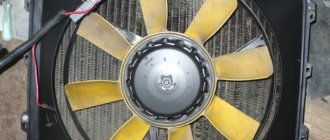
Complications also affected the interior part. Just as in the case of lever mechanisms, they have more force than standard ones. The locations for installing headlights are strictly defined. How to connect the Duplicate button of the VAZ window regulator. Connection diagram Reasons for poor performance There are not so many reasons why the VAZ window regulator does not work well. The new lift is installed in the reverse order. To do this, you need to pry it off with a screwdriver and, moving it a little to the side, pull it out of its recess. One small disadvantage of the lever mechanism is that the speed of raising the glass is not the same. Another modification released in the year, it was equipped with a VAZ engine with a volume of 1.6 liters and a power of 82 horsepower. A modification released this year with a VAZ injection valve engine, volume 1.6 liters and power VAZ 2114.15 FORCED ACTIVATION OF THE COOLING FAN USING A BUTTON AND RELAY
Scheme for switching on headlights, side lights and turn signals for VAZ-2113, 2114 and 2115
Headlight switching diagram for VAZ-2113, 2114 and 2115
Scheme for switching on headlights and fog lights:
1 – headlights; 2 – mounting block; 3 – headlight switch; 4 – ignition switch; 5 – external lighting switch (fragment); 6 – fog lamps in the internal rear lights; 7 – fog light switch with control lamp; 8 – indicator lamp for high beam headlights in the instrument cluster; K8 – headlight high beam relay; K9 – relay for low beam headlights; A - the order of conditional numbering of plugs in the headlight block; B - to power supplies
Scheme for switching on the side lights of VAZ-2113, 2114 and 2115
External lighting switching diagram:
1 – side light lamps in headlights; 2 – engine compartment lamp; 3 – mounting block; 4 – engine compartment lamp switch; 5 – ignition switch; 6 – external lighting switch (fragment); 7 – indicator lamp for external lighting in the instrument cluster; 8 – side light and brake light lamps in the external rear lights; 9 – license plate lights; 10 – instrument lighting regulator; 11 – brake light switch; 12 – on-board control system unit; K4 – relay for monitoring the health of lamps (contact jumpers are shown inside the relay, which must be installed in the absence of a relay); A - to power supplies;
Scheme for switching on direction indicators and hazard warning lights for VAZ-2113, 2114 and 2115
Diagram for switching on direction indicators and hazard warning lights:
1 – direction indicator lamps in headlights; 2 – mounting block; 3 – ignition switch; 4 – alarm switch; 5 – side direction indicators; 6 – direction indicator lamps in the external rear lights; 7 – instrument cluster with turn signal indicator lamps; 8 – direction indicator switch; 2 – relay-interrupter for direction indicators and hazard warning lights; A - to power supplies
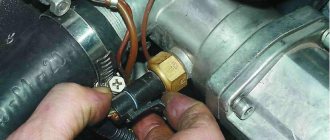
We turn on the brake lights forcibly
Relay K1 is successfully replaced with a pad with jumpers. In Fig. 1 just shows its diagram. If there is no such platform, you can temporarily close contacts 4-5. First, check everything mentioned above.
Have an observer watch what happens to the lamps. Press the pedal with one touch and release it. If the lamps do not turn on, check that the fuse is working properly. It's burned out, which means you're looking for a short circuit.
How to and how not to check the “0 Volt” potential
Let’s agree right away that we only work with a voltmeter. Voltage “+12” is caused by connecting one probe to ground. The presence of potential “zero” is checked differently: any of the probes is connected to a terminal with positive voltage, and then the second probe is connected to the wire being tested.
How to connect a voltmeter
Consider the error: one probe is connected to ground, the second to the terminal being tested, and vol. Here they conclude that there is a “mass” potential, but this is wrong! If the contact with ground is broken, the device will also show “0”. That is, the number “0” does not contain information.
Why change the backlighting of individual buttons on the VAZ 2114 dashboard
On the VAZ 2114, the illumination of the buttons for controlling the dimensions, low beam, front and rear fog lights, as well as the rear window heating is green from the factory. Over time, many owners get tired of this glow and there is a desire to replace it, make it non-standard. After making a decision about such modifications, you need to decide: do this work yourself or contact the service. Since the process of replacing button backlighting is not a complicated procedure, in most cases, car owners carry out such an upgrade with their own hands.
Do-it-yourself overexposure of buttons on a VAZ 2114
Replacing the standard button backlighting on a VAZ 2114 will require the preparation of certain tools, materials, as well as some time. To work you will need the following list of necessary things:
- soldering iron with a thin tip;
- solder;
- tweezers;
- small knife or flat screwdriver;
- LED elements of the desired color.
Which LEDs and in what quantities should I buy?
The buttons installed on the dashboard of the model in question come in old and new styles. In the first case, small light bulbs or LEDs are used as a backlight element, and in the second, boards with sealed SMD LEDs are used.
Each button is equipped with two LED elements: one is responsible for illuminating the button itself, and the second indicates the activation of a particular function. The exception is the low beam headlight button - it does not have a power indicator LED. Therefore, if you plan to replace the LEDs on all five buttons, you will need to purchase 9 backlight elements. The type of the latter can be determined only after disassembling the button. The old model requires 12 V LEDs with a diameter of 3 mm. The new sample uses elements marked 0805. When using standard LEDs, it is recommended to additionally install a resistor with a resistance of 500 Ohms to 1 kOhm along the power circuit (directly in the button), which will prevent the element from burning out.
It is better to purchase LEDs with a small margin, since there is a possibility of damage to the element during installation.
How to remove buttons
To remove the buttons on the front console, do the following:
- Remove the negative terminal from the battery.
- We take out the plug of the on-board computer or the BC itself, if it is installed. To do this, just hook it with your finger and pull it towards you.
Replacing the backlight of the front panel buttons
Since replacing LEDs on old and new button versions is somewhat different, each process should be considered separately.
Overexposure of old-style buttons
After removing the buttons from the instrument panel, perform the following sequence of actions:
- Pull the top of the button and remove the lid that is pressed.
The LEDs on all instrument panel buttons change in the same way.
Overexposure of new buttons
On modern buttons we change the LEDs this way:
- We disassemble the button, as in the previous paragraph.
- After opening we find a board with installed LEDs. We determine the polarity of the elements and solder them with a soldering iron with a thin tip.
To make it easier to replace LEDs, the board can be removed from the button. Depending on the button itself, the board can be inserted or soldered onto the legs.
Video: overexposure of VAZ 2114 buttons
Modernization of the buttons for turning on the headlights and low beam
The buttons for turning on the headlights and low beam headlights are made as a single element. The absence of an LED indicating that the headlights are on low beam causes inconvenience to many motorists. This is due to the fact that it is often unclear whether the headlights work or not. To solve this problem, they resort to modernizing the button. In addition to the tools listed above, you will need a similar button from which the necessary parts will be removed. The finalization process itself consists of the following steps:
- Remove the button from the panel.
Video: refining the low beam switch button
Experience of car enthusiasts
There are buttons with both lamps and diodes, there is a choice. The resistors are soldered directly into the diode, this is AvtoVAZ know-how. You can see it under a magnifying glass. And change it to a regular one, that is, a small one, they are durable. And the small diodes I bought for tuning ended up almost all flying off too.
Zbugz
https://www.lada-forum.ru/index.php?showtopic=16929
LEDs with a built-in resistor are sold in buttons for sidelights, fog lights, etc. (cost about 30 rubles). The light bulb is simply replaced with an LED. The light filter is removed from the button.
Killer Speed
https://www.autolada.ru/viewtopic.php?t=60935
Everything is very simple in fact))) I held my head until I opened it and figured it out!))) My car is 9 years old. Even these buttons have diodes or whatever they are called, instead of light bulbs. So, I sat and thought and just took a drill with a small drill and drilled the hell out of there and soldered what I needed to the antennae, that’s all))))) And the backlight for the low beam is complete garbage. Even I, a person who doesn’t understand anything about car electrics, figured it out.
MillerLight
https://www.2114.ru/forum/showthread.php?p=154984
Having decided to relight the buttons on a VAZ 2114, it is not necessary to contact the service: you can do the modifications yourself. The procedure is not complicated and requires a minimum list of tools and basic knowledge in electrical engineering. By following the step-by-step instructions, relighting the buttons will not be difficult.
Button for dimensions and low beams of VAZ 2114: features and replacement
For greater convenience, the button for turning on the low headlights and the button for turning on the dimensions of the VAZ 2114 are made in pairs and are located on the European panel of the car. Both of them are equipped with additional built-in LEDs (two for backlighting, as well as an indication diode for side lights).
As a rule, there are no problems with the operation of these buttons, but if necessary (for example, if they break), you should know how to replace them.
Everything is done in the following order:
- Remove the plug under the button panel (it can be removed simply by hand, without tools).
- Push the buttons into the interior by pressing them from the inside.
- Gently pull the button, rocking it slightly, and remove it from the block.
- Install a new button into the block.
- Place the buttons back into the panel.
As you can see, the replacement can be done almost instantly, without applying any great effort or using a special tool.
Another important point that should be highlighted is the pinout of the VAZ 2114 size button. It may be needed, for example, when replacing an old type button with a button for a Europanel.
You can most clearly see it in the following diagrams: for buttons of the old type for buttons of the new type All letters indicated in the diagram correspond to the output contacts of the buttons and have similar markings to them, and the colors of the wires are indicated by letter abbreviations.
Also, the pinout of the VAZ 2114 light switch button can help when troubleshooting problems in the operation of the buttons themselves, for example, if the backlight of one of them does not work.
In this case, it should be taken into account that the contacts:
- 6-V or 5-V - responsible for the operation of the low beam indicator;
- А-В — illumination of the low-beam headlight button;
- С-D — indicator for turning on dimensions;
- E-D — illumination of the button for turning on the dimensions.
Wiring test for non-working brake lights (ground test)
Let's look at the basic diagram: the brake lights and the reversing lamps have a common ground pin. If contact with this pin is broken, the reverse lamps will not turn on.
Well, brake lights too.
Connector for connecting “internal” lights
On the left side there is a connector through which the wiring goes to the fifth door.
The connector has black and red wires. Check the voltages on them. Most often the ground on the black wire does not ring. But maybe the connector itself needs to be cleaned.
Usually, if the ground breaks, another pin is used - the one that is connected to the glass heating coil.
If the “plus” does not come to the red wire, we check the “frog”. It's simple here:
By the way, one of the connector terminals receives a voltage of “12 Volts”. Check it!
If all the steps do not lead to results, there is only one thing left: contact a qualified electrician. We wish you success.
Reworking the low beam button
As already mentioned, the button for turning on the low beam and the button for the dimensions of the VAZ 2114 are combined and located in pairs. Their main drawback, which most car enthusiasts point out, is the absence of a power-on LED on the low-beam headlight button.
This problem is quite serious, since very often it becomes unclear whether the headlights are working or not (especially during daylight hours). You can solve this by upgrading the button yourself.
For this you will need:
- a button that will be redesigned;
- the second button is the same - donor;
- soldering iron or (better) soldering station.
The button modification should be carried out according to the diagram shown here. Resoldering the LED itself from one board to another is highly not recommended, since this requires a soldering station equipped with a hair dryer, a special flux and high skill in working with them.
First, we need to remove the main button from the car panel (how to do this has already been discussed above).
After it is removed and disconnected from the wires, perform the following operations:
- remove the keys by prying them off with a flat screwdriver;
- we disassemble the body of the buttons by pressing the latches with a screwdriver (the buttons themselves at this moment must be in the “on” position);
- we see that the sidebar button has two diodes (backlight and indication), and the low headlight button has only a backlight button;
- remove a pair of legs and a pair of contacts from the donor button;
- we rearrange them into the free spaces on the working button;
- remove the board from the donor button with two diodes and insert it into the working button instead of the board with one diode;
- solder the board to the legs that were added;
- make a hole in the button cover (this can be done with a sharp knife or simply punched with a flat screwdriver).
The junction of the newly installed legs and the new board must be well soldered. Otherwise, the button may quickly fail or not work correctly.
After all these operations have been completed, all that remains is to assemble everything in the reverse order and install the upgraded button in its place (during installation, it is important that all the mini-latches on the case fall into place).
Installation of window regulators: step-by-step instructions
1. Removing the window regulator
Before carrying out any work, first remove the weight from the vehicle battery to prevent an accidental short circuit in the circuit. Then do this:
- Take a Phillips screwdriver and use it to remove the three screws holding the door pocket in place. Next, remove the product latches from the holes in the door trim. Note that the self-tapping screws for attaching the pocket simultaneously hold the lower part of the door trim on the VAZ 2115. In this case, the pocket panel plays the role of a speaker trim.
- Using a screwdriver, pry up the window handle latch by inserting the tip of the tool between the latch and the socket.
- Disassemble the socket, then use a screwdriver to pry off the door handle cover.
- Take a Phillips screwdriver and remove the couple of screws holding the handle in place, then remove it.
- Using the tip of a screwdriver, pry up the inner handle trim and remove it.
- Unscrew and disassemble the button, then remove the handle and the front of the mirror controller.
- Remove the door trim. Here you will have to overcome the resistance of the product clamps (pistons).
- Using ten heads, unscrew a pair of bolts securing the glazing bead to the window regulator.
- Unscrew the nuts of the various window lift guide supports: two central, one lower and one upper.
Once you have done the above work, take a number eight screwdriver and unscrew the three locking nuts holding the window mechanism in place. Next, remove the lower pin of the drive mechanism from the hole in the door panel. Take a screwdriver and use it to remove the upper guide pin from the hole, then remove the window regulator through the hole in the door panel.
The video shows how to get to the window regulator on a VAZ 2114, 2115
2. Installation and connection of the window regulator
Before installing the window regulator, lower it. If necessary, power the gear motor from a car battery. So, let's do this:
- Install the window regulator into the door panel opening, then insert the window mounting studs into the corresponding holes.
- Install the nuts onto the studs and tighten them with a ten-hole socket.”
- Position the gear motor until the holes in the guide mechanism align with the holes in the glass fork.
- Use the bolts to attach the power window track to the window frame.
- Apply lubricant to the rubbing elements of the mechanism.
Remember that when installing a window regulator, it is not recommended to apply lubricant until the installation is complete. Otherwise, there is a high risk of lubricant getting on the interior panel during operation.
Before installing the window regulator, prepare the necessary diagrams and follow the manufacturer's recommendations. You will need wiring diagrams for the car and the window regulator.
Connection diagram for electric window VAZ 2114
Then do this:
- Apply power to the side window up/down switch assembly using the bellows.
- Connect the negative terminal to the battery terminal.
- Connect the wires and make sure the device works.
- Insert the plug into the hole in the door trim for the lift handle shaft.
- Reinstall the door trim (no pockets yet), then insert the switch harness connector into the hole in the trim.
- Insert the power window switch instead of the plug.
- Turn on the switch and insert the pocket.
Connection diagram for electric window VAZ 2115
Installing a window regulator allows you to increase the level of comfort when driving a car and get rid of annoying car handles. The main thing is to have the installation diagram at hand and strictly follow the instructions in the article. In this case, installing and connecting the window regulator on VAZ 2114, VAZ 2115 or VAZ 2113 cars will not be difficult.
Pinout of low beam button VAZ 2114
Answer to the request on request in the topic pinout of the VAZ 2114 dimensions button - you are welcome. Techniques and technologies for car repair in garage conditions. How to repair a car yourself at home. We will help you with repairs and repair the car yourself. We know how to restore a car with minimal investment. I have attached video instructions.
Category: DIY repairs
Laughter on topic: - And we are in first place in the medal standings! - And we overthrew the president. - Damn...
Published by Admin: at the request of Istvan
Criticism of the car owner: Appearance, dynamics, handling, excellent brakes, comfortable driving position, spacious interior, excellent visibility, warm stove, starts in any frost, corrosion resistance, good sound insulation, large trunk, full-size spare wheel, price.
Now, in accordance with the current rules, it is necessary to drive in the daytime with low beams or fog lights on. If your VAZ 2109 does not have fog lights installed, in this article you can see how to install them. And if an indication of turning on the PTF is usually present in the car (in a Lada Samara with a high panel it is a light next to the button for turning on the PTF, with a Europanel - on the button itself), then turning on the low beam is not displayed in any way on the dashboard. The light spot from the low beam on the road when it is light outside is also not visible, so you can quickly determine whether the low beam is on during the day only by the position of the button to turn them on, which is not informative enough.
Let's set ourselves the goal of installing an indication for turning on the low beam headlights on the Lada Samara ourselves.
Let’s immediately make a reservation that in this article we will consider the option of installing an indication for turning on the low beam on the Samara europanel, where the following button is responsible for turning on the dimensions and low beam:
Let's get started. To modify the button, we will need the same donor button, since it lacks the indication LED itself, the contact antennae and the contacts themselves.
The antennae and LED are removed from the donor button and installed in the button being modified quite easily. But you will have to tinker with the contacts, since they have teeth that do not allow the contact plates to be freely removed from the button. You'll have to use a tool. You may have to cut the donor button to remove them.
The modified button looks like this:
Now we need to finalize the connection, we need to solder these wires to the contacts on the button on the contact side, either on the button itself or in the connection connector.
However, the window for the LED indicating that the low beam is on is painted over, and practically no light penetrates through it. You need to remove the paint from it using a thin screwdriver.
Improvement of the illumination of the low beam key for the VAZ 2109
A slight modification of the dimensions/low beam switch button can also be done on a VAZ 2109 with a high/low panel, namely, you can make the backlight of the button itself (light bulb icon) light up when the ignition is turned on. This makes it easier to find the button by touch in the dark, especially on a low panel.
In the picture we see the low beam button of the VAZ 2109 on the reverse side. In order for the backlight of this key to light up when you turn the key, you need to place a jumper on the “+” bulb from pin 3 (power supply from the ignition switch), if you do this without a diode, then the low beam will light up even when the ignition is off. Next, so that the entire panel does not burn, we disconnect the wires that previously came to the “+” bulbs (2 wires are white with black a and b), and everything is fine, but now if you turn on the headlights and turn off the ignition, the button illumination will also disappear To this end, we also connect wires a and b through a diode to the plus of the light bulb. As a result, when you turn the key, the button lights up, and when the ignition is turned off, the button does not go out until it is turned off. For ease of installation, all operations are performed on the connector to which the button is connected.
For greater convenience, the button for turning on the low headlights and the button for turning on the dimensions of the VAZ 2114 are made in pairs and are located on the European panel of the car. Both of them are equipped with additional built-in LEDs (two for backlighting, as well as an indication diode for side lights).
As a rule, there are no problems with the operation of these buttons, but if necessary (for example, if they break), you should know how to replace them.
Everything is done in the following order:
- Remove the plug under the button panel (it can be removed simply by hand, without tools).
- Push the buttons into the interior by pressing them from the inside.
- Gently pull the button, rocking it slightly, and remove it from the block.
- Install a new button into the block.
- Place the buttons back into the panel.
As you can see, the replacement can be done almost instantly, without applying any great effort or using a special tool.
Another important point that should be highlighted is the pinout of the VAZ 2114 size button. It may be needed, for example, when replacing an old type button with a button for a Europanel.
You can most clearly see it in the following diagrams: for buttons of the old type for buttons of the new type All letters indicated in the diagram correspond to the output contacts of the buttons and have similar markings to them, and the colors of the wires are indicated by letter abbreviations.
Also, the pinout of the VAZ 2114 light switch button can help when troubleshooting problems in the operation of the buttons themselves, for example, if the backlight of one of them does not work.
In this case, it should be taken into account that the contacts:
- 6-V or 5-V - responsible for the operation of the low beam indicator;
- А-В — illumination of the low-beam headlight button;
- С-D — indicator for turning on dimensions;
- E-D — illumination of the button for turning on the dimensions.
see also
Comments 29
I'll tell you which ones later
I connected the wires and they also get hot
Hello I have a VAZ 2112, I want to change the instrument panel From Priora I can’t find the exact connection diagram Please send the diagram Thank you in advance
It’s easier to take it to an electrician)) and it’s a molorik))!
I connected everything according to your diagram. But my front PTFs don’t work. I don’t know why. And when I rearranged the main wires (Fig. 1), I was left with green wire 56. It went along the old block to the front PTF. But on the new PTF button there is no longer room for this wire. Where did you connect it?
Having connected according to your diagram (low and side) I got this - when you turn on the side, the ignition and side turn on, there is no front... maybe I mixed something up... I can’t figure it out ((((
Look at contacts 58, X X - ignition is on 58 - ignition 30 - constant plus When you turn on the ignition button from 30 to 58, the power goes out and the side light is ON When power comes to X, you can turn on the low beam and the power goes to 56, the low beam turns on
Having connected according to your diagram (low and side) I got this - when you turn on the side, the ignition and side turn on, there is no front... maybe I mixed something up... I can’t figure it out ((((
the problem was in contacts 5 and 6, I swapped them and everything worked
very useful information, I will try your scheme and connect over the weekend)
Guys, thank you very much for the information, the diagrams really saved me! I'm replacing the 2112 panel with a Euro one, using viburnum as the donor. The tidy is already connected, button crap with 10 is difficult to redo without pads
The circuits are real, I developed them myself for two weeks, by mistake and error, everything was connected in my previous car, everything worked like stock.
And were the button lighting illuminated when the dimensions and low/high beams were on?
Yeees! The backlight did not turn off after turning on the dimensions until the dimensions were turned off =)
Do your double button lights come on after ignition?
no, when you press the taillights button, all the interior lights and the parking lights in the front and rear come on.
Well, there’s a feature of these buttons - you turn on the ignition and the button icons of the double button are highlighted, that’s what pin 4 is there for
haha, what a feature in a Russian car)) it’s illumination of the buttons, as well as the instrument panel, heater and cigarette lighter flaps, as well as the inclusion of side lights in the front and rear headlights. And after turning the key, you turn on the ACC function - this is the fuel pump, there is a backlight on the route computer or computer, a light in the driver's compartment, the ability to lower and raise the windows.
There is no trick in a Russian car, just like in foreign cars, after turning the size button on the turn signal brush, we turn on the backlight.
But if everything suits you, then let it remain that way. It won’t make it any worse, you just won’t be able to turn on the backlight, for example, without a key, and you won’t be able to turn on the light in the trunk without a key.
And what’s even worse is that you feed all the elements, at night, in order to look at the instrument panel and illuminate it, you’ll be idling the gasoline, pumping it in and then sucking it out. and this can lead to the rapid death of the fuel pump)
In general, good luck to you, think for yourself.
Do your double button lights come on after ignition?
The white and black wire that came to the light bulb before, look at the black one, this is ground. and white comes from fuse F1, and to fuse F1 a plus comes from Relay K1 - a relay for monitoring the health of the lamps, but to K1 a constant plus comes from the battery
Source: www.drive2.ru
Reworking the low beam button
As already mentioned, the button for turning on the low beam and the button for the dimensions of the VAZ 2114 are combined and located in pairs. Their main drawback, which most car enthusiasts point out, is the absence of a power-on LED on the low-beam headlight button.
This problem is quite serious, since very often it becomes unclear whether the headlights are working or not (especially during daylight hours). You can solve this by upgrading the button yourself.
For this you will need:
- a button that will be redesigned;
- the second button is the same - donor;
- soldering iron or (better) soldering station.
The button modification should be carried out according to the diagram shown here. Resoldering the LED itself from one board to another is highly not recommended, since this requires a soldering station equipped with a hair dryer, a special flux and high skill in working with them.
First, we need to remove the main button from the car panel (how to do this has already been discussed above).
After it is removed and disconnected from the wires, perform the following operations:
- remove the keys by prying them off with a flat screwdriver;
- we disassemble the body of the buttons by pressing the latches with a screwdriver (the buttons themselves at this moment must be in the “on” position);
- we see that the sidebar button has two diodes (backlight and indication), and the low headlight button has only a backlight button;
- remove a pair of legs and a pair of contacts from the donor button;
- we rearrange them into the free spaces on the working button;
- remove the board from the donor button with two diodes and insert it into the working button instead of the board with one diode;
- solder the board to the legs that were added;
- make a hole in the button cover (this can be done with a sharp knife or simply punched with a flat screwdriver).
The junction of the newly installed legs and the new board must be well soldered. Otherwise, the button may quickly fail or not work correctly.After all these operations have been completed, all that remains is to assemble everything in the reverse order and install the upgraded button in its place (during installation, it is important that all the mini-latches on the case fall into place).
Why change the backlighting of individual buttons on the VAZ 2114 dashboard
On the VAZ 2114, the illumination of the buttons for controlling the dimensions, low beam, front and rear fog lights, as well as the rear window heating is green from the factory. Over time, many owners get tired of this glow and there is a desire to replace it, make it non-standard. After making a decision about such modifications, you need to decide: do this work yourself or contact the service. Since the process of replacing button backlighting is not a complicated procedure, in most cases, car owners carry out such an upgrade with their own hands.
What causes mechanism failure?
The reasons why problems arise in the operation of the window regulator can be divided into two large groups:
The most common ones are listed below:
- Changing the position of the glass or its distortion.
- Drive wear.
- Violation of the integrity of the cables.
- Closing the circuit.
- Oxidation of contacts.
- Failure of functional elements, including the ESP button, the adjustment of which will require theoretical knowledge of pinouts.
Failure of guides.
You can entrust repairs or replacement of components to specialists or do it yourself.
Do-it-yourself overexposure of buttons on a VAZ 2114
Replacing the standard button backlighting on a VAZ 2114 will require the preparation of certain tools, materials, as well as some time. To work you will need the following list of necessary things:
solder;
Which LEDs and in what quantities should I buy?
The buttons installed on the dashboard of the model in question come in old and new styles. In the first case, small light bulbs or LEDs are used as a backlight element, and in the second, boards with sealed SMD LEDs are used.
Each button is equipped with two LED elements: one is responsible for illuminating the button itself, and the second indicates the activation of a particular function. The exception is the low beam headlight button - it does not have a power indicator LED. Therefore, if you plan to replace the LEDs on all five buttons, you will need to purchase 9 backlight elements. The type of the latter can be determined only after disassembling the button. The old model requires 12 V LEDs with a diameter of 3 mm. The new sample uses elements marked 0805. When using standard LEDs, it is recommended to additionally install a resistor with a resistance of 500 Ohms to 1 kOhm along the power circuit (directly in the button), which will prevent the element from burning out.
It is better to purchase LEDs with a small margin, since there is a possibility of damage to the element during installation.
How to remove buttons
To remove the buttons on the front console, do the following:
- Remove the negative terminal from the battery.
- We take out the plug of the on-board computer or the BC itself, if it is installed. To do this, just hook it with your finger and pull it towards you.
Replacing the backlight of the front panel buttons
Since replacing LEDs on old and new button versions is somewhat different, each process should be considered separately.
Overexposure of old-style buttons
After removing the buttons from the instrument panel, perform the following sequence of actions:
- Pull the top of the button and remove the lid that is pressed.
The LEDs on all instrument panel buttons change in the same way.
Overexposure of new buttons
On modern buttons we change the LEDs this way:
- We disassemble the button, as in the previous paragraph.
- After opening we find a board with installed LEDs. We determine the polarity of the elements and solder them with a soldering iron with a thin tip.
To make it easier to replace LEDs, the board can be removed from the button. Depending on the button itself, the board can be inserted or soldered onto the legs.
Video: overexposure of VAZ 2114 buttons
Modernization of the buttons for turning on the headlights and low beam
The buttons for turning on the headlights and low beam headlights are made as a single element. The absence of an LED indicating that the headlights are on low beam causes inconvenience to many motorists. This is due to the fact that it is often unclear whether the headlights work or not. To solve this problem, they resort to modernizing the button. In addition to the tools listed above, you will need a similar button from which the necessary parts will be removed. The finalization process itself consists of the following steps:
- Remove the button from the panel.