Setting the ignition timing is one of the main settings of a car engine. Incorrectly set ignition (both in the direction of increasing the advance angle and in the direction of decreasing) immediately affects its operation for the worse. Therefore, you should pay special attention to this procedure, especially on front-wheel drive VAZ 2108, 2109, 21099 vehicles.
overheating, detonation, shots into the muffler or carburetor - this is not a complete list of such malfunctions.
It should be borne in mind that similar symptoms occur with an incorrectly adjusted or faulty carburetor, faulty valve mechanism, etc.
Purpose of setting ignition timing
Set the required ignition timing at which the main characteristics of the car engine - power, throttle response, idle speed, fuel consumption - will be normal.
Tools for work
— Stroboscope (the simplest one, without a built-in tachometer, can be bought in a store for 200-300 rubles). A more advanced one, with a built-in tachometer, costs a little more.
— Tachometer (you can use the one built into the instrument panel, you can connect an external one (for example, an auto tester, a multimeter in tachometer mode), you can use your ear, if you have experience).
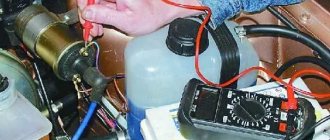
strobe and autotester
— Socket wrench or open-end wrench. Either a matching ratchet socket or an L-shaped wrench. Size 10.
Preparatory work
— We warm up the car engine to operating temperature (85-90 0).
— Set the minimum idle speed (750-800 rpm).
To do this, turn the “amount” screw of the fuel mixture on the carburetor. You can set the minimum speed using the tachometer or by ear. If they correspond to the norm, then we skip this point.
location of the adjusting screw for the “amount” of the fuel mixture on the carburetor 2108, 21081, 21083 Solex
— We remove from the fitting on the housing of the vacuum ignition timing regulator , on the distributor, the silicone vacuum supply tube coming from the carburetor.
— We check by placing a finger on its hole to see if there is a vacuum in it. It shouldn’t be there, since in theory it should start working at speeds above 800. If it is, slightly reduce the idle speed (by rotating the “amount” screw of the fuel mixture on the carburetor) until it disappears.
— We turn off the engine.
— We plug the hole in the silicone tube with a small bolt or simply bend it in half (tie it in a knot).
— Using a 10mm wrench, loosen the three nuts securing the distributor housing.
— We are looking for a hatch on the gearbox housing with a scale and a visible part of the flywheel. It is usually closed with a rubber stopper. We remove the plug.
location of the inspection hatch in the clutch housing on VAZ 2108, 2109, 21099 cars
— We wipe the scale in the hatch with a rag so that the installation marks are clearly visible on it.
— Use a slotted screwdriver to turn the flywheel by the splines of its crown and find a long transverse alignment mark on it. When it stands opposite the triangular cutout on the scale in the hatch, it means that the ignition timing is 0 0, and the pistons of the first and fourth cylinders have risen to top dead center. If it is poorly visible due to oiling or contamination, we wipe the edge of the flywheel through the hatch until we find it. You can highlight the mark with chalk.
mark for setting the ignition timing on the flywheel and a scale with degrees
— We check whether this is a risk (suddenly your flywheel is installed incorrectly). We check using the following marks - the long mark on the flywheel should be opposite the triangular cutout on the scale, the mark on the camshaft pulley should be opposite the protrusion on the rear timing belt cover (to see them, remove the plastic timing belt cover).
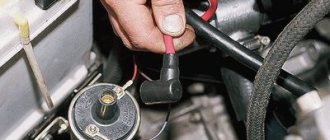
— Connect the strobe light. We carry out the connection according to the instructions for your strobe, since their models are different and the methods of connecting them may differ in detail. Basically, connecting a strobe looks like this - a red wire to the “K” (+) terminal of the ignition coil, a black wire to the “minus” of the battery, or any part of the housing, a metal clamp to the high-voltage wire of the fourth cylinder (closest to the distributor).
procedure for connecting a strobe
Setting the ignition timing (ignition timing)
— We start the engine, once again check with the tachometer that the idle speed is minimal.
— We direct the flashing beam of the strobe into the hatch with the scale.
— In the light of the strobe beam, the long, highlighted mark on the flywheel should be opposite the desired division on the scale.
Each division on it corresponds to one degree of ignition timing.
The bottom of her middle triangular cutout is zero degrees.
Angles for 92nd gasoline
On engine 2108, ignition timing (-1 0; +-1 0), 21081 (1 0; +-1 0), 21083 (1 0; +-1 0).
Angles for 95 gasoline
For engine 2108, the advance will be 1 degree - one mark on the scale towards the windshield from the bottom of the triangular cutout in its center, 21081 - 5 degrees (5 divisions), 21083 - 4 degrees (divisions). An error of one degree is permissible both in the direction of decreasing the angle and increasing it.
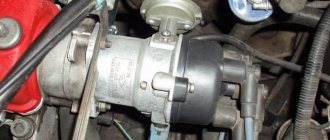
— We adjust the ignition timing by rotating the ignition distributor housing (distributor).
By rotating clockwise (as viewed from the distributor cover), the advance angle increases (ignition becomes earlier), counterclockwise, the advance angle decreases (ignition becomes later). You can navigate by the scale with divisions and “+” and “-” signs on the distributor body. By rotating the distributor, we move it relative to the protrusion on the body of the auxiliary units. Towards the minus side - we do the ignition earlier, to the positive side, later. One division of this scale is equal to 8 0. Therefore, we turn the distributor slowly, carefully and at a small angle.
adjusting the ignition timing using a distributor
— Having achieved the desired ignition timing, turn off the engine, disconnect the strobe light, and secure the distributor.
Checking the correct ignition timing
— When you press the gas pedal, on a warm engine, at idle speed, there should be no “failures” in operation.
— When you sharply press the gas pedal, when driving at a speed of 45-50 km/h, on a flat section of the road, in fourth gear, a short-term detonation should be felt (3-5 seconds). “Tap of fingers” in other words. If it is not present, the ignition is late; if it is present and does not go away, the ignition is too early. We correct the situation by slightly rotating the distributor in one direction or another. Then we check again.
Notes and additions
— If the long installation mark on the flywheel does not stay in place opposite the scale in the hatch, but constantly jerks and moves, then you may have problems with the distributor (ignition distributor), voltage regulator in the generator, ignition coil, high-voltage wires. A minor breakdown of the wiring is also possible.
Basic technical concepts
The ignition system is a variety of interconnected instruments and devices that guarantee the appearance of an electrical discharge, which in turn ignites the mixture of fuel and air in the internal combustion engine system. This system plays a huge role in the vehicle’s technical equipment and electrical equipment.
We are not interested in the entire ignition system, but only in the moment the spark appears, which determines the correct operation of the entire system. This moment is called the ignition moment, because. determines the time for ignition of the working mixture in compressed form. Incorrectly set ignition timing entails many problems in the operation of the car. With the help of this article you will learn how to identify the problem, what it means and how to fix it.
VAZ-21099: under the hood
Operation of the hall sensor and centrifugal mechanism
The VAZ 2109 distributor device allows you to adjust the ignition timing while the engine is running. This is achieved through a centrifugal device, which is capable of moving the slider with a sharp increase in the number of revolutions. The design of the centrifugal mechanism is similar to those installed on distributors with a contact ignition system.
The VAZ 2109 distributor also has a vacuum corrector. It works as follows: when a vacuum is created in the intake manifold, to which the corrector is connected, the vacuum is transmitted through a tube to a chamber with a rubber diaphragm. The diaphragm is connected to a rod, which is hinged to the plate on which the hall sensor is located. It was this sensor that replaced the contact group in the distributor and made the ignition system more stable. Together with the plate, the sensor can move, adjusting the ignition timing, increasing or decreasing the angle, depending on the intensity of the set of revolutions and the vacuum in the manifold.
What are the dangers of ignition malfunctions?
Problematic engine starting, acrid smoke from the exhaust pipe and other troubles that can happen to your car are often a consequence of incorrectly set ignition timing, and not problems with the carburetor. Ignorance of this simple fact forces drivers to spend a long time futilely delving into the details of the car. However, if the spark does not appear at all, or the spark plugs flood, the fault must be looked for elsewhere.
VAZ-21099 with a carburetor engine requires precise adjustment of the ignition torque. This can be done without specialized equipment, but it is easier to use a strobe. This tool will greatly facilitate your job of setting the ignition timing, which will most likely need to be done more than once.
The problems described in this article can arise for many reasons, but it is easier to check the first failure that comes to mind - incorrectly set ignition angle. So, the most common problems with the engine system:
- too much detonation in the piston system. Characteristic signs: when you press the gas, a characteristic ringing sound is heard. This problem often occurs among inattentive motorists who do not pay proper attention to their car. The reason for early detonation is premature ignition, which threatens not only uncomfortable operation of the car, but also subsequent deformation of the piston rings. It should be noted that repairing the piston system is not the cheapest “pleasure”;
- When the engine starts, strong black smoke comes out of the exhaust pipe. This problem may also indicate that the ignition is too fast;
- engine power is significantly reduced; use of larger fuel volume compared to conventional displacement; the engine cannot quickly change operating mode, throttle response is reduced. All the problems described above are associated with the opposite problem - ignition too late. The reason is that the mixture does not burn completely at the highest point of the piston. This top point is also called dead. Thus, even when the piston moves in reverse, the mixture continues to burn. A second reason is also possible - the temperature of the exhaust pipe system is too high;
- If the problem is diagnosed when the gas pedal is pressed, then its most likely cause is too late ignition. In this case, the engine operates with significant interruptions, and when the gas is pressed, so-called “failures” are diagnosed, during which the engine does not work. This problem can cause uneven driving;
- An idling engine runs unevenly.
Therefore, if you see one of the listed problems in your VAZ-21099, pay attention to the angle set in the ignition system. Perhaps that is where the problem lies.
Angle set in the ignition system
Carburetor internal combustion engine
Before we talk about breakdowns of carburetors and electrical equipment, we suggest you understand the scheme by which the system works:
- When the driver turns on the ignition, but does not start the engine, power is supplied through the high-voltage wiring harness to the motor terminals, and the indicators on the instrument panel light up.
- Next, the starter activates the crankshaft, as well as the entire piston group. In the same way, the voltage through the high-voltage wiring harness starts the generator. The panel continues to work.
- Then power from the device is supplied to the ignition coil, which begins to generate a pulse. The impulse arrives through the high-voltage wire harness to the distributor, the instrument panel works.
- After this, the crankshaft of the motor begins to rotate the distributor drive. The device begins to close the contacts, thus transmitting the discharge through the same high-voltage wire harness to the carburetor spark plugs. The instrument panel continues to operate normally.
Classic ignition
If you cannot start the engine on a carburetor, you need to pay attention to diagnosing the following elements:
- Inspect the electrical wiring between the coil and the generator. You need to check the contacts for breaks or oxidation, sometimes you can simply clean them, in some cases they require replacement. If the electrical circuit itself is in poor condition, then it may make sense to replace the wires.
- You should also diagnose the ignition coil. First of all, you need to check for the presence of a spark. To do this, remove the high-voltage wire from the distributor harness and bring it to the metal elements of the engine compartment. When you try to start the engine by turning the ignition key, a spark should appear from the high-voltage wire. If it is not there, then the coil is faulty and needs to be repaired or replaced.
- In addition, you need to check the distributor chain and the spark plugs themselves. If you see that the high-voltage wires in the harness are in a sad state, then it may make sense to change them. Carry out diagnostics of the internal slider, as well as the carburetor spark plugs themselves (video author - MR. Boroda).
Electronic ignition
The VAZ 2109 can be equipped with an electronic, that is, contactless switch, which is mounted between the coil itself and the distributor. The electronic system is designed to provide a better spark if the engine operates on a lean fuel mixture. If the pulse is too low or completely absent, as you were able to verify when checking for the presence of a spark, then it would be better to change the switch. If the installation of a new device does not solve the problem, it will be necessary to completely or partially change the electrical wiring. There is a possibility that the resistance level in the circuit is very high, and this contributes to a too weak spark.
Adjusting the ignition yourself
To normalize engine operation and fix problems, you need to correctly set the ignition timing of your car. Only if these conditions are met can the engine operate correctly. To diagnose and correct errors in the ignition angle, you will need the following tools:
- strobe (desirable);
- tachometer. Most often, such a tool is built into the autotester, so there should be no problems with it;
- slotted screwdriver;
- wrench 10 (socket or open-end).
Having a strobe light will make all your work much easier, so it is better to purchase it for private use.
Before you start directly adjusting the ignition timing and angle, you need to do some preparatory work. First, place the key in the ignition and start the engine. Afterwards, you need to bring the system to a temperature of 90 degrees and increase the idle speed to 800 rpm (using a tachometer) using the fuel regulator knob on the carburetor body.
Hatch in the gearbox
After the engine has warmed up, remove the silicone tube that supplies vacuum from the fitting. You will find the adjusting lever on the panel of the ignition torque distributor, otherwise called the distributor. Its base is attached to the carburetor. Place the free edge of the silicone tube close to your finger to find out if there is a vacuum. If there is one, then the finger will stick to the tube. Reduce the number of revolutions until the vacuum disappears.
Next you need to turn off the engine. The tube should be bent until the lumen completely disappears. Use a wrench to loosen the nuts securing the distributor. The picture shows the flywheel and crankcase hatch. On the gearbox housing there is the same hatch with the flywheel scale. Remove the plug and clean the inspection hatch with the scale from dirt. You will see special strips to help you determine the correct ignition timing. This is where we will focus our attention.
How to connect wires correctly
When replacing high-voltage conductors, they are first connected to the ignition distributor. The distributor cover is convenient in that it is always installed in one position. There is a special mark on it, thanks to which it will not be difficult to place the part in place. Before connecting the wires, inspect the cover. It must be intact, since if cracks appear, the performance of this unit is not guaranteed.
The mark on the distributor cover is located next to the wire socket of the first cylinder. The firing order of the cylinders is slightly out of order (1-3-4-2) due to the ignition slider. It moves around the circle (distributor) counterclockwise. It is precisely by this principle of movement of the slider that it is easy to remember the order of the wires. They need to be connected to carburetor and injection VAZ-2109 according to the same principle. On the distributor cover, connect the wires according to the principle of movement of the slider, this is the only way you can set the ignition correctly:
- the socket of the first cylinder is located at the mark;
- the third one is connected at the very bottom;
- on the same line with the socket of the first, there is a place for the wire to the 4th cylinder;
- at the top point the second cylinder is connected.
On the engine itself, the cylinder numbering goes from the location of the timing belt to the starter, that is, from left to right. The fourth cylinder is closest to the starter, and the first is closest to the timing belt.
When connecting, it is important to look at which socket of the distributor cover the wire comes from, if you confuse their location, the car will not start
If you have connected the wires correctly, but the car still does not start, then the problem may be in them. Check high-voltage conductors for integrity. If you haven't changed them in a while, it's worth buying a new set. The peculiarity of these wires is that over time microcracks can form on their surface. They lead to a lack of spark when the ignition distribution system is working. Moisture and dust get into these cracks, which damages the wire from the inside, although it appears intact from the outside.
Setting the ignition
Now that the preparations are complete, you should set the correct ignition timing angle for the VAZ-21099. This is easy to do using the step-by-step instructions below:
- start the engine. The number of revolutions should be minimal - no more than 800 rpm. Use a tachometer to check;
- the strobe beam should shine through the observation window on the hatch;
- The longest mark on the flywheel should be set at the zero mark (in degrees). Determine the position on the mark specific to your fuel.
You need to change the ignition angle from the zero position of the long line, i.e. from the center of the triangle towards the windshield of the car. To avoid mistakes, gradually turn the ignition distribution housing to the right. This movement increases the advance angle, while counterclockwise movement decreases it.
The exact direction of movement will be helped by the scale on the distributor with a plus and a minus drawn. It is very convenient to use for proper adjustment. It is worth keeping in mind that each division is equal to 8 degrees, so to avoid errors you need to adjust slowly. Once the desired position is achieved, disconnect the distributor and secure it in the desired position.
Settings
The strobe is used like this:
- the red wire is applied to the “plus” on the coil;
- black – to the body;
- the clamp is connected to the veins installed on cylinder number 4.
After this, the actual adjustment begins.
The work is carried out in the following order:
- start the engine, bring its speed up to 800 and no more (measurements are made with a tachometer);
- the beam from the strobe is aimed at the inspection hatch;
- the long line is placed in the zero position (scale in degrees).
The angle is adjusted by rotating to the right - this increases the angle, respectively, movement in the opposite direction decreases it.
It is not difficult to find out the exact direction - it is indicated by the scale marked on the distributor (there is an o and a “plus” there). Each division corresponds to 8 degrees. For this reason, adjustment is slow. After finding the desired position, the distributor is secured.
Checking the ignition system
To check the ignition module of a car with an eight-valve injection engine, you will need the following items:
Ignition module with injection engine
- a computer with an injection engine diagnostic program installed on it;
- testing tool;
- wrench with screwdriver.
Do not rush to check the ignition module before testing the entire system. It should work correctly and properly, with all devices connected. If necessary, turn on the ground and ignition. After this, gasoline should begin flowing into the system. If the red indicator is on, diagnose problems on the VAZ-21099 on-board computer to which the laptop is connected.
After all preparations have been made, check the throttle valve. To do this, turn on the ignition and use a tester to determine the voltage value of the on-board computer sensor. There should be the following indicators: on-board system voltage - greater than or equal to 12 volts, sensor - at 0.5 volts, damper opening degree - up to 1 percent.
Press the gas pedal. The indicators should change - within 4.5 volts and from 90%, respectively. For better results, it is better to increase the throttle system indicator to one hundred percent. After all this, turn off the additional air supply regulator and achieve 50 percent opening. The last stage is to adjust the throttle system until it is completely closed.
SZ scheme
The ignition system used on the VAZ 2109 includes the following components:
- Switch;
- Candles;
- Distributor sensor;
- Ignition coils;
- Switch;
- Locking device. It does not allow the starter to turn on until the ignition is completely turned off;
- Locking and anti-theft device;
- Hall Sensor;
- The sensor-distributor roller, which is located horizontally and receives torque from the camshaft;
- System of spontaneous ignition shutdown, which is activated after 2-8 seconds;
- Switched current equalization system, which is required when the network voltage changes within the range of 6-18V;
- The system built into the switch, which regulates the time of energy accumulation in the coil, limits the current strength at low motor operating frequencies.
The ignition system operates with a voltage of up to 26 kV, the spark charge has a duration of 1.6-2.0 milliseconds, and the energy released during this time is 35-50 MJ.
Service
If you do not monitor the state of the system and lose sight of the presence of malfunctions and malfunctions, this can lead to certain consequences. Namely:
- Reduced reliability of the operation of the protective equipment, the occurrence of failures;
- Reduced technical characteristics of the engine, such as acceleration dynamics, maximum speed;
- A sharp increase in the amount of fuel consumed;
- Failure of SZ elements or the entire system.
Before you carry out SZ maintenance yourself, take into account several important recommendations
- Do not touch the ignition coil with your hands while the engine is running. This applies to wires, switch and other components.
- Do not test the SZ for performance using the “spark” method, as this can lead to injuries and costly repairs of the entire vehicle;
- Under no circumstances should you start the engine with a spark gap between the central terminal of the distributor sensor and the high voltage.
Maintenance
Maintenance of this system includes the following operations:
- Cleaning spark plugs from accumulated carbon deposits or replacing elements;
- Checking wires for insulation, quality of contacts and fastening;
- Ignition timing control, timing setting;
- Cleaning the rotor cover and distributor sensor when contamination occurs;
- Cleaning the rotor plate, electrodes of the SZ side terminals;
- Checking the quality of fixation of all system elements on the seats;
- Checking the wire fastenings.
Distributor repair
The ignition system on the domestic VAZ 2109 car is quite complex, although the principle of its operation does not cause serious difficulties even for beginners.
https://youtube.com/watch?v=A7WQ6fEN1Bg
Prevention and repair of the vehicle involves working with the electrical component of the car, so be sure to follow all established safety rules and rely on the recommendations specified in the vehicle’s operating manual.
Loading …
Consequences of an incorrectly set ignition
In order to more accurately diagnose the problem of engine operation, consider the symptoms that appear when the ignition is incorrectly set:
- not smooth operation of the engine at idle;
- thick black smoke from the exhaust pipe after starting the engine and while driving (indicates poor combustion of the fuel-air mixture). Poor combustion of the mixture is preceded by too early ignition;
- dips in speed when pressing the gas pedal while driving;
- a noticeable decrease in engine power and throttle response.
Signs that they need to be replaced
The main sign of the need to replace spark plugs is misfires (tribling). This is not always due to problems with spark plugs. To finally decide on the need to replace them, the easiest way is to install a known good one instead of the problematic spark plug.
The easiest way to identify a possibly faulty spark plug is with the engine running. To do this, it is necessary to sequentially disconnect the high-voltage wires (or the connector of the individual ignition coil) from each of them. The non-working cylinder will be the one from which, when disconnected, the nature of the engine operation does not change.
Also signs of a required replacement of spark plugs are:
- visual malfunction (contamination, carbon deposits in the gap area, change in the normal gray color of carbon deposits, its wetting, mechanical chips on the insulator);
- unstable engine speed;
- increased smokiness of exhaust gases;
- engine detonation;
- message or on-board computer.
Methods for adjusting the ignition
There are two ways to set the ignition correctly, both using special equipment and improvised means:
- using a strobe light;
- using a regular light bulb.
Of course, using a strobe, it will be much easier to adjust the ignition angle; the cost of this equipment is low.
In any case, regardless of the chosen adjustment method, it is necessary to carry out preparatory work, namely, warm up the car to operating temperature (80-90 degrees) and set the speed to 800 per minute using the fuel regulator on the carburetor body.
How to set the ignition on a VAZ 2109 with a strobe light
- The first thing to do is make sure the flywheel is visible. To do this, you will need to remove the protective rubber from the gearbox housing;
- Instead of the high-voltage wire of the first cylinder on the camshaft cover, we connect a strobe sensor;
- Connect the strobe to the battery;
- Start the engine.
Next, you need to unscrew the distributor mount.
The strobe light must be directed through the window at the flywheel; a mark on the flywheel should appear in time with the strobe light. We change its position by smoothly turning the distributor.
As soon as the mark is equal to the mark, this means that the ignition is set correctly.
How to set the ignition without a strobe with a light bulb
Without a strobe, you can set the ignition correctly using a light bulb; consider the algorithm of actions:
- We disconnect the wire going to the ignition coil from the distributor. You need to connect a wire from a light bulb (for example, a carrier) to it. The other wire from the lamp must be connected to the ground of the car (body);
- similar to the adjustment with a strobe light, unscrew the distributor mount;
- turn on the ignition - the light should light up. Next, you need to smoothly rotate the distributor until the lamp goes out. After the lamp has gone out, we also smoothly turn the distributor in the opposite direction and as soon as the lamp lights up again, you can tighten the distributor fastening.
Of course, this method will not allow you to adjust the ignition with great precision, as with a strobe, but you can still achieve good and correct engine operation.
Share the link with your friends on social networks:
We also have interesting e-mail newsletters, subscribe ! (once a week)
«>
Scheme for checking the Hall sensor on a car
1 – ignition distributor sensor; 2 – a voltmeter with a scale limit of at least 15 V and an internal resistance of at least 100 kOhm; 3 – view of the plug connector of the ignition sensor-distributor.
The ignition system is contactless. Consists of a distribution sensor, switch, ignition coil, spark plugs, ignition switch and high and low voltage wires. Some cars were previously equipped with a microprocessor engine control system (based on the “Electronics MS 2713-02” or “MS 4004” controller); some cars for export were equipped with a toxicity reduction system in accordance with US standards of 1983.
Ignition distributor sensor type 40.3706 or 40.3706-01, four-spark, unshielded, with a control pulse sensor (Hall) and built-in vacuum and centrifugal ignition timing regulators. On the -21081 engine, a distributor sensor 40.3706-10 was installed with different characteristics of the centrifugal and vacuum ignition timing regulators; its cover is marked with a distinctive red mark. The distribution sensor performs two main functions: firstly, it sets the moment of spark formation depending on its initial setting, the number of revolutions of the crankshaft and the load on the engine, and secondly, it distributes high voltage pulses (“spark”) among the cylinders in accordance with the order of their work. For this purpose, a rotor (runner) mounted on the distributor sensor roller is used. In order to avoid mistakes during assembly, the slider and cover are installed on the distributor sensor in only one position, just like its coupling - in the slot at the end of the camshaft. The slider has a 1 kOhm noise suppression resistor.
You can check the functionality of the Hall sensor by assembling the circuit shown in the figure below. Slowly rotating the ignition distributor shaft, monitor the voltmeter readings. The voltage should change sharply from the minimum (no more than 0.4 V) to the maximum (no more than 3 V less than the supply voltage). If a steel screen with slots touches the sensor (determined by slight jamming or a scratching sound when the roller rotates, as well as after partial disassembly of the sensor-distributor), check the axial play of the roller (no more than 0.35 mm - adjusted by selecting washers) and the fit of the screen on roller If necessary, replace the sensor-distributor assembly. A faulty Hall sensor cannot be repaired and must be replaced with a new one (with the exception of a broken wire between the sensor itself and the block on the sensor-distributor housing).
You can roughly assess the serviceability of the vacuum regulator directly on the car. With the engine running, disconnect the vacuum hose leading to the regulator from the carburetor fitting. If you now create a vacuum in the hose (you can use your mouth), the engine speed should increase, and when the vacuum is removed, it should decrease again. The vacuum should remain for at least a few seconds if the hose is pinched. You can visually verify the functionality of the vacuum regulator by partially disassembling the ignition sensor-distributor (see Removing and disassembling the ignition sensor-distributor) and applying a vacuum to the inlet fitting of the regulator. In this case, the screen of the sensor-distributor should rotate at an angle of 7±1°, and when the vacuum is removed, return back without jamming.
Accurate testing and adjustment of vacuum and centrifugal ignition timing regulators is carried out on special stands. It is not recommended to do this at home. If the vacuum regulator fails, it should be replaced; if the centrifugal regulator is faulty, the distribution sensor should be replaced.
A switch type 3620.3734, or 76.3734, or RT1903, or PZE4022 opens the power circuit of the primary winding of the ignition coil, converting the sensor control pulses into current pulses in the ignition coil. The switch is checked with an oscilloscope using a special technique. In the event of a malfunction, it cannot be repaired; if a malfunction is suspected, it is recommended to replace it. Do not disconnect the switch connector while the ignition is on - this may damage it (as well as other components of the ignition system).
Preparation
As previously noted, you can do without such a device as a strobe light, but if you want to set up the ignition yourself, then there is still a reason to purchase it.
Before you start setting the angle, do the following:
There is a special scale with which the set angle is determined. This should be discussed in more detail, since you need to set the ignition according to the marks. For this:
If everything is done correctly, then cylinders 1 and 4 move to the TDC position.
When the scale is poorly visible and you are not sure that you have found the necessary feature, then you can verify the correctness of the position in another way.
There are pulleys on the camshaft gears. They must coincide with the mark on the wall of the timing belt protective housing.
Possible reasons for the appearance of soot
Before answering the question of why the candles are black, it is necessary to determine how exactly they turned black. After all, it depends on which direction to search. In particular, the candles can turn black all together, or maybe only one or two of the set. Also, the candle may turn black only on one side, or perhaps along its entire diameter. There are also so-called “wet” and “dry” carbon deposits.
It should be noted that the speed of appearance and nature of carbon deposits directly depends on existing faults (if any):
- Carbon deposits on new spark plugs begin to form after at least 200-300 km. Moreover, it is advisable to drive along the highway at approximately the same speed and engine load. This way the spark plugs will work in optimal mode, and it will be possible to more objectively assess the condition of the car’s components.
- The amount and type of soot depends on the quality of the fuel used. Therefore, try to refuel at trusted gas stations, and not drive with gasoline or similar mixtures. Otherwise, it will be difficult to establish the real cause of the appearance of soot (if it occurs).
- In a carburetor engine, the idle speed must be set correctly.
Now let's move directly to the question of why black soot appears on the spark plugs. There may be 11 main reasons:
- If you notice blackening on only one side, then most likely this is caused by a burnt-out valve. That is, carbon deposits on the spark plug fall on the side electrode from below (and not on the central one).
- The cause of black spark plugs may be a burnt-out valve. The situation is similar to the previous one. Carbon deposits may penetrate the bottom electrode.
- An incorrectly selected glow rating of a spark plug causes not only damage to it during further use, but also uneven blackening at first. If the mentioned number is small, then the shape of the soot cone will change. If it is large, then only the top of the cone will turn black, and the body will be white.
“Dry” carbon deposits on a candle
As a rule, when the ignition is set late and the air-fuel mixture is rich, the following consequences arise:
- misfires (error P0300 appears on injection engines);
- problems starting the engine;
- unstable engine operation, especially at idle, and as a result, increased vibration levels.
Next, we will tell you how to eliminate the listed faults and how to clean the spark plugs.
repair of the ignition distributor (distributor) on a VAZ 2108, VAZ 2109, VAZ 21099
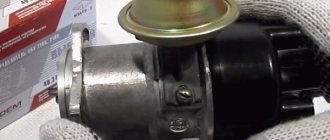
The ignition distributor (distributor) consists of the following parts (see figure below): 1 – o-ring; 2 - coupling; 3 — adjusting washers; 4 — roller with a centrifugal regulator; 5 — support plate; b — dust screen; 7 - slider; 8 - Hall sensor; 9 – lock washer; 10 - thrust washer; 11 – distributor body; 12 - vacuum corrector. 1. Remove the distributor from the VAZ 2108, VAZ 2109, VAZ 21099.
2. Unscrew the two fastening screws and remove the distributor cover. Then remove the slider by pulling the slider up.
3. Replace the slider with cracks, signs of burning, significant wear or corrosion of the outer contact 1. The slider must be tightly installed on the distributor shaft. This is ensured by leaf spring 2. A slider with a weakened or broken spring must be replaced. Using an ohmmeter, measure the resistance of resistor 3, it should be equal to 1 kOhm. Otherwise, replace the slider.
4. Remove the dust shield from the distributor.
5. Unscrew the screw securing the low voltage wire terminal and remove the terminal from the distributor body.
6. Unclench the holder's claws with a screwdriver and remove the wire from the holder.
7. Remove the two screws securing the Hall sensor support plate.
8. Remove the retaining ring from the backing plate pin.
9. Unscrew the two screws securing the vacuum corrector.
10. Using a screwdriver, remove the vacuum corrector rod from the support plate pin.
11. Remove the vacuum corrector from the distributor.
12. Using a screwdriver, lift up the support plate and remove it.
13. If the bushing is scuffed or significantly worn, replace the support plate.
14. Remove the retaining ring from the ignition distributor shaft, and then the thrust washer.
15. Remove the snap ring holding the clutch mounting pin.
16. Replace the torn or lost elasticity o-ring.
17. Drive out the coupling mounting pin using a suitable punch.
18. Remove the ignition distributor drive clutch and adjusting washers. Replace a coupling with severely worn studs.
19. Remove the roller with the centrifugal regulator.
20. Inspect the bushings in which the shaft rotates on both sides of the distributor body. If there are scuffs or significant wear on the bushings, replace the distributor body complete with bushings.
21. Using a screwdriver, remove the two weight springs from the struts. To avoid confusing the springs during assembly, mark the post to which the small spring is attached.
22. Remove the driven plate of the centrifugal regulator with the screen.
23. The weights of the centrifugal regulator must turn freely on the axes. Otherwise, remove the retaining rings securing the weights.
24. Then remove both weights from the axles. Clean the holes of the weights and lubricate them with grease. Replace the roller if it is badly worn or burred.
25. To replace the Hall sensor, unscrew the two mounting screws and remove the Hall sensor from the base plate.
NOTE On parts of the ignition distributors, the Hall sensor is attached to the support plate using rivets. In this case, the Hall sensor is replaced as an assembly with a support plate.
26. Wipe the distributor cover outside and inside. Replace the distributor cap with cracks, signs of puncture (very thin cracks), chips or badly worn contacts. The contact ember should move freely inside the distributor cover. If the contact angle is chipped, cracked, badly worn, or the angle spring is broken, remove it with the spring from the distributor cover and replace it. 27. Reassemble the ignition distributor (distributor) in the reverse order, having first lubricated the bushings and roller with a thin layer of engine oil.
28. Before installing the clutch, install the slider with the outer contact towards the contact of the 1st cylinder in the cover.
29. Then install the coupling on the shaft so that the spikes of the coupling coincide with the slots on the camshaft with the piston of the 1st cylinder installed at TDC.
parts of the ignition distributor (distributor) of the VAZ 2108, VAZ 2109, VAZ 21099
Removing and installing a distributor (ignition distributor) on a VAZ 2108, VAZ 2109, VAZ 21099
repair of distributor (ignition distributor) VAZ 2106
lubrication of the ignition distributor (distributor) VAZ 2106
Solex carburetor design
Lada 2110 But not on credit Logbook Repair of the bottom of the door
The Solex carburetor has several models, namely:
The main modification of this brand of carburetors is SOLEX 21083. This model has the smallest diffuser cross-section. In terms of structure, all Solex models are the same, there are only some differences (different brands and models of cars have their own modification). Therefore, the Solex settings for all models are the same.
The Solex carburetor type is emulsion. It is installed only on cars with engines with contactless ignition.
Solex device:
- two chambers with throttle valves;
- chamber dosing system;
- transition systems for both chambers;
- idle speed system only for the first chamber.
Classification of Solex carburetors by configuration:
- Semi-automatic starting system.
- Carburetor accelerator pump.
- Power mode economizer.
