Today, air conditioning in a car has ceased to be a distinctive feature of expensive models from foreign manufacturers. Budget cars are increasingly being equipped with air conditioning or climate control. And more and more car owners, faced with an unpleasant odor that occurs when the air conditioner is turned on, are asking questions - who is to blame and what to do?
Who is guilty? By and large, no one is to blame in this situation. This is not a malfunction of the air conditioner, but a consequence of the immutable laws of nature. An air conditioner is a heat engine that removes heat from one part (the evaporator) and transfers it to another (the condenser). The condenser heats up and the evaporator cools. For better airflow and better heat dissipation, the condenser is usually located in the front of the car next to the radiator of the engine cooling system. The evaporator is most often located deep in the instrument console; air entering the cabin is blown through it. And the cold evaporator cools the passing air, providing the desired coolness.
This is where the problem arises. The air sucked in from the street contains moisture. Not much - in summer with a humidity of 50-60% this is about 10-15 grams of water per cubic meter of air. But when cooled, the air loses its ability to hold moisture, and it condenses on the evaporator in the form of droplets. During an hour-long trip, up to 2-3 liters of liquid can form. Naturally, the designers know about all this and provide special measures. Any car air conditioner has a drain pipe that drains excess fluid to the street. It is usually located on the bottom of the car.
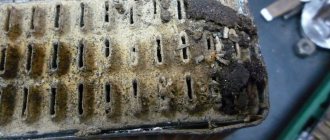
But what else happens to the incoming air? A wet evaporator is an ideal trap for dust and other debris that comes with the air. It turns out to be a kind of vacuum cleaner with an aqua filter. There is only one difference - the aqua filter of the vacuum cleaner is easy to remove and clean. And dirt that gets into the evaporator remains there forever. After turning off the air conditioner, the temperature of the evaporator rises and creates an ideal humid and warm environment for bacteria, fungi, mold and other evil spirits. This is where the smell comes from.
What to do? But here everything seems obvious - kill bacteria, clean out dirt in the air conditioner. This will get rid of the unpleasant odor, and at the same time increase the performance of the air conditioner. After all, dirt accumulated on the evaporator acts as a heat insulator, preventing the passing air from cooling to the desired temperature. The method of cleaning the air conditioner evaporator depends on many factors - the age of the car, operating conditions, and the skills of the owner. In any case, it is better to start by cleaning the air conditioner in the car without removing it.
Cleaning the air conditioner in a car
This method is suitable for relatively new cars – 3–5 years old. It’s a good idea to clean the air conditioner for younger cars as a preventative measure. To clean the air conditioner, a variety of chemicals are used, for example CRC Airco Cleaner, PRESTO Klimaanlagen-reiniger, LIQUI MOLY Klima-Anlagen-Reiniger and others. When using these products, it is best to follow the instructions for use.
In general, aerosol products are intended for disinfection purposes only and are used as follows:
1. Start the car engine, turn on the air conditioner and fan at maximum power, turn on recirculation. 2. Place the can on the floor in front of the front passenger seat (where air is usually taken in during recirculation) and turn on the spray. Close all car windows and doors. 3. Wait for the time specified in the instructions and ventilate the interior. Foam products are intended for both disinfection and cleaning of the air conditioner and are used as follows:
1. Remove the cabin filter and fill the air ducts with foam through its seat. 2. After the time specified in the instructions, start the engine, turn on the air conditioning and let it run in different modes. 3. Ventilate the interior.
How to clean the air conditioner in a car with improvised means
Some air conditioner disinfection and cleaning products are so good that they give you some ideas. For example, right on the packaging of Condiclin (costing 300 rubles per 200 ml) the composition is written - chlorhexidine bigluconate 0.05%. The most interesting thing is that in pharmacies a 0.05% solution of chlorhexidine bigluconate costs 10 rubles per 100 ml.
Let's see what can be used to disinfect and clean the air conditioner using improvised means.
Chlorhexidine
.
You can take a ready-made pharmacy 0.05% solution. You can look for drugs of a different concentration and with other names (desihand, desiscrub, dezin). True, it will be more expensive due to the greater concentration and volume. To increase efficiency, chlorhexidine solution can be mixed with alcohol 1:1. Lysoformin 3000
.
A Russian-made product intended for disinfection of indoor surfaces, combating mold, disinfection of medical products, disinfection of especially dangerous infections. So it will definitely deal with bacteria on the evaporator. To obtain a 5% solution, dilute 50 ml of the product in 1 liter of water. Chloramine
B. It is used for disinfection of indoor surfaces, dishes, linen, toys, medical products and preventive disinfection in infectious areas. To obtain a working solution, dilute 1 tablespoon of powder in a liter of water. To clean the air conditioner, prepared solutions are poured into a sprayer that produces a fine suspension (for example, a flower sprayer). In the car, remove the cabin air filter, turn on the air conditioner and fan at full power and spray the composition into the hole in the air filter. It is better to open the car doors and cover all exit deflectors with a cloth so as not to spray the interior with the solution.
Generator for viburnum from 2110
I understand about the alteration, it’s more difficult with MFRN.
Which one to put? I found some info on the drive Quote: So we go to the store and buy any of these RN 93.3702 844.3702 845.3702 611.3702-05 7931.3702 I4 7931.3702-01 9444.3702
now the question. Really any of these? Or should I choose by generator? We don’t know what kind of generator it is yet..
If the generator is KZATE 9402.3701 or BATE 3202.3771, then any of these. My RN rating is: 1. 7931.3702 I4 2. 7931.3702 I4M 3.4. 844, 845.3702 5. 611.3702-05, 07
I haven’t encountered much with VTN; their regulators are not bad. But it’s better not to take 93.3702. ASTRO has some good stuff, but RN is not one of them.
If the PRAMO generator is of the 5102 series, then none of these launch vehicles will be suitable. Need 846.3702
No, not for free, but I just want to deal with this problem once and for all.
Then I'll try something small, change the voltage regulator, and then we'll see.
If the problem is not in the regulator, then recommend a normal generator. Which one can I take? And with what current, 85A or more?
By the way, my voltage also fluctuated at xx. At first I thought the spark plugs were bad, I changed them, no effect. I changed the diode bridge and the regulator, and everything became normal.
I saw that one friend had a generator in his tenth car, he installed a generator from some foreign car, and it seemed to be as much as 120 amperes. and it really was like that, it was necessary to accelerate it so that it would turn on, something he didn’t do with it. Because of this, the car did not start from autostart, or rather, it started and drained the battery into trash. Then he simply put the regular generator back and plus a generator from some kind of small car, through a hydraulic coupling. he has powerful music in his car, and the car is made like a rally, all kinds of headlights, and so on, the usual was not enough.
Source
How does the misfire check mechanism work?
Any injection engine equipped with a distributed fuel injection system has self-diagnosis for misfires.
It works very simply - the engine rotation speed per revolution remains quite stable in any case.
The engine rotation speed is checked using the crankshaft position sensor. It generates impulses at the moments when the teeth on the pulley pass by it.
If the sensor detects that the engine is not rotating evenly, a check is made for random or persistent misfires in a specific cylinder and based on this ignition, a warning lamp is displayed and an error code is recorded.
Generator for viburnum from 2110
I understand about the alteration, it’s more difficult with MFRN. Which one to put? I found information on the drive
Quote: So let’s go to the store and buy any of these RN 93.3702 844.3702 845.3702 611.3702-05 7931.3702 I4 7931.3702-01 9444.3702
now the question. Really any of these? Or should I choose by generator? We don’t know what kind of generator it is yet..
If the generator is KZATE 9402.3701 or BATE 3202.3771, then any of these. My RN rating is: 1. 7931.3702 I4 2. 7931.3702 I4M 3.4. 844, 845.3702 5. 611.3702-05, 07
I haven’t encountered much with VTN; their regulators are not bad. But it’s better not to take 93.3702. ASTRO has some good stuff, but RN is not one of them.
If the PRAMO generator is of the 5102 series, then none of these launch vehicles will be suitable. Need 846.3702
I got my hands on it, maybe it will help someone. Photo of native tripe 115 casate
[IMG]https://content.foto.mail.ru/mail/rider243/_myphoto/i-606.jpg[IMG]
I have 115A. They have been installing it since 2010. Email I don't have heated glass.
It’s also true that you actually need to know which diodes to take. Plus, judging by the design, all diode bridges have horseshoes, so I understand the radiator. in fact, the question arises of how to cool the self-propelled gun or whether a large reserve of power is needed, which will lead to a significant increase in the cost of the finished product. Now I'll try to find diodes. In general, a diode bridge from a **different** brand must be found and removed as a separate unit. py.sy. As I understand it, the regulator, in principle, does not suffer much; unfortunately, there was no time to experiment, but according to the continuity, both old ones are alive. I change it en masse just to be sure
Added after 37 minutes the most **strong** swelling diode in the form factor used in auto rectifiers https://www.eandc.ru/catalog/detail.php?ID=5823
Added after 54 seconds I’ve already forgotten electrical engineering. Knowledgeable people can tell me what diodes are needed?
Source
Why do you need a rough road sensor?
Everything is extremely simple - when driving on an uneven road, a situation where the wheel may momentarily lift off from the surface is possible; naturally, this will instantly lead to a change in the engine rotation speed. Since the accuracy of determining the engine rotation speed is very high, the slightest deviation leads to a misfire error.
If there is a signal from the rough road sensor, the error control is temporarily turned off, and on some cars, the ignition timing is shifted towards a retardation, for more reliable ignition of the mixture.
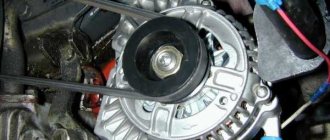
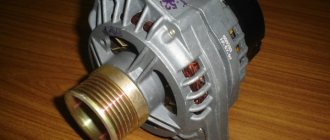
Construction and repair of the Kalina generator
Lada Kalina cars are equipped with generators of two brands - 5132.3771 or 9402.3701-06. The standard Kalina generator is a three-phase alternating current device, which has a built-in rectifier unit and an electronic voltage regulator.
There are very different reviews regarding the quality and reliability of the devices with which these cars are equipped during factory assembly. If the unit fails, you can replace or repair it yourself.
Operating principle
The basic principle of operation of the generator is as follows: a three-phase alternating current is induced in the stator winding, which is converted into direct current using a rectifier unit attached to the cover of the device. On the cover there is a unit consisting of an electronic voltage regulator and a brush holder. The rotor rotates from the crankshaft of the car engine via a serpentine belt.
The Lada Kalina generator has the following characteristics:
- maximum output current - 85-90 A;
- voltage - 14.4-15.1 V;
- engine-generator gear ratio - 1:2.4;
- direction of rotation is right.
4 bolts secure the stator and covers of the device. The covers contain bearings in which the rotor shaft rotates. The rear bearing is located on the rotor shaft; it is mounted in the rear cover with a small gap. The front bearing, which slides along the rotor shaft, is installed in the front cover with a slight interference fit and covered with a pressure plate. The device is covered at the back by a plastic casing.
The generator connection diagram is quite simple. When the car's ignition is turned on, voltage is supplied to the voltage regulator through the low battery warning light. When the engine is started, the field winding receives power from 3 diodes that are installed on the rectifier block.
Typically, checking the alternator is easily done using the battery charging warning light. If the device is working properly, this lamp should light up when the ignition is turned on, and when the engine starts, it should go out. If the lamp burns brightly or at full intensity, then the generator needs to be replaced or repaired because it is faulty.
Replacing bearings
AvtoVAZ cars are very often subject to fair criticism from the owners of cars produced by this company. The Lada Kalina model was no exception to the general rule. Almost all current converters installed on cars of this brand break down after 10 thousand kilometers, after which the generator requires repair or replacement.
As practice has shown, the cause of many breakdowns is not only the bearings, but also the Kalina generator bracket. Car owners often fix this problem on their own. Doing this with certain skills is not so difficult.
To repair the generator, it is necessary to disassemble it. To do this, use a screwdriver to hook the tips of the stator wires and pull them out a little from the springs of the diode bridge. Then unscrew the bolts that attach the diode bridge. After this, the connecting bolt is unscrewed.
After disassembling the generator, check whether the rear bearing is in good condition. To do this, you need to twist its outer ring. If it rotates easily, without noise or rattle, and there is no play, then the bearing is in good condition. At the slightest suspicion of a malfunction, it is better to replace the bearing.
Next, you need to dismantle the Kalina generator bracket. Using a screwdriver, the stator is picked up and removed from the device casing. The bracket includes a bearing, which should also be checked. If a malfunction is detected, the part must be replaced.
The front bearing of the unit is rolled into its casing. Although AvtoVAZ does not recommend changing it, it would still be more advisable to do so, because otherwise you may then need to buy an expensive new generator for Kalina.
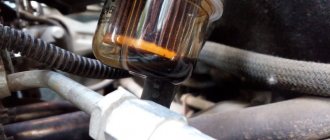
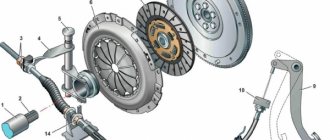
Valve and evaporator design features
The evaporator is located in the air conditioner unit and is presented in the form of aluminum tubes with fins. The latter elements improve heat transfer. When the cabin fan turns on, air masses blow through the evaporator tubes. The air, cooling, flows into the cabin. At the bottom of the evaporator there is a tray and a drainage hole, which is designed to remove excess moisture from the interior of the Lada Kalina. Therefore, this hole must be free.
Another equally important element of the air conditioning system is the thermostatic valve, which is located in the evaporator housing. The refrigerant, passing through the hole, reduces the pressure and begins to boil. The valve body has a control element that changes the flow area of the hole taking into account:
If during the repair or replacement of parts of the air conditioning system at least 1 unit was opened, the receiver must be replaced with a new one. Otherwise, when charging the system, the refrigerant will not be drained. Acids can form inside the air conditioner, destroying parts of the main device.
Installation of Kalina generator on 2110
Messages: 119 Registered: November 18, 2010, 00:00 From: Tyumen, st. Moskovsky tract 142/3 Experience: 2006 Car: UAZ
Thanked: 1 time Thanked: 1 time
Post by zvezdoril » Apr 27, 2012, 3:30 pm
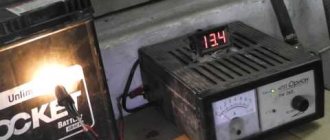
I think you're talking some kind of nonsense. My native one at any load is 14.3 V
Added after 1 minute 49 seconds:
It's time for you to install a new one, that's all. Don't trust computer readings. On my computer there is even 13 V. Using a first-class ammeter, the accuracy does not fall below 14. If you have any questions, call. 62-21-50
Added after 2 minutes 58 seconds:
How often should you clean
The air conditioner evaporator drain tube is easy to clean, but difficult to reach. Therefore, in normal cases, it is cleaned together with the general air conditioning system. According to the rules, cleaning work should be performed once every 2-3 years for new cars and once a year for old ones.
But here it is necessary to take into account the condition of the road surface on which the car drives and the thermal zone in which this occurs. If the air conditioner is used very often in hot weather, then it generally becomes dirty just as often and heavily. But this does not mean at all that the device does not become dirty in winter. Microbes that have already appeared on the tube, evaporator and condenser will multiply and further pollute the system.
Replacing the Lada Kalina generator
The article provides general information about Lada Kalina generators and explains how to replace the regulator relay and the entire generator itself.
The generator must always be in good working order
Any modern car is equipped with electrical equipment that is absolutely necessary for the vehicle:
- without a starter it is impossible to start the engine;
- a car cannot be driven without lighting at night;
- The heater motor creates heat in the cabin;
- The wiper motor clears the windshield of rain and snow;
- FM radio makes it possible for the driver not to get bored on the road.
But all these devices cannot work without electricity, so the car must have a power source.
The current from which all consumers in the car are powered is produced by the generator, and the performance of the entire electrical circuit of the vehicle depends on its condition.
Therefore, the generator must always be in good working order, and if any breakdowns occur with it, they must be eliminated in a short time.
Generator Lada Kalina
Lada Kalina cars are equipped with three-phase generators that produce alternating current; to produce direct current, a rectifier unit is included in the generator circuit.
AvtoVAZ equips VAZ 1118 cars with generators of the type 5132.3771
or 9402.3701-06
, there are many different manufacturers producing spare parts for VAZ cars.
The generator for the Lada Kalina can be of different power; the industry produces current sources of 85, 100, 90, 115, 120, 135 Amperes.
Among the most famous manufacturers of VAZ parts are:
- Pramo;
- StartVOLT;
- KZATE;
- LKD (China);
- Eldix (Bulgaria);
- ISKRA (Slovenia);
- BATE (Belarus);
- Bosch.
Device
The Lada Kalina generator consists of the following parts:
- housing (front and back cover);
- pulley;
- stator windings;
- armatures (rotor);
- voltage regulator relay (charging relay);
- diode bridge (rectifier unit);
- two armature bearings;
- rear plastic casing.
Inside the generator housing, along its walls there is a stator with a winding, and a rotor is located in the center.
At the back of the case there is a diode bridge and a voltage regulator relay; the diode bridge is covered with a plastic casing to prevent dirt and dust from entering.
There is a pulley in front of the housing; it is put on the rotor shaft and secured with a nut.
The generator is driven by a drive belt placed on a pulley.
Malfunctions
All generator malfunctions can be divided into two categories:
A whistling or grinding noise may be caused by bearings or tension belts.
The reason for poor charging or its complete absence may be:
- break or short circuit in the rotor or stator winding;
- wear of the brushes (they are located in the same housing with the relay regulator);
- charging relay malfunction;
- breakdown of the diode bridge;
- loose belt.
Vehicle voltage
For normal operation of all consumers in the car, the generator must maintain a certain voltage; for the Lada Kalina on-board network, with a working generator, it must be in the range from 13 to 14.8 volts.
Within specified limits, the voltage is provided by a relay regulator, and with any deviation from the specified norm, various problems arise:
- At high voltage, the electrolyte in the battery banks boils, and the battery quickly fails;
- If there is insufficient charging, there is not enough current for consumers, as a result the battery quickly discharges.
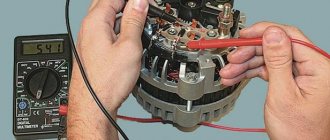
The voltage generated by the current source is measured in the following way:
- On a digital multimeter (voltmeter), set the limit to 20 volts;
- We connect the probes of the measuring device to the battery and start the internal combustion engine, the voltmeter should show a voltage of about 14 volts;
- Without turning off the engine, we turn on the load - headlights (high beam), heater motor at maximum speed, windshield wipers, radio, etc. If the generator is in good condition, when the engine is idling, the voltage should not fall below 13.2V, optimal The voltage is considered to be 13.7-13.9 V.
POPULAR WITH READERS: DIY repair manual for VAZ 2110
Brush wear
As the generator brushes wear out on the Lada Kalina, charging begins to disappear - the indicator of insufficient battery charging periodically lights up (blinks) on the instrument panel.
Diagnostics
You can check the operation of the sensor in two stages. The first step is to carry out ordinary monitoring of the system using standard devices - a scanner or a laptop with a special program. On domestic cars you can encounter several errors when the sensor breaks down:
- P1616 - reduced signal level;
- P1606 - the impulse has left the limit;
- P1617 - pulse value too high.
Usually, this is quite enough to identify the cause of the light bulb. But to determine the exact problem, you can conduct a more detailed diagnosis. To do this you will need the DST-2M device. Although you can use other devices with identical operating principles. At its core, it is a scanner with advanced functionality. It is also capable of detecting the response of the rough road sensor.
If this device is subjected to mechanical action, for example, by knocking on it, then it will transmit some kind of signal, and the scanner will show the speed level - g. It is noteworthy that this sensor is considered quite sensitive, so it should respond to even minimal rocking of the car.
Lada Kalina Hatchback 300Hp/400Nm › Logbook › Installation of generator 2108/2110 on Kalina
Now I’ll tell you about some points that you need to be prepared for in advance so that everything starts the first time. So, first of all we need the generator excitation terminal. On old generators it is different, and in order not to deprive ourselves of the opportunity to install any generator, we solder the second terminal with a piece of wire next to the original one.
The second point is the difference in the generator excitation circuits. Kalina/Prior/Grant generators have a smart voltage regulator inside, which measures its output value directly from the diode bridge, and takes the excitation current from the + terminal of the generator. The charging indicator in the device is just an output that the regulator turns on if there is no charging. For generators 2108/2110 everything is a little different. They receive excitation through an indicator in the dashboard, and until internal excitation is formed in the generator, the indicator is on. For initial excitation, it needs current, which it has nowhere to get - on the new panels the charging indicator is an LED, and there are also no additional excitation resistors.
This solution has already been described more than once, but let me repeat it. So, we remove the instrument panel and disassemble it. We remove the arrows from the instruments and take out the board.
Three seats for output resistors have already been made for us, and holes have been made. Resistors are placed on the back of the board, but soldering must be done from the inside.
In total, a resistance of 40 to 60 ohms must be soldered into the circuit. You can select from several, as I did. The resistor power must be at least 5W. We solder resistors to any pairs of holes.
With this installation, they are connected in parallel. I happened to have a pair that needed to be connected in series to get the desired resistance, so I set them up like this
After installation, we connect the tidy board to the connector and check that the charging LED lights up and goes out after starting.
Voila! Now we can install generators from 2108, 2110, Kalina and Priora.
Attention! Generators 2108/2110, unlike Viburnum/Priors, have the disadvantage of a sluggishly functioning native regulator, which maintains a very low voltage in the on-board network. Treatment for this problem is known and has several ways. I chose to install a ready-made three-level regulator. You can also install one or a pair of diodes inside the generator; you can find information on this topic on the Internet.
brief information
You may be interested in: 2LTE engine: technical specifications
In fact, not all motorists know about the true purpose of the rough road sensor. So if you are one of them, don't be discouraged. In fact, this strange device is surrounded by many rumors and even legends with which car owners try to explain its presence in the design of their vehicle.
Most often, motorists consider the main task of this sensor to be limiting speed while driving on uneven roads. But in fact, this opinion is fundamentally wrong and is not at all related to the real purpose of the device. Remember: this device has absolutely nothing to do with the speed of movement on bumpy surfaces. To be more precise, the sensor concerns this problem only indirectly. At least it won't signal if you drive off-road at top speed.
You may be interested in: Years of production of the VAZ-2107. Car history
Then why do you need a rough road sensor? You might be surprised by the answer to this question. However, in reality it is necessary to temporarily stop the cylinder misfire diagnostic system. In simple terms, it disables certain functions of the car so that the check engine light on the dashboard stops systematically lighting up.
Generator Lada Kalina
A car generator is a rather important design element, without which it would not be possible to even move the car.
The unit is designed to convert mechanical energy into electrical energy, which powers the vehicle battery, as well as associated systems, sensors and devices.
In the case of Lada Kalina cars, manufacturers used two types of generators with part numbers:
Both units are three-phase AC units. Their design includes a rectifier unit and an electronic voltage regulator that facilitates the constant transfer of electricity. The cost of original generators is 10-12 thousand rubles.
In case of failure, the owner of the Lada Kalina can replace the generator with its analogue. The table shows the main models, where the article number and price are indicated.
GeneratorArticleCost, in rubles
| 1118 Lada (90a) LADA art. 11190370101003 | 11190370101003 | 4750 |
| 110A VAZ 1117-1119/2170-2172/Kalina/Pri¬ora/Granta F 000 BL0 652_ Bosch | F000BL0652 | 9000 |
| (115A) LADA Kalina / Granta / Priora | 21700370101082 | 5480 |
Thus, you can replace a failed generator with a cheaper analogue or select a unit of the same cost, but with better characteristics.
Cause of generator failure
The failure of the generator in a Lada Kalina car is influenced by several reasons:
- Poor quality of vehicle operation. This implies ignoring regular technical inspections, timely replacement of the timing belt, and repair of structural parts.
- Using low-quality oil. Oil reduces friction between parts and improves their performance. If you use low-quality compounds, the friction index may increase, which will lead to failure.
Also, the generator may fail simply because its service life has expired. In any case, the car owner will need to replace the unit in order to continue operating the car.
Preparatory stage
Before you begin replacing the generator in Lada Kalina, you should first prepare the necessary set of tools and materials. The list includes:
- open-end or ring wrenches of different diameters;
- small and large ratchets;
- brushes for cleaning the interior;
- wrench with extension.
Only after preparing the instruments can you proceed directly to the procedure.
Main process
Replacing the generator in the case of Kalina with an 8-valve or 16-valve engine involves performing the following steps:
- First of all, you will need to install the car on the repair site and fix the position of its wheels using wheel chocks. It is also necessary to turn off the engine and disconnect the terminals from the battery to ensure the safety of the work being carried out.
- After this, you need to loosen the belt tensioner roller, which fixes the position of the generator. To do this, you will need to unscrew the fasteners and dismantle them.
- The next step is to disconnect the plug secured by a plastic latch. To remove it, you need to lightly press it and pull it to the side. If everything is done correctly, the plug can be removed without problems.
- You will also need to remove the wire terminals located under the protective cap. Therefore, the car owner will first need to dismantle the protective cap by prying it off, and only then remove the terminals.
- The next step is to unscrew the nut securing the upper part of the generator. It is considered the most complex process among those listed, and it is better to familiarize yourself with the structure of the car in advance so that no problems arise. In order for the nut to give in quickly, it can be loosened with a wrench and then worked with a ratchet handle. Finally, all that remains is to lightly tap the protruding bolt so that it moves, after which you can remove it from the reverse side.
- Once the top bolt of the generator is removed, you can proceed to the bottom one. The actions are the same - a knob, a ratchet handle, a light knock and dismantling. However, in this case, it is recommended to hold the nut on the reverse side so that it does not turn.
- Next, you should begin dismantling the rod. This should be done carefully and carefully, since there are bearings and bushings inside. They will need to be held so that they do not fall and get lost.
The final step will be to dismantle the generator, clean the internal space of dirt, rust, possible traces of oil, and install a new unit - a standard generator or its equivalent.
You can check the functionality of the generator with a multimeter by connecting it to the battery terminals. The voltage reading should not be less than 13.4 volts.
Cleaning Guide
Cleaning a car air conditioner with your own hands is a relatively simple task that almost any motorist can do. The cleaning procedure itself consists of three steps: directly cleaning the device, disinfecting it and refilling it. The method of cleaning the car air conditioner is selected in accordance with several factors - the age and condition of the vehicle, the operating conditions of the device, as well as the skills of the car enthusiast. Let's consider each option for cleaning a car air conditioner with your own hands separately.
Method 1
This DIY cleaning option is more relevant for vehicles that are up to five years old. This method can also be used as a preventive measure. To do this, you will need special aerosol cleaning products. Their use is carried out in accordance with the operating instructions.
The choice of such aerosols on the market today is very large; you can choose a product in accordance with your preferences and financial capabilities. We have already written in more detail about such means in this article.
As a rule, such products are used as disinfectants; they are used as follows:
- First you need to start the engine, after which the air conditioner must be turned on at full power. You also need to turn on the recirculation mode.
- The aerosol can is then opened and placed in front of the front passenger seat. After these steps, spraying is turned on. When the aerosol is working, all windows and doors in the vehicle must be closed, and the driver must not be in the cabin.
- You need to wait a while, usually about five minutes. More details about how long to wait are indicated in the instructions for using the product.
Method 2
Another option for cleaning your car air conditioner yourself is to use foam products. Such cleaners allow you not only to disinfect the system, but also to completely clean it.
If you decide to do everything yourself, then follow these steps:
- First of all, you need to dismantle the cabin filter element. In accordance with the operating instructions, all air ducts of the system should be filled with foam.
- When the certain time specified in the instructions has passed, you need to start the engine. Next, the car air conditioner itself turns on. You need to let the device work in different modes.
- After these steps, the interior is completely ventilated.
Method 3
Another option is to use improvised means. For example, chloramine B, lysomorphine 3000 or chlorhexidine can be used for these purposes. Initially, lysomorphine 3000 was created for the disinfection of premises, as well as medical products. This product is also actively used to combat mold. So, if there is an unpleasant odor coming from the air conditioning system during operation, you can be sure that the product will be able to cope with any bacteria and fungus that has appeared on the evaporator.
Disinfectant Chlorhexidine
As for chlorhexidine, it is a solution that can be purchased at any pharmacy. Of course, in its absence, you can use analogues, for example, desihand, desiscrub, dezin and others. If you want the effect of using the product to be maximum, it can be mixed with alcohol, and the proportion should be one to one.
The drug chloramine B is intended for disinfection of all kinds of surfaces, as well as household items and belongings. The solution will be ready for use after one tablespoon of powder is mixed with one liter of water.
- So, after you have received a ready-made solution from one of these products, you need to pour it into a spray bottle.
- The air filter element is removed from the car.
- After closing all windows and doors, you need to turn on the air conditioning system at full power. The solution itself is sprayed with a spray bottle into the hole where the filter element was installed. Let the car air conditioner operate at full power for about ten minutes, then replace the air filter and check the operation of the system.
Generator for viburnum: how much does it cost and where is the best place to buy
Lada Kalina is a well-known and popular car among Russians. As you use it, car parts break down. One of the serious breakdowns is the malfunction of the generator. If there are a large number of failed elements of this system, the device is completely replaced. You can buy a generator for Kalina in Russia at a price of 2000-7000 rubles .
What is this?
A generator is a device that transforms mechanical energy into electrical energy. Lada Kalina cars are equipped with a three-phase alternating current generating device. Thanks to this equipment, all electrical appliances function: radio, wipers, lighting elements, starter.
The following signs indicate that it is time to buy a new generator:
- The battery is undercharged and completely discharged ahead of schedule.
- The brightness of the headlights decreases.
- You can hear grinding and whistling noises when the machine is running.
The cause of failure of an electric current-generating device may be:
- Loose belt.
- Charging relay faulty.
- Brush wear.
- Short circuit or break in the stator or rotor winding.
- Breakdown of the diode bridge.
Sometimes the current-generating device can be repaired. But if there are a large number of failed elements, it is easier to replace them with a working device.
Causes of air conditioner contamination
The question - how to clean the air conditioner in a car on your own - is relevant for all motorists whose cars are equipped with air conditioning systems. When the device is in active use, usually during the hot season, problems may occur in its operation. For example, the air flow during cooling does not allow moisture to be retained in the system; accordingly, condensate in the form of droplets gradually accumulates on the evaporative element.
Due to the formation of moisture, debris and dirt begin to collect on the device. As a result, the component may resemble the aquafilter that is equipped with every modern vacuum cleaner. The only fundamental difference is that the filter element itself can be removed and cleaned without any problems.
Select the vehicle modification to search for a generator
- Lada Kalina 1117 1117 Station wagon 1.4 16V 90 hp id31253 Engine: volume - 1.4 liters, power - 90 hp, type - petrol, model - VAZ-11194. Drive: front. Year of manufacture: 2008-present. time
- Lada Kalina 1117 1117 Station wagon 1.4 16V LPG 88 hp id32057 Engine: volume - 1.4 liters, power - 88 hp, type - petrol, model - VAZ-11194. Drive: front. Year of manufacture: 2008-present. time
- Lada Kalina 1117 1117 Station wagon 1.6 82 hp id26658 Engine: volume - 1.6 liters, power - 82 hp, type - petrol, model - VAZ-21114. Drive: front. Year of manufacture: 2004-present time
- Lada Kalina 1117 1117 Station wagon 1.6 84 hp id11574 Engine: volume - 1.6 liters, power - 84 hp, type - petrol, model - VAZ1110. Drive: front. Year of manufacture: 2010-present time
- Lada Kalina 1117 1117 Station wagon EL 82 hp id112005 Engine: power - 82 hp, type - electric motor. Drive: front. Year of release: 2013-present time
In the next step, for an expanded selection, you can enter the vehicle's Vin code to go to illustrated catalogs, where you can find the layout of parts down to the bolt and duplicates that are not in the catalog of analogues.
See also other spare parts
Selecting a new device
If you are the owner of a foreign car, then give your preference to the original sensor provided by official suppliers. Even for the most expensive cars, its cost will be relatively low. So you shouldn’t save money and buy a Chinese device, because no one will give you a guarantee on it.
For domestic cars, rough road sensors are produced by several companies. The most famous are Kaluga devices and those devices that were produced in Zelenograd. And those who prefer German quality can choose a device from Bosch.
Replacing the alternator belt Lada Kalina 8 valves: size, photo, video
The alternator belt on the Lada Kalina plays an important role in engine operation. Without it, the generator will not be powered, which in turn may result in the battery not charging. If the battery is not charged, the car will not be able to start.
Replacing the alternator belt: step-by-step instructions
First of all, to replace the alternator belt of the 8-valve Lada Kalina, you will need a tool: an open-end wrench with a size of 19, a wrench with a size of 10, and a socket with a size of 8. Now you can proceed directly to the replacement process:
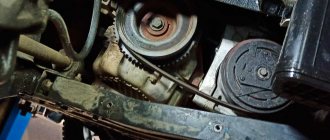
- The alternator belt is located to the left of the engine.
- Using a wrench, you need to loosen the tension roller to release the belt. Loosen the tensioner roller
- Use a 8 key to unscrew the adjustment rod. Using a 13mm wrench, unscrew the lower fastening of the tensioner mechanism.
- Move the adjustment rod up and remove the belt. Belt adjustment rod down
- Now we dismantle the tensioner system.
- We unscrew the roller mount and dismantle it.
- We assemble everything in reverse order. The new belt is preparing to be installed in its “rightful” place
The tension moment must be strictly observed. Too little tension will not give normal speed to the generator, which will lead to a drop in voltage in the on-board network. Too strong and will cause the belt to “stick” or break.
Russian know-how, ordinary market weights guard the alternator belt tightening force
Recommendations
Experts recommend changing the alternator belt on the 8-valve Kalina every 25 thousand km, but AVTOVAZ - every 30,000 km. But, it is worth considering that you need to constantly check the condition of the belt. Since failure can occur even after 10,000 km.
Gates belt - mileage 40,000 km, rips are visible, nothing critical, but better to replace
Replacing this element is not limited by a time frame, but is determined by the condition of the generator belt. If you constantly examine the condition, you can prevent breakage and other negative consequences. At the same time, motorists are recommended to carry a spare belt with them so that they can change it at any time and move on.
Belt selection, catalog number, price
Each belt in a car has its own service life and resource, and therefore requires periodic replacement. So what kind of alternator belt should be installed on the 8-valve Lada Kalina and how is this done?
Original number and belt size:
- Knowing the original catalog number. Using it you can easily find a suitable belt, without knowing the size or teeth.
- By size and type of teeth (number of ribs = 6, size = 1018 mm). Belt marking for Lada Kalina with 8 valves – 6PK1018 . Gates 6pk108 - ideal price/quality ratio
This is the standard size that fits this car. The teeth of the generator belt on Kalina do not run across the base of the court, but along it, having 6 strips that are installed on the corresponding pulleys.
It is worth considering that the replacement of the alternator belt also includes a tension roller, which wears out along with it. When performing the replacement process, it also needs to be replaced.
When choosing a belt and roller, the motorist faces a difficult task: original or analogue. Both are good. But what should you do if you don’t have a belt with you when buying in a store?
Alternator belt items for Kalina
- The original article number for the alternator belt for the 8-valve Lada Kalina looks like this - 1118-1041020 . The average cost in the Russian Federation is 750 rubles. Analogue of the original alternator belt 1118-1041020 - 6PK1018
- The original alternator belt pulley costs about the same, about 750 rubles. and has a catalog number - 2123-1041056. In total, a set of spare parts for replacing the alternator belt with an 8-valve Kalina will cost the owner 1,500 rubles. Old roller and new 2123-1041056 generator belt tensioner pulley
Table of alternator belt analogues for the 8-valve Lada Kalina
Manufacturer Catalog number Price in rubles
All belt analogues performed quite well and won the trust of motorists.
Table of alternator belt roller analogues for the 8-valve Lada Kalina
Manufacturer Catalog number Price in rubles
| Trialli | CM 123 | 800 |
| Master-sport | 21230-1041056-10-ST-PCS-MS | 1000 |
| Pilenga | PT-P 1523 | 750 |
Determination of malfunction and replacement time
Determining a faulty alternator belt is quite simple. Let's look at the main indicators:
- Whistle in under engine space. It appears when you increase the speed of the gas pedal, and the current in the bot network increases.
- Tightening the belt had no effect and the whistle remained.
- Cracks or elasticity in the belt. Bad alternator belt, bad - teeth torn (torn off)
- Frame deformation, eversion. The crack on the alternator belt is clearly visible
All these malfunctions indicate that it is time to replace the alternator belt on Kalina. Otherwise, it may break at the most inopportune moment.
Torn belt on one of the Kalinas
Evaporator function
The evaporator is designed to perform one of the main functions of an air conditioner. It is in this part that the refrigerant in a gaseous state is mixed with air and the second gives off heat. This is where the name evaporator comes from.
The air conditioner can only operate when the car engine is turned on. In simple terms, the principle of operation of a car air conditioner is that the refrigerant is constantly compressed and circulated using a compressor. During compression, it becomes liquid and condenses, releasing heat. In the reverse stroke, during evaporation, the generated heat is absorbed and this function is performed precisely in the evaporator.
Without it, the air conditioning system is impossible in principle. But there is a small nuance here: in large and large devices there are many filters that purify the air as it enters and exits the air conditioner. They can stand either before or after the part in question. This point should be clarified with the air conditioner manufacturer.
Replacing the charging relay
If the charging relay is faulty, the voltage in the car's network can be too high or too low, and the voltage can also “jump”.
To eliminate the malfunction, it is necessary to change the relay regulator. On the Lada Kalina, this part is easy to replace with your own hands; the replacement can be made without removing the generator itself:
- turn off the engine, open the hood and remove the negative terminal from the battery;
- on the back side of the generator, pull off the top chip with the wire, unscrew the nut securing the supply wires and disconnect the wires themselves;
- remove the plastic casing, the cover can be removed easily - you need to unclip three hooks. If the casing is difficult to remove, it can be removed by hooking it with a screwdriver between the generator body and the plastic cover;
- unscrew the two bolts securing the relay regulator (key 8), disconnect the chip with the wire and dismantle the part;
- install the new charging relay in place and assemble everything in the reverse order.
Instructions for controlling a heater with air conditioning and the principle of its operation in Kalina
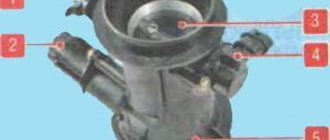
Viburnums with air conditioning (climate system) differ from a conventional stove in the following elements: a button to turn on the air conditioner appears (number 3 in the figure), its own temperature regulator with drawn values is installed (number 5, a special difference from a conventional stove regulator in reverse adjustment, that is Where it is hot at the regulator of a conventional stove, it is cold at the regulator with air conditioners).
Also, in cars with air conditioning, an additional interior temperature sensor is installed in the interior lighting. First, we will name all the air conditioner control elements, and then we will describe what each one does and the operating principle itself:
Fan speed controller
This regulator has 5 positions: Off, 3 flow speeds and maximum speed. I put the maximum speed in a separate paragraph, since this speed works without a resistor and works even if it burns out. When the regulator is positioned in zone 0, all electrical elements of the system are turned off.
Recirculation, air intake regulator
This regulator is responsible for where new air will come from, either from the street or from your cabin. It has 2 positions: street and interior, although you can also set the central position (partially taken from the street and partially from the interior). It is not advisable to turn on recirculation from the cabin for a long time, since fresh air will not flow into the cabin and the condition of the people in the car may worsen.
Air conditioning button
This button starts the air conditioning compressor itself and the interior radiator of the air conditioner begins to cool; it only works when the fan speed is turned on. Until 2011, the air conditioning indicator was not connected, although it was provided for in the design.
Airflow direction control
With this regulator you can set where the cooled or heated air flows will come out. Basic 4 positions: windshield only, center ducts only, feet only, feet and windshield. For faster cooling or heating of the interior, I advise you to use the position of the central air ducts, and otherwise use the position: legs and windshield. This is especially necessary when the air conditioner is operating in cooling mode, so that you do not get blown out.
Temperature regulator
With this regulator you indicate to the climate system what temperature the interior should be. A viburnum with an air conditioner has 2 radiators installed in the stove: the heated engine cooling liquid flows through one, and the air conditioner freon flows through the other (which cools when the air conditioner button is turned on). Depending on the set temperature, the damper regulates which radiator and how much air to pass through in order to achieve the desired result. If the regulator is turned to the far left position (cooling), then all the incoming air passes through the air conditioner radiator, and if it is turned to the far right, then through the second heating radiator.
In other positions, that is, exactly the desired temperature is set, the controller comes into play, which sets the temperature from 2 factors: the interior temperature and the desired temperature. Let's consider the following possible options for operating the climate system at a given temperature:
The very inclusion of the air conditioner affects the temperature of the radiator (evaporator) of the climate itself.
Source
Maintenance (cleaning) of the air conditioner of LADA cars
If your LADA car has an air conditioner, keep in mind that its efficiency decreases during operation. Over the course of a year, even in a sealed system, the amount of refrigerant can decrease by 15%. Therefore, the air conditioning system requires regular preventative maintenance. We'll tell you how to care for and clean your air conditioner.
1 – capacitor; 2 – pipeline connecting the compressor to the evaporator; 3 – pipeline connecting the condenser to the evaporator; 4 – pipeline connecting the compressor to the evaporator; 5 – thermostatic valve; 6 – evaporator; 7 – compressor; 8 – pipeline connecting the compressor to the condenser; 9 – pressure sensor.
The air conditioning device on all modern LADA cars (XRAY, Vesta, Largus, Granta, Priora, Kalina and Niva 4x4) has no fundamental differences. Therefore, its maintenance is carried out in a similar way.
Operation of climate control
Climate control system
To determine the causes of the malfunction of the unit in question, you first need to find out the principle of its operation and the refrigerant flow pattern. This system in Kalina includes the following elements:
- sensor;
- pipeline;
- radiator;
- fan;
- evaporator.
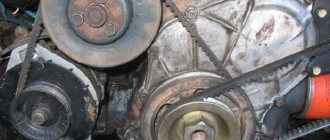
The air conditioning compressor is located on the BC of the engine. It works by rotating the belt. The compressor shaft is located on the housing. The air conditioner pulley is located on a bearing, which rotates regularly when the engine is running. The important elements of this mechanism are:
- friction clutch;
- electromagnetic drive.