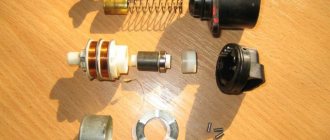
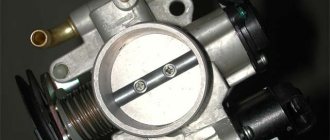
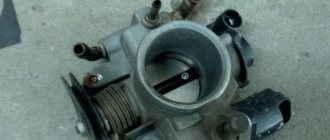
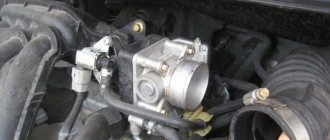
Modern cars are controlled and controlled by an on-board computer. The Lada Priora model line was no exception, the central control device of which is the ECU (electronic control unit). When controlling the engine from a computer, the latter needs to receive the most up-to-date information from numerous sensors located in the engine compartment and other places of the car. One of these important elements is the throttle position sensor or Priora TPS.
The importance of this element is due to its purpose - calculating the position of the damper at the current time.
When you press the gas pedal (connected to the throttle assembly using a special cable), the throttle opens exactly as much as you apply pressure. At the same time, the amount of fuel supplied to the cylinders also depends on the degree of pressure. In order for the ECU to calculate the amount of gasoline to supply, it queries the TPS, which records the required data.
A few words about the car and the intake system
Since we are interested in the Priora throttle valve, we simply need to understand the engine structure of this particular model in order to find out where this part is actually located, why it needs to be cleaned and what damage can be caused by untimely maintenance. Lada Priora has been produced since 2007 in sedan, hatchback and station wagon versions.
The car went through several restylings, its appearance changed slightly, but the level of comfort, safety and quality of the Priora car noticeably improved. Today, models with automatic transmission are even available.
But no changes were made to the configuration of the equipped engines; the car is equipped with almost identical 4-cylinder engines with varying differences in the power offered: from 81 to 120 horsepower. All Prior engines are injection engines, the main difference from carburetor engines is the forced supply of fuel at certain moments directly into the engine cylinder. Our desired throttle valve also plays a significant role in this system. It migrated to the injection system from the carburetor, and, in principle, performs the same role - it meters the amount of air entering the intake manifold.
Throttle valve on Priora
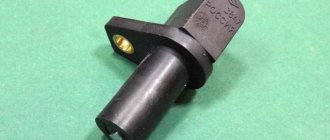
On the Lada Priora engine, the valve itself is located in the throttle assembly, which in turn is located on the intake manifold. The unit is connected to the accelerator pedal drive, by pressing which the driver changes the position of the damper. The electronic intake system is a precise system for which it is necessary to take readings from certain sensors (mass air flow sensor, camshaft position sensor, crankshaft position sensor and many others). There are many of them, but we are concerned with the one that is directly related to the throttle valve. Correctly called a throttle position sensor (the abbreviation TPS is usually used), it monitors the position of the throttle and transmits data to the on-board computer so that all other elements of the power system work harmoniously.
The remote control position sensor can be either electrical or mechanical, which depends on the price of the car, although the difference between them is small.
The position sensor can also break, and when cleaning the throttle assembly, it would be useful to check it. If it becomes noticeable that the car does not switch well from high speeds to low speeds, the engine does not start well in cold weather, at low speeds the engine stalls or runs poorly - this could all be due to contamination of the throttle valve.
This is interesting: What is CVT on Toyota
Node location
Opening the hood of the Priora, you won’t be able to see the throttle assembly. It is located under a plastic casing that covers the top of the engine. In addition to aesthetic value, it has the function of protecting against a heated valve cover.
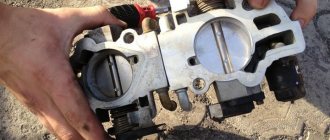
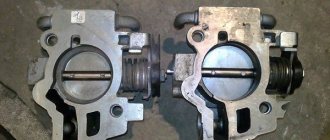
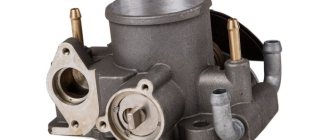
After removing the casing, the air supply system will appear. It is a large rubber pipe connected on one side to the air filter box, and on the other to the intake manifold. A Priora throttle valve assembly is installed between them. It looks like an aluminum insert with a plastic black wing in the form of a sector, to which the control cable is connected (in the case of a mechanical drive).
Read more: Getting into trouble, what is trouble?
When and how to do it yourself
When to do it
adaptation of the throttle valve zero and adaptation of the misfire diagnostic function:
- After replacing the ECU controller or resetting the controller using a scan tool.
- After replacing the throttle assembly.
Throttle zero adaptation procedure
:
Adaptation will be interrupted
, If:
- the engine turns over;
- the car is moving;
- the accelerator pedal is pressed;
- engine temperature is below 5 °C or above 100 °C;
- Ambient temperature is below 5 °C.
Adaptation procedure
Misfire diagnostic functions:
- warm up the engine to operating temperature (parameter value “Coolant temperature” = 60...90 °C);
- accelerate the car in 2nd gear until higher crankshaft speeds are reached (parameter value “Engine crankshaft speed” = 4000 min-1) and perform engine braking (“Engine crankshaft speed” = 1000 min-1);
- Perform engine braking six times in one trip.
This adaptation procedure is specified in the technological instructions for LADA cars.
Replacing EPA from a car
- Turn off the ignition.
- Disconnect the wires from the EPA.
- Unscrew all three nuts securing the pedal to the bracket and remove the EPA.
Installing the pedal is carried out in the reverse order:
- Installation on the bracket and fixing the pedal with three nuts.
- Connecting electrical wiring to the ESA.
Pay for goods by credit card, using QIWI, Yandex.Money or WebMoney and save on your purchase from 4%, avoiding postal and bank commissions
This product was chosen by 9 customers
The electronic accelerator pedal replaces the previous cable-operated accelerator pedal mechanism. Previously, when you pressed the gas pedal, the cable was set in motion and acted on the mechanical damper of the carburetor, the amount of fuel supplied increased, the speed increased and the car drove faster. With the advent of the injector, the gas pedal acquired a different design. When you press the electronic gas pedal, the sensor analyzes the angle of pressure and transmits this information to the Controller (ECU), which analyzes the information received and sends a signal to the throttle valve to open in a certain way. According to studies, an electronic gas pedal is more reliable than a mechanical one.
Attention! This pedal is intended for installation on cars of the Lada Priora family after 2010!
When ordering, in the “Order Comments” line, indicate the model and year of manufacture of your car.
Weight, kg: 0.3 Dimensions, cm: 25 x 18 x 8 Volume, m3: 0.00360
Causes
The most common reason for an adaptation to be made is the consequences of throttle valve maintenance. As a result of operation, a large amount of deposits forms in this unit, therefore, after flushing, the position of the throttle valve changes, and the ECU continues to send signals about its condition until maintenance.
Over time, natural wear occurs on the resistive layer of the sensor potentiometer and the moving elements of the throttle valve; in this case, after adaptation, it will most often require replacement. It is necessary to conduct training if changes are made to the ECU settings (chip tuning), especially if operations have been performed to increase engine power.
The procedure is performed using special programs on computer equipment or without them (a strictly defined procedure, which will be discussed below) depending on the brand of car. Auto electricians must take into account the features of the model, year of manufacture, and type of ECU installed on the vehicle.
Need for maintenance
The prophylaxis procedure should not be carried out in the absence of obvious reasons. Before starting, you need to carefully evaluate the condition of the throttle valve. If there are no obvious signs of tar deposits and areas of coking, then the reason for unstable operation may lie elsewhere.
Also consider the mileage of the car. Experts recommend resorting to flushing no earlier than after 100 thousand km. But on some cars, for example, a Ford Focus, it may be necessary to flush it after 30 thousand kilometers.
You should know how to clean your throttle body to achieve the desired result. This requires a special carburetor cleaning solution, for example, Abro Carb & Choke Cleaner or similar products. The assembly must be dismantled; only in this case can the maximum effect be achieved, otherwise carbon deposits will remain inside the tubes. Disconnect all pipes from the throttle valve to gain good access to the inlet part of the assembly.
Remove carbon deposits delicately using a clean rag or soft brush. Do not use excessive force; you may damage the valve. The internal elements are coated with a thin layer of molybdenum, which novice car enthusiasts mistake for harmful deposits.
The consequences of zealous cleaning can be different: the moving part of the damper will begin to bite, or vice versa, in the closed position it will begin to let air through. In this case, it will not be possible to do without repairing the throttle valve.
Throttle learning idle
After flushing the unit or reflashing the ECU, the throttle valve should be trained to idle. To do this, fulfill the following conditions:
- check the voltage on the battery with the engine off, it should be at least 12.9 V;
- the coolant temperature should be in the range from 70 to 100 degrees;
- the steering wheel must be in a neutral position;
- The gearbox oil must be warmed up;
- all electrical consumers are turned off;
- automatic transmission handle in position P.
Failure to comply with the above requirements will lead to incorrect operation of the engine, so they must be followed. After warming up the engine, you must:
- turn off the ignition for 10 seconds;
- make sure that the accelerator pedal is in the up position;
- turn the key to the ON position for 3 seconds (do not start the engine);
- Press the gas pedal all the way 5 times within 5 seconds and release it for the last time;
- after 7 seconds, press the gas pedal all the way and wait until the “CHESK ENGINE” display lights up continuously;
- After pausing for 3 seconds, release the gas pedal.
Try to start the car, the attempt can be repeated several times. During stable operation, rev the throttle several times and the idle speed should return to the acceptable range.
The procedure for learning the throttle using a PC and car programs has its own specifics, depending on the brand of car, etc. Therefore, it makes no sense to describe the entire process in detail. But first you need to install special software on your PC, for example, VAG-COM for a VAG car group (or other) and drivers. The following is the standard connection order for all:
- turning on the ignition;
- connecting the PC to the car diagnostic connector with an information wire;
- launching software on a PC;
- conducting a test;
- receiving information about readiness for further work - the inscription: “The adapter is ready for work.”
Following a special algorithm, you will be able to coordinate the remote control and the ECU in the “throttle fully open/fully closed” modes for cars with both an electronic and mechanical gas pedal. In this case, the throttle valve training is carried out when the car is warm and the above requirements are met.
This is interesting: Who invented the turbine for the engine
Big throttle on LADA. Does it make sense to install it? Buyer Experience | Motorring online store
Product groups
- Freebie!
- New items
- Appearance
- Salon
- Engine
- Exhaust system
- Intake system
- Steering
- Transmission
- Suspension
- Brake system
- Fuel system
- Electrical and electronics
- Climate system and ventilation
- Alarms and anti-theft systems
- Windshield wiper and accessories
- Car accessories
- Special tools Roller cutters, countersinks, cutters, countersinks
- Cutting tool
- Those. engine maintenance and repair
- Chassis repair and maintenance
- Fuel pump pullers
- Special auto tools
- Special tools "AvtoDelo"
- Flaringers, pipe cutters, pipe benders
- Crescent keys
- Glass repair
- CV Clamp Pullers
- Steering rod and ball joint pullers
- Measuring instruments and tools
- Torque wrenches
- Tire inflation guns
- Mini ratchets
- Car jacks
- Spray guns
- Tools miscellaneous
- Technical hair dryers
- Tool sets
- Body work
- Stripping wires, crimping terminals
- Extractors, Nut Cutters, Hairpin Drivers
- Oil filter pullers
- Universal pullers
- Oilers, plunger syringes
- Impact and reinforced screwdrivers
- Hub pullers and wrenches
- Ties, cables
- Milling cutters for cylinder head modification
- Honing the cylinder
- Working with interior trim
- Retaining Ring Pullers
- Metal brushes
- Lada Granta
- Tuning for hunting and fishing
News We are on VKontakte! Reviews on VKontakte!
Hi all! In this text we will talk about such easy tuning of the intake system as installing a throttle valve of increased diameter: https://motorring.ru/product/89
What does this give us? It allows the engine to pass the greatest amount of air. And the easier it is for him to do this, the greater the output power will be. Let me remind you that the diameter of the stock damper on VAZ 2108-2115 cars is 46 mm. Accordingly, when installing a throttle with a diameter of 52-56 mm on a car, in theory, the power should increase, which we will check later.
What size should I install the damper then?
By installing a throttle with a diameter of 56 mm on the “stock” motor, we will give the motor the opportunity to process air even more easily, compared to 52 and 54 mm, and even more so 46 mm. After all, with the same pressure on the gas pedal, much more air enters through 56 mm than through 46. But comfort in the cabin will be lost, a jerk will appear at the bottom, and you will also need to work more carefully with the accelerator pedal. In general, without a habit, it will be difficult at first.
Direct cleaning
Having figured out what the throttle valve of a Priora car is, where it is located and why it is needed, you can move on to the highlight of the program - cleaning. To clean, you must first remove the throttle assembly from the car. The tool we will need:
- Various screwdrivers to remove the clamps from the pipes.
- Set of socket wrenches.
- Any convenient flushing liquid (can be purchased at an auto chemical store).
To put it simply, to remove the throttle assembly you need to unscrew and remove everything connected to it. However, this must be done in a certain sequence. First, remove the forced ventilation hose and air pipe. Next, you need to unscrew the cap of the expansion tank to reduce the pressure in the cooling system. A hose with hot antifreeze is connected to the damper to heat it up. To remove them you need to unscrew all the clamps and remove the hoses, and put some plugs in the pipes so that nothing leaks out. Then disconnect the gas tank ventilation hose and disconnect the drive cable from the accelerator pedal. That's it, then we remove the assembly by unscrewing it from the manifold.
The most effective and common means for cleaning the throttle body of a Priora car can be called, of course, WD-40. Any other aerosol product will do.
Do not use any brushes, especially for metal, only rags and cleaning agent. It is necessary to flush all the channels of the unit, and the forced crankcase ventilation channel first; it is usually very dirty. It is also necessary to inspect the idle speed sensor and the throttle position sensor; their cleanliness affects their operation, so it would not be superfluous to wash them. After cleaning has been carried out, the unit is put back in the reverse order. If everything was done correctly, positive changes will not keep you waiting.
Mechanical drive
The first models came with a cable drive. When you press the gas pedal, the force is transmitted mechanically.
The Priora throttle body additionally combines a position sensor for this element of the intake system and an idle speed regulator, which sets the crankshaft speed when the throttle is closed, as well as at the time of starting the engine and while connecting additional electrical equipment: headlights, air conditioning, electric heater motor salon It operates electrically. Which supplies air through the valve, bypassing the damper.
In addition, the housing is part of the crankcase cooling and ventilation system. The Priora throttle body with 16 valves differs from the throttle body of a car with 8 valves by an additional hole on the perimeter of the body on the side of the intake manifold.
How to clean the throttle valve on a Priora yourself
To carry out such a procedure, it is not at all necessary to go to the service. Everything can be done independently. Cleaning the throttle valve on a Priora is not a complicated procedure, and it will take a little time to do everything - about half an hour. It should be warned that before starting work directly, you need to let the engine cool down - this is a matter of your own safety.
In order to clean the Priora throttle valve, you need a minimum set:
- set of wrenches;
- screwdrivers - flat and Phillips;
- cleaning agent - it’s difficult to name a specific one, their choice today is quite wide.
However, first of all, we need to get to this node. We put the car in neutral, not forgetting to apply the parking brake. Next, remove the plastic engine cover and the cap from the expansion tank. After this, loosen the clamps holding the air pipe and carefully remove it. While performing these operations, you can at the same time inspect the engine and engine compartment for possible leaks.
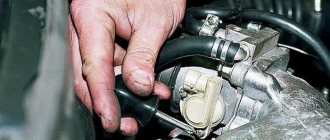
Next, remove the damper heating pipes, having first loosened the clamps. To prevent dirt from getting inside, you can plug the pipes with a rag. After this, it is advisable to disconnect the hose used to ventilate the fuel tank. Now all that remains is to unscrew the bolt, remove the throttle cable and remove the damper itself.
The first stage of work is completed, and you can proceed directly to cleaning. Using a pre-purchased product, thoroughly wash the damper and all its channels. In the latter case, you can use a knitting needle with a rag wrapped around its end. Remove and wash the idle speed sensor. To do this, you will need to unscrew 2 bolts. At the same time, we carry out visual diagnostics for various kinds of visible defects. The work is considered complete if no traces of dirt are visible on a clean rag that you run through the channels.
Now all we have to do is replace the gasket and put the damper in place. All work here is carried out in reverse order. I would like to warn you that everything needs to be done very carefully so as not to accidentally drop anything inside the collector. As you can see, there is really nothing complicated in this procedure. Everything can be done on your own with minimal effort and time.
After the damper is put in place, you should check how effective this procedure was. In particular, pay attention to starting the engine - it should start, as they say, with half a turn. There should not be any extraneous sounds. Next, try the car on the move, switching from high to low gear, or even better, to “neutral”. A normal decrease in speed will be the main sign that everything is done correctly.
Important addition
When cleaning the internal cavity, it is not recommended to change the position of the Priora throttle valve with electronic gas, since the drive gears can be damaged. The mechanical damper, on the contrary, can be rotated by the drive, completely opening access to the inside. You can also disconnect the damper from the rotation axis. It is secured with two bolts. However, you need to know how hard to tighten it back. If self-loosening occurs after assembly, the bolts will fall into the combustion chambers of the engine. To prevent this from happening, after finishing the work you need to drive 500 km, disassemble the unit again and tighten the damper fasteners.
After assembly, do not forget to add coolant to the operating level.
Read more: Nissan x trail t30 wheels
Good day friends!
My ignition coils are still a little wobbly, and it’s not clear which one will get better soon. But it was decided to buy a carburetor cleaner, disassemble the throttle valve assembly, look at the condition of all the sensors and the valve (visually) and make a decision to fix the problem.
I purchased the following cleaning fluid:
in short - here is the assembly with the throttle valve, IAC and TPS sensors, hoses, etc.
The throttle valve itself sits on two studs - use a 13″ wrench to unscrew the two nuts and calmly remove the throttle. This is the condition of my throttle after 66 t.km:
Well, I sprayed the whole thing with cleaner, wiped it off with a small screwdriver and a cloth, and put it back together. I didn’t take a photo of the throttle and so it’s clear that everything is clean now, but I did take a photo of the sensor
What can I tell you, it started up easier, the idle speed became a little higher when warmed up, the feedback on the gas pedal was a little more sensitive. So it's ok.
Let's go off topic. Today such garbage: the battery light came on the other day, then went out, then came on again and went out. This morning I was driving, the light was constantly on, the instrument panel started to go crazy, the red exclamation mark lights came on, either together or separately, there was an exclamation mark in a circle, ABS, airbag, check, about five seconds, it disappeared, for 40 seconds the lights came on, you started accelerating, the lights came on again, you changed gears, half stops lighting, at one moment the BC stopped showing (the dashes, I mean, were on like after a reset), the arrows all froze (this was when it was accelerating) and immediately after a moment half of the sensors stopped lighting and the BC worked, the arrows were normal and everything was fine. PI...C.
I have an idea to go to an electrician, first check and GET DAMN to the brushes (I think they need to be replaced) and look at the diode bridge, in case one diode burns out, well, we’ll see. Priora with a Conder, I tried to disassemble the cover outside at minus 6, what happened, I can’t unfasten the latches completely and pull out the cover.
These are the tops. Help with advice, I will be grateful!
The throttle assembly on Lada Priora cars is no different in design from previous VAZ models, except that the difference from 8-valve ones will be in favor of a larger internal diameter and that’s all.
Such problems often occur when all the sensors seem to be working properly, the pressure in the rail is good, the ignition system is in perfect order, but the engine is somehow not running smoothly, the speed may fluctuate, freeze at certain moments, etc.
Read more: Car shops in the Southern Administrative District of Moscow
If similar problems could arise with your Priora, then you can try removing the throttle assembly and cleaning it. Of course, this cleaning is possible without removal, but it is still more reliable with complete dismantling.
In order to remove the throttle on a Priora, we need the following tool:
- Phillips and flat blade screwdriver
- Pliers
- The wrench is 13 mm, and it is most convenient to use a ratchet and a socket
- Extension
Conditions for carrying out the idle speed adaptation process
Before starting training, a number of prerequisites must be met:
- travel by car for 10 minutes;
- ensure that the battery voltage at idle is at least 12.9 V;
- warm up the gearbox;
- The wheels of the vehicle must be straight, the steering wheel must be in the middle position;
- engine temperature – 70–95 °C;
- all devices that put a load on the car’s electrical network (heated windows, headlights, etc.) should be turned off;
- The automatic transmission selector is set to N or P.
Adaptation of air flow at idle speed
Now you can proceed directly to learning how to idle, “armed” with a stopwatch and a little bit of patience. The procedure is performed like this:
- The engine starts and warms up to standard operating temperature.
- The ignition is turned off and no action is performed for 10 seconds.
- The ignition turns on (the accelerator pedal is in the released position), wait 3 seconds.
- The following actions are performed five times in a row: the accelerator pedal is fully depressed and fully released.
- After 7 seconds, the pedal is pressed again (fully) and maintained in this state for 20 seconds.
- The pedal is released completely (and without delay) at the moment when the malfunction indicator on the panel stops flashing (it should be lit steadily).
- Then immediately, without touching the accelerator pedal, you need to start the engine so that it can idle.
- We wait about 20 seconds.
After all the announced actions, we accelerate the engine (2-3 times) and make sure that the ignition timing and idle speed standards comply with the standards. At this point, the damper adaptation procedure can be considered complete.
E-gas adjustment
The electronic throttle is adjusted according to only one parameter – the response time of the gas pedal. It is adjusted by simply moving the accelerator pedal unit (APB). It is factory sealed and this work is usually carried out at an authorized service center, but the operation is simple and can be done with your own hands. Not on all Prioras, adjustment is possible, but on cars produced since 2014, adjustment is definitely possible.
To adjust E-gas you need:
- Open the hood, remove the wipers, frill, negative terminal from the battery, the battery itself, get close to the pedal block.
- In the pedal block, unscrew the three nuts of the accelerator block. Do not disconnect the harness! Otherwise, the setting will still become factory default.
- Loosen (do not pull out!) two screws on top and one on the bottom and move the block horizontally. To the right (relative to the driver) – short response, to the left (relative to the driver) – long response.
