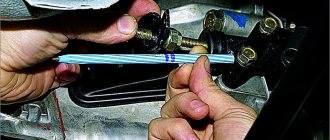
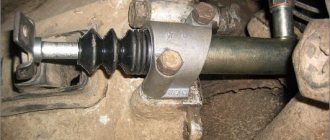
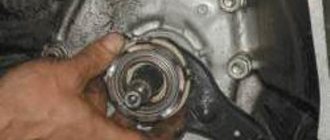
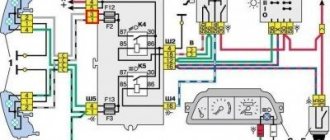
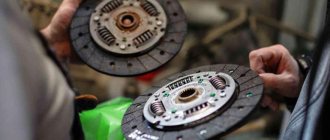
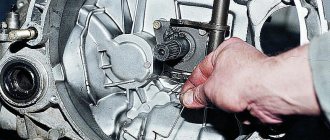
Currently, a hydraulic clutch drive is used on Lada XRAY, Vesta, Largus and 4x4 vehicles. Proper operation of the hydraulic clutch release drive is only possible if there is no air in the system, due to which the clutch may not disengage completely. As a result, changing gears will be difficult or impossible. Let us consider in detail the process of pumping the hydraulic clutch drive or replacing the brake fluid in the hydraulic drive.
When to replace brake fluid in the hydraulic clutch system:
- LADA 4×4 – every 30,000 km. mileage
- Largus, Vesta and XRAY - every 90,000 km. mileage or after 6 years of operation (whichever comes first).
To change the fluid, bleed the clutch hydraulic drive. The criterion for completing the replacement is that the old brake fluid stops leaving the air bleed valve.
The procedure for removing air (bleeding, replacing fluid) from the clutch hydraulic drive:
- Check the brake fluid level in the clutch reservoir (for Niva 2121/2131) or the master cylinder (for other LADA models). If necessary, add fluid to the “MAX” level.
- Remove the protective cap from the valve to remove air from the clutch slave cylinder (it is more convenient to get to it from below the car, see hydraulic drive device).
- Place a transparent hose on the valve and lower its end into a container with a small amount of brake fluid.
- Ask an assistant to slowly press the clutch pedal 10-15 times at intervals of 2-3 seconds and lower the pedal.
- We loosen the fitting with a “8” key (for Niva 2121/2131). Use a screwdriver to pry the spring clamp of the tube and lift it 1 click. We move the tip from the working cylinder pipe by 10 mm (for other LADA models).
- Have an assistant depress the clutch pedal and hold it depressed. Liquid will flow out of the hose into the container.
- As soon as the fluid stops running out: fix the fitting with a wrench (for Niva) or push the tip of the hose into the nipple of the clutch slave cylinder and secure it with a spring retainer.
- Release the clutch pedal and wait 5 seconds.
- Repeat steps 4-7 until the fluid in the drive is completely pumped (clean fluid without bubbles should flow out of the hose).
- We put the protective cap on the air removal valve.
Bleeding the hydraulic clutch
Bleeding the clutch drive on cars before 2009 and after is performed in the same way.
If, when you press the pedal all the way, the clutch does not disengage completely (“clutch engages”), which is accompanied by a characteristic grinding of gears when engaging reverse gear, then there is probably air in the clutch hydraulic drive. Requires pumping.
In addition, bleeding must be done after replacing the fluid or when changing clutch parts, which is carried out with depressurization of the system.
We carry out the work on a lift or inspection ditch.
Check the fluid level in the clutch hydraulic reservoir and add fluid if necessary.
|
We put a transparent plastic hose on the fitting, the end of which is lowered into a container with brake fluid.
Using an “8” wrench, unscrew the fitting 1/2–3/4 turn.
In this case, the assistant sharply presses the clutch pedal and releases it smoothly until the air bubbles released from the hose disappear.
With the clutch pedal pressed, tighten the fitting, remove the hose and put on the cap.
Video
Source
Cooling systems.
The cooling system here is liquid, closed type. This includes a radiator, pump, sensor. thermostat, fan, expansion tank, hoses, etc. The capacity is 8 liters.
The expansion tank is located next to the brake booster. Installed markers allow you to quickly determine the fluid level. It is important that everything is completely sealed, so the inlet and outlet valve monitor and regulate the pressure.
The tubular-plate radiator is made of aluminum and has plastic tanks. Coolant Antifreeze A-40 M for this system is poured through the expansion tank.
Niva 2121 2131 bleeding the hydraulic clutch
We bleed the hydraulic clutch on a Niva 2121 and 2131 when there is air in the system, which is accompanied by deterioration of the clutch, provided that the remaining elements of the system are in good condition. To carry out repair work, the car must be driven into an inspection pit, overpass or lifts, then prepare a standard set of tools and perform the following sequence of actions:
- Check the brake fluid level in the clutch hydraulic reservoir and add if necessary.
- Prepare an empty plastic bottle into which you need to fill the brake fluid; you will also need a silicone tube with an internal diameter that should match the diameter of the clutch slave cylinder fitting.
- Next, remove the protective cap from the working cylinder fitting. If it is not installed, then it is necessary to clean the hole in the fitting and, upon completion of the work, be sure to install a new one so that it does not become clogged.
- We put one end of the tube onto the fitting, the other end of which is lowered into a container with brake fluid.
- Using an eight key, loosen the tightening of the fitting.
- Now the assistant should press the clutch pedal sharply and release it smoothly. At this moment, brake fluid with air bubbles will come out of the hose. We repeat this operation until the air in the system runs out.
- We tighten the cylinder fitting with the clutch pedal depressed.
- During the pumping process, do not forget to monitor the fluid level in the tank and add it if necessary.
Source
Modernization of Lada 4x4 (Lada 4x4) - wheels.ru
The nivovods took all this seriously! Why! VAZ itself was interested in our opinion! And we know our Nyvka inside and out, inside and out! Not only do we know its advantages (there are countless of them!), but we are also well aware of its disadvantages! And the proposal itself is just a fairy tale, how flattering and interesting! By the end of March last year, the Niva 4x4 club prepared two reports of fifty pages each - on the current Niva and on the one that was “either”... On the current Niva it was written... Guess how many comments, wishes and suggestions? Ten? Twenty? Fifty? You didn’t guess: there were exactly 209 points!
The reports were sent to VAZ, and the plant invited the club administrator to Togliatti, where they showed him everything, told him everything and listened to him attentively at a specially convened meeting. And then it turned out that, on the one hand, many of our important wishes correspond to the plans of the plant.
They know, for example, about the Niva’s weak engine - a wasteful copy of the same one that was sold for a penny half a century ago. And the plant has plans to supply the Niva with a more powerful, modern domestic engine. And two options have even been thought out - a volume of 1.6 liters 21116 from Kalina and a volume of 1.8 liters, a completely new one...
And the factory workers know about the problem of the front hub assembly, and even there is already a solution. Looking ahead, I will say that during the second trip to Togliatti in May last year, the club administrator saw with his own eyes (the eyes of a consumer!) two Nivas on which these new hub units were tested. That is, everything is ready, all that remains is to implement it!
But on the other hand, some of our proposals and wishes were a revelation for VAZ. For example, you can’t drive out of the garage door at all on the tires that the plant puts on all Nivas in winter. Although they say “MS”, which means “mud{amp}amp;snow” - “mud and snow”. It’s written, it’s written, but the breeders have been warning on their website for a long time: no-no! It’s very easy to kill yourself...
The factory workers also learned that cars with injection engines simply need to display controller fault codes. Niva specificity: the service can be several hundred kilometers from the forest village where Niva lives. How do you get there if the check engine light is on?
In May of the same last year, the club administrator was invited to the plant again. We drove around the test site, discussed tires and the indication of fault codes at two meetings. We made positive decisions on both counts...
“The fairy tale is told soon, but the deed is not done soon” is an immutable truth, gleaned from Russian folk tales in childhood. But still, by the beginning of summer, several of those 209 points were completed. And their implementation was supervised by Vice President for Technical Development Evgeny Nikolaevich Shmelev.”
How to pump the clutch on a Niva yourself and on any car
In this manual, you will learn how to bleed the clutch on a Niva yourself. There is nothing difficult in this process even for those who have never done DIY repairs alone before. These steps are suitable for any car with a manual transmission.
The clutch on a Niva car is pumped when there is air in the hydraulic drive. Fortunately, this problem does not occur often. Sealing failure occurs due to wear and various damage during the repair process. Bleeding is also carried out when replacing fluid and clutch parts.
The presence of air in the hydraulic drive of the clutch system can lead to its ineffective operation and complete failure. You should be careful when bleeding the clutch.
Niva Chevrolet: filling tanks, features, purpose
The number of these elements in each vehicle may vary. In addition, it is important to have a clear understanding of the location, types, engine and transmission oil used, types of lubricants and fluids.
The recording is more for myself, but maybe it will be useful to someone else. Since after the purchase I only changed the oil in the engine, and it’s not at all clear what and how much in the transmission, I’m thinking about changing the oils in the gearbox, transfer case and axles. It would be good to know what kind of transmission oil to fill in to reduce the howling of the transfer case.
0 l Engine cooling system 8.0 l Engine lubrication system 3.75 l Gearbox housing 1.6 l Transfer case housing 0.79 l Front axle housing 1.15 l Rear axle housing 1.3 l Brake hydraulic system 0.5 l Clutch release hydraulic system 0.15 Windshield washer reservoir 5.0 l Tailgate washer reservoir 2.0 l Front shock absorber 0.15 l Rear shock absorber 0.215 l Power steering 1.7 l Air conditioning: refrigerant 0.650 kg
How to avoid falling asleep while driving on the highway
GreasesFront wheel drive joints CV joints-4M, SPECTROL CV joints MoS2 TU 0254-001-0014882Front suspension ball joints, Steering rod joints ShRB-4 TU 38.
USSR-201-143 Joints for cardan shafts Litin 2 TU 0254-311-00148820 Splined joints for cardan shafts 158 TU 38.
Dowcorning
Pressure regulator DT-1 TU 38-USSR-201-116
Brake and clutch hydraulic drive system Brake fluids type DOT-4 SAE J 1703, FMSS116
In this article we will talk about how to change the oil in the gearbox, transfer case and axles of a Chevrolet Niva. The use of high-quality lubricants for vehicles plays an important role in the operation of any car. The most common process for proper vehicle operation is the oil change process. It is possible to change the oil yourself, without resorting to the help of auto service employees, while significantly saving money.
Choosing engine oil is a responsible task on which the service life of the power plant depends. This procedure is no less important than the oil change process itself. Oil should be selected according to the parameters and tolerances specified in the operating instructions.
You cannot make a mistake in your choice, as this mistake can result in a serious technical breakdown, and incompatible oil can cause a major overhaul of the engine.
In this article, using the example of the popular Chevrolet Niva SUV, we will pay attention to the most important parameters of motor oil, and also consider the best brands of oils and how much oil should be filled.
After all, Chevrolet Niva filling tanks must be filled taking into account the plant’s recommendations so that all systems can fully operate.
Signs of air in the system
The presence of air in the hydraulic drive is indicated by the following signs: when you press the pedal, the clutch does not disengage completely; when you turn off the reverse speed, a characteristic grinding noise is heard. To work, you will need a set of tools, a small container, a hose and brake fluid. This procedure is practically no different from bleeding the brake system. Therefore, even a novice motorist can handle it. You must use the fluid recommended by the car manufacturer.
Reservoir for windshield and brake fluid.
Another filling capacity of the Chevrolet Niva is two glass washer reservoirs, the capacity of which is five and two liters.
This model has two independent braking systems. The working one has a hydraulic drive, the parking one has a mechanical drive. The contours are separated from each other.
The hydraulic drive includes a special tank made for brake fluid.
Chevrolet Niva reservoirs for refilling liquids and lubricants are quite reliable and convenient when you need to make a replacement.
Various tags and sensors make it possible to carry out control almost immediately, which allows you to avoid an emergency situation.
Sequencing
How to bleed the clutch on a Niva? It is better to carry out repairs to the hydraulic clutch drive on an overpass.
- First, you need to check the hydraulic drive elements for leaks.
- Then the fluid level in the tank is checked. It is located in the engine compartment.
- If necessary, add liquid. At the same time, debris and other foreign impurities should not get into the tank.
- Then the clutch itself is adjusted.
- Only after this can you start pumping.
An assistant is needed for this work. If it is missing, a gas stop is required to fix the clutch pedal.
- Remove the protective cap from the working cylinder fitting.
- Then one end of a transparent silicone hose is put on it.
- Its other end is lowered into a container with brake fluid.
- The tightening of the fitting is loosened several turns with a key of eight.
- After this, air will begin to come out of the hose along with the liquid.
- The assistant sits behind the wheel, sharply presses the clutch pedal several times and releases it.
- The interval between presses is approximately 3 seconds. This action stops only when liquid comes out of the hose without air bubbles.
- Fluid is then added to the clutch reservoir. With the pedal pressed, screw in the fitting and put on the cap.
- After this, the clutch system is checked.
When shifting the gearbox, no extraneous sounds should be heard. At high speeds the car should accelerate dynamically. This completes the repair.
VAZ 2121 how to bleed the clutch
HomeVaz 2110Vaz 2121 how to bleed the clutch
2121, 2131
repair
transmission
clutch
Clutch hydraulic drive and bleeding
Instructions for repairing and replacing clutch discs Niva 2121, procedure for removing and installing cylinders Niva 2131, VAZ 2121. Clutch hydraulic drive and bleeding Clutch device Niva 2121, Niva 2131, do-it-yourself repair transmission repair clutch, device, repair and maintenance
We carry out the work on a lift or inspection ditch.
We check the fluid level in the Niva 2131 hydraulic clutch reservoir and add fluid if necessary.
Remove the cap from the fitting of the working cylinder Niva 2131.
We put a transparent plastic hose on the fitting, the end of which is lowered into a container with brake fluid.
Using an “8” wrench, unscrew the fitting 1/2–3/4 turn.
In this case, the assistant sharply presses the Niva 2121 clutch pedal and releases it smoothly until the air bubbles released from the hose disappear. With the VAZ 2121 clutch pedal pressed, tighten the fitting, remove the hose and put on the cap.
Clutch VAZ 2121, Niva 2131
| Clutch device Niva 2121, Niva 2131 |
| Features of the clutch design Niva 2121, Niva 2131 |
| Adjusting clutch engagement and disengagement Niva 2121, Niva 2131 |
| Bleeding the clutch Niva 2121, Niva 2131 |
| Replacing the hydraulic clutch reservoir Niva 2121, Niva 2131 |
| Replacing the clutch master cylinder Niva 2121, Niva 2131 |
| Removal and installation of the clutch slave cylinder Niva 2121, Niva 2131 |
| Removing and installing a flexible hose for the hydraulic clutch Niva 2121, Niva 2131 |
| Removal and installation of driven and driven clutch discs Niva 2121, Niva 2131 |
| Replacing the clutch drive Niva 2121, Niva 2131 |
Units and transmission device VAZ 2121, VAZ 2131
Maintenance and operation of the Niva 2121 box. Repair instructions for the cardan, axle and wheel drive Niva 2131.
clutch, device, repair and maintenance
gearbox, troubleshooting and replacement of parts
transfer gearbox, inspection and testing
cardan transmission, photo, DIY repair
How to bleed the clutch on a Niva Chevrolet: photos and videos
Clutch bleeding should be done when the clutch is not fully engaged.
The basics of bleeding the clutch in the video below:
Bleeding the clutch on a Chevrolet Niva
When everything you need for work is at hand, you should perform the following activities:
- Open the reservoir where the liquid is poured and fill it to the neck. It is located in the engine compartment. Clutch bleeding fluid
- A hose should be put on the fitting of the system cylinder, and its other end is immersed in the container. How to connect
- Next, the assistant depresses the clutch pedal (3-4 times) and then holds it depressed.
- With the pedal depressed, unscrew the valve and bleed the fluid in the system. After this, the valve closes and pressure is created in the system again. Bleed the clutch by pressing and holding the pedal
- The procedure should be repeated until clear liquid comes out of the system. There should also be no air bubbles in it. Controlling the color of the liquid and air bubbles
- During the process, you need to check the fluid level in the tank. If necessary, it is topped up.
- After pumping, add fluid to the reservoir up to the MAX mark.
- With the engine warm and idling, depress the clutch pedal and engage the gear. During the process, no grinding noise should be heard in the gearbox.
- When accelerating a car, it must gain speed in proportion to the increase in crankshaft speed. If the engine is running at high speeds, but the car does not accelerate dynamically, it means that the clutch is slipping. It will need to be repaired.
Checking the clutch condition
Before a test drive, check how the gears engage with the clutch depressed.
To check the technical condition of the clutch, you will need:
How to determine the need to bleed the clutch
This can be determined because when you engage any gear, you will hear a grinding noise in the box.
This situation may indicate that air has appeared in the system. This can happen as a result of replacing both the fluid itself and system parts.
To do this work yourself, you should have a set of tools, replacement fluid, an empty container and a tube. It will be convenient to carry out the work with an assistant. Pumping should be done on an inspection hole or overpass.
Useful tips
You should not constantly keep your foot on the clutch pedal while the car is moving.
In this case, the disc will slip and wear out faster. And also the release bearing will work under load, as a result of which its life will be reduced. For the same reason, you should not keep the clutch pedal depressed for a long time. This can happen, for example, in a traffic jam.
Knowing these points, you can independently determine the quality of the clutch and, if necessary, pump it.
VAZ 2121 clutch bleeding - VAZ Autotrack
Dear visitors of the Autotrack website! We will be very grateful for your comments on the video clip “VAZ 2121 bleeding the clutch”; registration is not required for this. We also ask you to let us know if you have any problems playing the video.
Oh wow, I’d better go to the experts to change it. By the way, Murat Thagalegov made me happy =
10/27/2016 — 11:50 Dmitry Zavertaylo
Thank you Video helped a lot
Main signs of clutch failure
In the new Chevrolet Niva, the clutch does not cause any complaints. But over time, the friction surfaces of the disc wear out, the fatigue strength of the clutch fork decreases, and the seals age and crack.
As the vehicle is used, the surface of the friction discs wears out.
Signs that your car's clutch is in poor condition include the following::
- the clutch “slips” and heats up due to its incomplete engagement due to wear of the friction linings, oil and dirt getting on their surface;
- the clutch “leads” due to its incomplete disengagement due to air entering the hydraulic system, loosening of the rivets of the friction linings, warping, misalignment and end runout of the driven or pressure plate;
- characteristic noises and knocking are heard when pressing or releasing the clutch pedal due to a malfunction of the release bearing, deformation or breakage of other clutch parts.
All this indicates that the clutch system should be disassembled and repaired, and in case of serious malfunctions, the worn clutch should be replaced with a new one.
Which clutch is better to install on a Chevrolet Niva?
We can recommend various types of clutches from different companies, which differ in manufacturing and assembly quality, reliability and, accordingly, price:
- The SACHS clutch from the reputable German concern ZF is of high quality, therefore does not require periodic maintenance, does not have environmentally harmful asbestos linings, and guarantees a mileage of 100 thousand kilometers. The difficulty when purchasing is the high price, since “you have to pay for quality”!
SACHS clutch kit.
VALEO clutch kit.
LUK clutch kit.
Clutch kit VAZINTERSERVICE.
Other clutch options with a good reputation are also possible: FSO (Poland), HOLA (Holland) and others. But beware of Chinese or Turkish counterfeits.
Bleeding the clutch and replacing the hydraulic reservoir of the VAZ-21213
We bleed the clutch after replacing the master cylinder, clutch slave cylinder or clutch hose.
The design features of the VAZ-21213 clutch are discussed in the article - “VAZ-21213 clutch design”
We carry out the work on a lift or inspection ditch.
Check the fluid level in the clutch hydraulic reservoir and add fluid if necessary.
0.2 liters is poured into the clutch release hydraulic drive system. brake fluid DOT-3, - 4.
Remove the cap from the working cylinder fitting.
We put a transparent plastic hose on the fitting, the end of which is lowered into a container with brake fluid.
Using an “8” wrench, unscrew the fitting 1/2–3/4 turn
In this case, the assistant sharply presses the clutch pedal and releases it smoothly until the air bubbles released from the hose disappear.
With the clutch pedal pressed, tighten the fitting, remove the hose and put on the cap.
Removing the clutch reservoir
The tank is usually removed to replace or wash it.
We unscrew the reservoir cap and use a rubber bulb to pump out the brake fluid from the reservoir.
Loosen the hose clamp and remove the hose from the tank fitting.
Using a 10mm wrench, unscrew the two nuts securing the tank clamp to the body
It is best to wash the tank with a soapy water solution.
After this, you need to rinse the tank under running water and dry it.
Install the tank in reverse order. Fill the brake fluid and bleed the clutch hydraulic drive.
Characteristics of motor 21213
The requirements for an SUV engine at the time of design were:
- increase power and torque, at least at medium speeds;
- ensure acceptable fuel consumption within 12 l/100 km;
- provide a basis for injection modification in the future.
The engine uses a crankshaft with a “long” crank radius and 82 mm cylinders. If the gas distribution mechanism drive breaks, it bends the valves, but at 3000 rpm the torque is 126 Nm, and the power is increased to 81 hp. With. Factory tuning used a modernized attachment - a Solex carburetor, and increased volumes of combustion chambers.
| Manufacturer | AvtoVAZ |
| Engine brand | 21213 |
| Years of production | 1994 – … |
| Volume | 1690 cm 3 (1.7 l) |
| Power | 61 kW (82 hp) |
| Torque moment | 126 Nm (at 3000 rpm) |
| Weight | 117 kg |
| Compression ratio | 9,3 |
| Nutrition | Solex carburetor |
| Motor type | in-line |
| Ignition | distributor |
| Number of cylinders | 4 |
| Location of the first cylinder | TVE |
| Number of valves on each cylinder | 2 |
| Cylinder head material | aluminum alloy |
| Intake manifold | duralumin |
| An exhaust manifold | cast iron |
| Camshaft | original cam profile |
| Cylinder block material | cast iron |
| Cylinder diameter | 82 mm |
| Pistons | original |
| from 2103 | |
| Piston stroke | 80 mm |
| Fuel | AI-92 |
| Environmental standards | Euro-0 |
| Fuel consumption | highway – 8.3 l/100 km mixed cycle 10.5 l/100 km city – 11.5 l/100 km |
| Oil consumption | maximum 0.7 l/1000 km |
| What kind of oil to pour into the engine by viscosity | 5W30, 5W40, 10W40, 15W40 |
| Which engine oil is best by manufacturer | Liqui Moly, LukOil, Rosneft |
| Oil for 21213 according to composition | synthetic in winter, semi-synthetic in summer |
| Engine oil volume | 3.75 l |
| Operating temperature | 95° |
| ICE resource | declared 80,000 km actual 160,000 km |
| Adjustment of valves | nuts |
| Cooling system | forced, antifreeze |
| Coolant volume | 10.7 l |
| water pump | with plastic impeller |
| Candles for 21213 | BCPR6ES from NGK or domestic AU17DVRM |
| Spark plug gap | 1.1 mm |
| Valve train chain | double-row, from 2103 with a new tensioner shoe design |
| Cylinder operating order | 1-3-4-2 |
| Air filter | Nitto, Knecht, Fram, WIX, Hengst |
| Oil filter | with check valve |
| Flywheel | with clutch landing diameter 200 mm or 215 mm |
| Flywheel mounting bolts | M12x1.25 mm, length 26 mm |
| Valve stem seals | manufacturer Goetze, inlet light, exhaust dark |
| Compression | from 10 bar, difference in adjacent cylinders maximum 1 bar |
| XX speed | 750 – 800 min -1 |
| Tightening force of threaded connections | spark plug – 31 – 39 Nm flywheel – 62 – 87 Nm clutch bolt – 19 – 30 Nm bearing cap – 68 – 84 Nm (main) and 43 – 53 (rod) cylinder head – three stages 20 Nm, 69 – 85 Nm 90° 90° |
Also interesting: Choosing oil for a Chevrolet Niva engine
Taking into account the year of manufacture (1994) and the low compression ratio (9.3 units), users filled in 92 gasoline, and the engine manufacturer recommended AI 91 - 93. Compliance with the environmental protocol has not yet been discussed, so the engine is considered Euro-0.
Read news about the new Niva
- Brake pads for VAZ 21214: selection and replacement
- Tuning VAZ 2131 - tuning the interior, engine of the NIVA VAZ 2131
- How to buy a used Chevrolet Niva. - adviсe
- Buy Niva Wheel Hub Cap online, Niva Wheel Hub Cap at a discount on AliExpress
- How to connect a stove on a field 21213
- Electrical diagram of Niva Chevrolet: electrical wiring diagram of VAZ 2123, Chevrolet Niva, electrical diagram and connection of speed sensor, charging with description
- Chevrolet Niva air conditioner radiator in Moscow
- New Chevrolet Niva presented
Replacing the Clutch Disc VAZ 2121
Design features of the Niva 2121-2131 clutch
The clutch is single-plate, dry, with a central diaphragm-type pressure spring. It is located in an aluminum crankcase, bolted to the engine block and structurally integrated with the gearbox. The clutch drive is hydraulic.
The clutch housing of the VAZ 2121 is connected to the flywheel with six bolts. The Niva 2131 flywheel has three pins, which, when installed, fit into the corresponding holes in the casing, centering it. The casing is connected to the pressure plate by three pairs of elastic steel plates with rivets.
The other three plates connect the casing to a thrust flange facing the clutch release
(“squeeze”) This assembly (“clutch basket”) is balanced on a stand, so it should be replaced as a whole.
Replacement is necessary if the surface of the pressure plate is severely worn or the spring is “settled.”
The driven disk of the VAZ 2131, assembled with a spring torsional vibration damper, is installed between the flywheel and the clutch housing and can move along the splines of the gearbox input shaft. Disk
Replace if there is more than 0.5 mm of runout in the area of the linings, their cracking, scuffing or uneven wear, and also if the distance from the surface of the lining to the rivets is less than 0.2 mm.
The VAZ 2131 is mounted on a clutch, which, when the clutch is turned on and off, moves along the guide sleeve, acting on the thrust flange of the diaphragm spring.
When the clutch is disengaged, there must be a gap between the bearing and the thrust flange, which is determined by the free play of the clutch release fork pusher (see Adjusting the clutch release drive). The bearing does not require maintenance or lubrication.
Lubrication system.
The lubrication system itself is also combined. The oil pump supplies oil under pressure to the bearings, crankshaft, and drive helical gear. Some parts are lubricated by splashing.
High temperatures, constant loads and friction affect the service life and operating time of the motor. Without lubrication, gears and parts wear out quickly. In addition to cooling, it is possible to eliminate carbon deposits and microparticles.
Source
Clutch adjustment Niva VAZ 21213, 21214, 2131 (Lada 4×4)
The gap between the pusher and the master cylinder piston required to completely disengage the clutch should be 0.1–0.5 mm. To adjust...
| ...using a “10” wrench, loosen the locknut of the clutch pedal travel limiter, holding the limiter with a wrench of the same size (the pedal assembly has been removed for clarity). |
By rotating the limiter, we achieve the required gap.
In this case, the free play of the clutch pedal is 0.4–2.0 mm.
The free play of the working cylinder pusher should be 4–5 mm. To determine it, we use a simple template, for example, a pencil.
Remove the release spring and rest the end of the pencil against the boss of the lower fastening of the clutch slave cylinder. On a pencil we make one mark opposite the end of the fork (pressed against the adjusting nut), and a second mark to the right, at a distance of 5 mm from the first.
| We move the clutch release fork back until it stops, that is, we select free play of the working cylinder pusher (the front driveshaft has been removed for clarity). |
With normal free movement of the pusher, the fork will align with the second mark. Otherwise, adjustment is necessary:
| use a 13mm wrench to unscrew the lock nut, holding the adjusting nut with a 17mm wrench; |
holding the pusher with pliers, rotate the adjusting nut, achieving normal free play of the pusher. We close the connection.
After adjustments, the free play of the clutch pedal until it starts to disengage should be 25–35 mm.
We finally check the operation of the clutch with the engine running: with the clutch depressed, the gears should shift easily, and the car should move off when the pedal is released from the floor one to two thirds of its travel.
Adjustment procedure
- Adjustment of the Chevrolet Niva clutch is carried out with the engine turned off. It is also better to disconnect the battery so as not to accidentally start the engine when the shaft rotates.
- The gearbox is moved to neutral. The master cylinder is installed with a gap of half a millimeter from the pusher. This distance is sufficient to disengage the clutch disc. Subsequently, the pedal travel is adjusted.
- The pedal travel should not exceed 3 millimeters. Adjustment must be made by changing the position of the locknut and bolt. By tightening them you can adjust the stroke amount.
- The pusher should move freely no more than 4-5 millimeters. To adjust it, you need to adjust the stop nut.
- Also, to adjust the pusher, you can change the position of the lock nut.
The total free play of the pedal should be within 25-35 millimeters. To more accurately adjust the clutch pedal, it is necessary to work on an inspection hole or lift.
autoruk.ru
Mitsubishi Lancer has a striking sporty appearance, stylish interior design and a variety of performance options. The model is produced in Japan. Like all Mitsubishi cars supplied to Russia, the new product is fully adapted for operation in Russian conditions.
The Lancer X represents a new family of Mitsubishi vehicles created on the basis of the first global platform “Project Global”. This platform underpins several new Mitsubishi models, including the new Outlander XL mid-size SUV and the new generation Lancer Evolution sports car.
The use of “Project Global” made it possible to increase the overall dimensions and space of the vehicle interior, as well as body rigidity while maintaining the maneuverability characteristic of the previous generation of the model. The new suspension design improves handling and ride comfort.
The new range of 16-valve 4-cylinder DOHC engines with an aluminum cylinder block and proprietary MIVEC electronic valve timing control system provides high dynamic performance while meeting the most stringent environmental standards. Mitsubishi Lancer is obedient and perfectly controlled.
Engines 11186 and 21116 differ from model 11183 in a lightweight connecting rod and piston group.
All piston rings are thinner than on previous engine models, which is designed to reduce internal engine friction losses.
Replacing the clutch in the field without an assistant, in one person
Replacing the clutch in the field
Immediately after the new year, on January 7, I finally changed the clutch in the field, and at the same time changed the clutch master and slave cylinders.
Replacing the clutch on a field and on a single-wheel drive is a completely different task in terms of labor intensity. I changed my clutch for two days, although I did a lot of other things along the way. It is highly advisable to call a friend for help.
I managed to do everything alone, but next time I will try to do it with an assistant.
So, let's begin our difficult journey. Replacing a clutch in a field is one and a half times more troublesome than on a conventional front-wheel drive. The Niva also has a transfer case and two cardan drives, all of which are bolted together and to the gearbox. The photo shows that the front driveshaft has already been removed.
A picturesque view of the razdatka, then RK. In principle, there is no point in completely unscrewing the rear driveshaft. Simply unscrew the RK from the flange and put it aside. As in the photo.
I remember that year I wrote a little about the intermediate shaft. He became the reason for leaving the trophy raid on the first jersey. In the photo, the new shaft for 21213 is a CV joint, one part of it is essentially a standard “grenade”. The old-style crosspiece cannot be found in stores, which is sad.
There are some being analyzed and I think I heard that they are making non-original ones. I didn’t buy it right away, I needed to drive it, so I took the standard one again. Its peculiarity is that if damaged, the car is immobilized.
On the old cross shaft, according to people’s stories, you can somehow slowly get to the repair site.
In order to remove the steering wheel, it is necessary to release the locking and downshift levers from above. To do this, the entire manual transmission cover is removed. The casing is on large self-tapping screws, for a Phillips screwdriver. Under the casing, right from the cabin, we can see the donut of the washout.
Then we go down under the car and unscrew the transfer case supports. But before doing this, using an awl, scissors, or something sharp, we outline the position of the supports relative to the bottom. In the photo you can see a mark around the studs - that's what it is - marks. We need to put the transfer case in the same position when we put it back.
What's better here?
For the first time, the Niva VAZ-2121 was modernized in its fifteenth year of life.
Then, in 1993, it was replaced by the carburetor model 21213, which soon turned into the injection model 21214. In August 2009, production of the third generation Niva began (trademark - Lada 4x4). Now we have before us “Lada 4×4 21214-046”. Outwardly, it is the same as its predecessor, but there are a lot of technical differences. It was possible to improve driving performance, higher comfort, reliability, some components and parts were unified with the Chevrolet Niva.
https://www.youtube.com/watch?v=ZuKtyTnKEHA
We talked about preliminary plans for modernization a year ago, in ZR, 2008, No. 9 - now let’s see what of the plans was embodied in the hardware.
Let us remind you that the engine, which now complies with Euro III or Euro IV standards (depending on the configuration), remained without major changes - reliable gaskets with silicone rollers and a water pump with an improved oil seal were used.
The fuel filter has been moved under the body - there are fewer pipes, reducing the likelihood of a fire in the engine compartment. The flywheel, as planned, has a diameter increased to 215 mm. And, of course, the Valeo clutch along with the slave cylinder and automatic freewheel adjustment. As a result, pedal force is reduced by 40% and free play adjustment is no longer necessary as wear occurs.
Particular attention was paid to coordinating the characteristics of the front and rear suspensions. The energy intensity and service life of the front suspension have been increased. The lower ball joints are 2123, the upper ones are 21214, they have a forged body and a larger pin swing angle.
The consequence of the changes was the track widened to 1440 mm. To “expand” the dynamic suspension travel, the compression and rebound buffers were shortened by 10 mm.
Modernization of the chassis made it possible to improve handling, smoothness and stability - in fact, the entire range of driving qualities of the Niva.
At the next stage (in six months to a year) there will be new door trim and body side panels, a redesigned rear seat with an ISOFIX child seat mounting system, CV joints in the driveshafts and improved interior sound insulation.
Bleeding the clutch and replacing the hydraulic reservoir of the VAZ-2121
We bleed the clutch after replacing the master cylinder, clutch slave cylinder or clutch hose.
We carry out the work on a lift or inspection ditch.
Check the fluid level in the clutch hydraulic reservoir and add fluid if necessary.
0.2 liters is poured into the clutch release hydraulic drive system. brake fluid DOT-3, - 4.
1. Remove the cap from the working cylinder fitting.
We put a transparent plastic hose on the fitting, the end of which is lowered into a container with brake fluid.
2. Using an “8” wrench, unscrew the fitting 1/2–3/4 turn
In this case, the assistant sharply presses the clutch pedal and releases it smoothly until the air bubbles released from the hose disappear.
With the clutch pedal pressed, tighten the fitting, remove the hose and put on the cap.
Removing the clutch reservoir
The tank is usually removed to replace or wash it.
1. Unscrew the reservoir cap and use a rubber bulb to pump out the brake fluid from the reservoir.
2. Loosen the hose clamp and remove the hose from the tank fitting
3. Using a 10mm wrench, unscrew the two nuts securing the tank clamp to the body
It is best to wash the tank with a soapy water solution.
After this, you need to rinse the tank under running water and dry it.
Install the tank in reverse order.
Fill the brake fluid and bleed the clutch hydraulic drive.
How much to fill
Nominal filling volumes are indicated in the Lada 4×4 operating manual:
| Refillable system | Volume, l |
| Engine cooling system (including interior heating system) | |
| Rear axle housing | 1,3 |
| Steering gear housing | 0,18 |
| Transfer case housing | 0,79 |
| Front axle housing | 1,15 |
| Hydraulic clutch system | 0,2 |
| Hydraulic brake system | 0,535 |
| Power steering reservoir | 1,7 |
