In any car, the main driving element of movement is the axle shaft with a bearing. The bearing on the axle shaft ensures equal rotation of the rear and front wheels, and, accordingly, minimizes shock and other mechanical loads on them. The axle bearing is located in the rear axle, behind the brake drum. Like any other mechanical part, a bearing has a certain working life, after which it fails and requires replacement. If the bearing is not replaced, this can lead to serious consequences for the vehicle owner. A deformed bearing can very quickly destroy its cell from excessive friction in the rear axle. Accordingly, the bridge itself will have to be replaced. And this will result in financial losses much more expensive than replacing only one bearing.
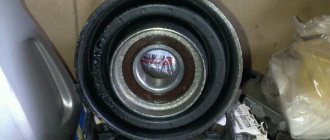
Characteristics of the axle bearing for VAZ 2107 classic
Russian-made bearings for VAZ are produced with article numbers 2101-2403080 and 180306. And foreign-made parts have article number 6306 2 RS.
The main characteristics of axle bearings include:
- part type. The bearing belongs to the group of ball, single row;
- radial two-way direction of loads. The value shows which bearing can withstand the load perpendicular to the axes of rotation;
- outer diameter of the bearing – 72 mm;
- internal diameter – 30 mm;
- product width is 19 mm;
- dynamic load capacity, or possible service life - 28100 N;
- static load capacity for residual deformation – 14600 N;
- its weight is 0.35 kg.
List of faults
The total service life of an axle bearing in domestic cars can range from 50 to 150 thousand kilometers. However, the bearing wears out faster when the car is driven on uneven roads, and vice versa, if the car is driven on roads with good coverage, its service life can be significantly longer. Most often, the initial signs of axle bearing wear, which a car enthusiast can notice, appear after the car has covered a mileage of 100 thousand or more km.
Mechanical deformations and material wear of the bearing lead to its malfunction and should be replaced. Without disassembling the axle shaft, it is not possible to determine wear or damage to the part. There are factors by which bearing failure can be determined:
- Noise, hum when turning the wheels.
At the initial stage of bearing wear, a hum or metallic grinding noise can be heard when the wheels are turned. These sounds may increase or decrease depending on the speed of the car. This factor is not critical when the car is moving. But at the same time, you should not put off replacing the bearing for too long.
- Drum heating.
When moving, a faulty bearing increases the friction force of the axle shaft and flange, and the excessively generated heat is transferred to the central part of the drum. This factor can be noticed if you drive the car a little and then touch the central part of the drum with the back of your hand.
- The grinding of wheels.
After a hum appears during the turning movements of the wheels and the drum heats up, and the grinding of the wheels also becomes audible, then it’s time to sound the alarm. Most likely, the axle bearing has failed or is completely destroyed. Given the combination of these three factors, you should not continue further movement, but immediately look for a service center to replace the bearing. Otherwise, it will lead to irreparable consequences.
- The appearance of a gap on the wheels.
If the wheel has a gap or play, this may indicate a faulty axle bearing. To detect this, you need to shake the wheel using your hands and a jack. If the bearing is normal, the wheel will not wobble.
Illusory repair possibilities
It should be said right away that repairing throttle position sensors is extremely rare. Firstly, the part itself, even the most expensive one, costs only a few dollars, and it makes sense to spend the money. Secondly, in most cases it is simply impossible to make repairs, for example, to restore a worn-out base layer. However, in some models you can slightly shift the resistive tracks relative to the slider and thereby extend the life of the device.
So, there is a special screw on the sensors. With its help, the position of the tracks is fixed. If they are already worn out, then you should loosen this same screw, this will change the location of the slider a little, and you can be a little patient with replacing the device. But don't count on long-term respite. Naturally, we remember that the contactless sensor cannot be repaired. This completes the adjustment, repair and replacement of the throttle position sensor, now you can operate the car for several more years and not even think about such issues.
To check the supply voltage, disconnect the wire block from the sensor. Turn on the ignition and use a tester to measure the voltage between terminals “A” and “B” of the wire block. The supply voltage should be about 5V. To check the sensor, we connect the block of wires to it and, with the ignition on, measure the voltage (the wires of the block can be pierced with thin needles connected to the terminals of a voltmeter) between the sensor terminals “B” (“ground”) and “C” (slider) - it should not be more than 0.7V. Turning the plastic sector of the drive by hand, fully open the throttle valve and measure the voltage again - it should be more than 4V. Turning off the ignition, disconnect the wire block and connect an ohmmeter between terminals “C” and “A” (or “B”) of the sensor. Slowly turning the drive sector, we monitor the readings of the tester arrow. There should be no jumps in the needle throughout the entire working range. To replace the sensor, remove the throttle body from the receiver studs without disconnecting the coolant inlet and outlet hoses from it (see Removing the throttle body).
Using a Phillips screwdriver, unscrew the two screws securing the sensor to the throttle body...
...and remove the sensor.
The sensor is marked 2112-1148200
Remove the sealing foam ring installed under the sensor.
Install the sensor on the throttle body in reverse order. In this case, the damper must be in the closed position. The tightening torque for the sensor mounting screws is 2 N•m.
The VAZ 2107 throttle sensor, together with a mass air flow sensor and oxygen concentration control, acts as an element that controls the supply of fuel to the combustion chamber depending on the position of the throttle valve. As with any repair to replace electronic fuel injection sensors, they must be checked for functionality. To check, you will need a regular multimeter with the function of measuring resistance in the power circuit and a set of standard tools.
To check the throttle sensor:
- Disconnect the package with wires from the sensor.
- The connector body will be marked. Connect the ohmmeter leads to terminals “B” and “C”. We open the throttle valve; for a working sensor, the resistance will increase from 2.7 to 8.2 kOhm.
- Next, we switch the multimeter to voltmeter mode and connect its negative terminal to engine ground, turn on the ignition in the circuit, and the positive probe will turn on. For a working sensor, the voltage should be approximately equal to 5V, if absent or significantly different from the norm, there is a malfunction in the power circuit or in the computer. After measuring the voltage, turn off the ignition.
After confirming that the throttle sensor is not working and deciding to replace it, you must:
- To remove the sensor, use a Phillips screwdriver to unscrew the two screws securing it to the throttle body and remove it.
- There will be a foam gasket between the sensor and the housing.
At this point, the repair work to check and remove the VAZ 2107 throttle sensor is completed. The installation must be carried out with the damper closed, aligning the protrusion of the damper axis with the groove on the sensor body.
Sources
- https://carnovato.ru/proverka-regulirovka-datchika-polozhenija-drosselnoj-zaslonki/
- https://www.autofizik.ru/VAZ/VAZ-210721047/features-of-repair-of-a-VAZ-2107-20-with-engine-VAZ-2104/checking-and-replacing-position-sensor-d
- https://remont-vaz2106.ru/datchik-drosselnoj-zaslonki-vaz-2107
Selecting a bearing to replace
The bearing for a VAZ is a single piece and cannot be repaired if completely worn out. Even if you try to lubricate it, it still won’t last long. During the operation of the car, it will be destroyed.
Since Russian-made bearings fully comply with regulatory documentation and are manufactured in accordance with GOST, preference should be given to them when purchasing. Russian bearings are fully intended for vehicle movement on Russian roads, so their wear life will be more optimal for the owner.
Bearings are produced at factories in Vologda and Samara. The average cost of one unit is about 250 rubles. Do not forget that along with the bearing you must also purchase a locking ring and an oil seal. Their cost varies 220 rubles and 25 rubles, respectively.
Experienced car enthusiasts advise changing the bearing head right away, since they have approximately the same mileage and if one fails, then most likely in a few days the second one will also fail.
Replacing the axle bearing
It is quite difficult to replace a bearing yourself, but it is possible. This process is very labor-intensive and time-consuming. To replace the bearing you will need about two hours of free time. The most important point in this process will be the availability of all the necessary tools to carry out the replacement efficiently:
- Jack.
- Devices for strengthening the raised body. (can be replaced with a removed wheel)
- Balloon wrench.
- Wheel stops.
- Reverse hammer. (can replace removed brake drum)
- Keys for 8 and 12.
- Socket or socket wrench size 17.
- Vise, workbench. (working with a vice is safer)
- Slotted screwdriver.
- Blowtorch or gas torch
- Bulgarian.
- Hammer and chisel
- Pliers.
- Grease and rags.
Sequence of actions when dismantling the axle shaft
To dismantle the axle shaft and get to the bearing, you must perform the following steps in strict sequence:
- For convenience, the vehicle is placed on a flat surface.
- Secure all the wheels of the car with stops or other devices.
- The wheel bolts must be turned with a wheel wrench until they are slightly loosened before removal.
Removing wheels.
- Use a wheel wrench to completely unscrew all the bolts on the wheels.
- Use a jack to raise the car body and secure the lifting with supports.
Removing the brake drum.
- Remove the two drum guides using a 8 or 12 wrench.
- Remove the drum itself. If necessary, assist removal with hammer blows. To avoid deformation, place a wooden stand. An alternative way to remove the brake drum: start the car, put it in third gear, spin the engine to 3 thousand rpm and sharply press the brake. Repeat acceleration and deceleration several times, after which the drum can be easily removed
Unscrewing the axle shaft bolts.
Little by little, without using much effort, turn the axle shaft to get to the nuts. The axle shaft mounting bolts can be unscrewed using a 17mm socket wrench. They are used to loosen and remove 4 fastening nuts, which are closed with a special flange.
Removing the axle shaft.
We turn the removed brake drum over (with the inner side facing us), screw it to the axle shaft with a couple of bolts and sharply pull it towards ourselves, thus pulling out the axle shaft. (Instead of the brake drum, you can use a previously removed wheel)
But if you have a reverse hammer, you can remove the axle shaft with it. The hammer is attached to the axle shaft with wheel bolts. If you sharply place a load in the opposite direction, then due to the appearance of a shock load, the axle shaft begins to move towards the load. Thus, the axle shaft is removed. Then unscrew the hammer from the axle shaft and remove the rubber sealing ring.
Removing the lock bearing from the axle shaft.
The axle shaft is clamped in a vice and a small cut is made using a grinder on the outside of the locking ring.
The clamped locking ring is finally split by alternately striking the cut from the grinder with a hammer or chisel. Thus, the bearing is removed from the axle shaft. The axle shaft is checked after removing the bearing for surface deformations or chips or other damage. If there are any, then the axle shaft will have to be changed.
Installing a new bearing and lock ring on the axle shaft.
- The boot is pulled out of the new bearing.
- The bearing is then lubricated with grease or grease.
- Reinstall the boot.
- Lubricate the axle shaft with grease.
- Place the bearing on the axle shaft so that the boot is turned towards the oil deflector.
- Use a hammer to drive the bearing into the cell. To make it easier, you can use a piece of pipe. Place one end of it against the axle shaft with the bearing, and hit the other end with a hammer.
- The locking ring is heated with a blowtorch until a white coating appears on it.
- Using pliers, place the ring on the axle shaft of the VAZ 2107.
- Install the ring hermetically tightly to the bearing.
- Cool the lock ring by pouring engine oil onto it.
Replacing the axle shaft seal.
The oil seal to be replaced must be pulled out of its cell. To do this, lift its body with a screwdriver and remove the oil seal. The cell under the oil seal is wiped from the accumulation of dirt and dust, and grease is applied. The new oil seal is inserted into the seat with a spring to the beam. Use a special bushing and a hammer to drive the oil seal so that it is pressed tightly.
Installing the axle shaft.
Installation of the axle shaft is carried out in the reverse order from its removal. Put on the rubber sealing ring and bolt the axle shaft. Use small rotational movements to put it in place.
After installing the axle shaft, it is necessary to check it for the formation of gaps. They shouldn't exist. To do this, the wheels are rotated in all directions. If there are no gaps and no extraneous sounds appear during rotation, then the installation of the bearing and axle shaft was done correctly and correctly.
If necessary, replace the bearing on the second axle shaft in the same manner. Also, when carrying out these actions, you can immediately replace the brake pads and check the presence and level of lubricant in the axle housing.
Anti-lock braking system (ABS)
| GENERAL INFORMATION |
| The front wheel sensors are located in the steering knuckles as shown. They control the speed of the car's wheels through ring gears mounted on the front drives. |
| The rear wheel sensors are attached to the rear axle carrier as shown. |
REPLACEMENT OF ABS ELEMENTSREPLACEMENT OF ANGULAR SPEED SENSORS OF FRONT WHEELSRemoval
PERFORMANCE ORDER 1. Disconnect the ground cable from the battery. 2. Raise and place the front of the vehicle on stands. 3. Remove the wheel, allowing access to the sensor cable.
4. Remove the plug connection in the wheel housing from the holder and unplug it using a screwdriver.
5. If there are several plug connections, find out which one belongs to the ABS sensor.
6. Disconnect the cable from the mount.
7
Unscrew the sensor mounting bolt with a socket wrench and carefully separate it with a screwdriver. Installation
Installation
PERFORMANCE ORDER 1. Tighten the fastening bolt to a torque of 9 Nm. 2. Be careful not to twist the sensor cable. The cable is marked with a white line. 3
When tightening the cable mounting bolts, pay attention to the different tightening torques. 4
The lower cable fastening bolt is fastened with a torque of 27 Nm, the upper cable with a torque of 6 Nm
4. The lower cable fastening bolt is fastened with a torque of 27 Nm, the upper cable with a torque of 6 Nm.
5
Make sure that the speed sensor is not dirty or damaged.
6. After completing the work, set the ignition key to the operating position and check that the ABS warning light goes off.
REPLACING REAR WHEEL ANGULAR SPEED SENSORS Removal
| EXECUTION ORDER |
| 1. Disconnect the ground cable from the battery, lift and place the rear of the car on stands. |
| 2. Find the sensor cable and unplug the plug connection, disconnect the cable from the mount. |
| 3. Unscrew the sensor. The location of the sensor on the rear suspension is shown in the illustration. |
Installation
| EXECUTION ORDER |
| 1. Be careful not to twist the cable when connecting. For proper installation, the cable is marked with a white line. |
| 2. Tighten the sensor mounting bolts to a torque of 22 Nm, the cable mounting bolts to a torque of 27 Nm. |
INSTRUCTIONS ON WHEEL SPEED SENSORS Diagram explaining the principle of operation of the wheel speed sensor REPLACING THE FRONT WHEEL SENSOR ROTOR
| EXECUTION ORDER |
| 1. Remove the front hub as described in the appropriate section. |
| 2. Remove the rotor from the inside of the wheel hub. |
| 3. If the removed rotor is installed backwards, it is necessary to check the tooth surfaces. They must not be damaged. |
| 4. When installing, tighten the bolts to a torque of 18 Nm. |
REPLACING THE REAR WHEEL SENSOR ROTOR
| EXECUTION ORDER |
| 1. Raise and place the rear of the car on stands. |
| 2. Remove the rear drive as described in the appropriate section. |
| 3. Remove and install the gear rotor in connection with replacing the drive bearing. |
| 4. The specified work is also described in the Chapter Brake system |
Replacing the axle bearing on a VAZ-2107 with your own hands
Experienced auto mechanics do not advise novice drivers to replace the axle bearing on a VAZ-2107 with their own hands. They believe that only an experienced specialist can handle this labor-intensive and time-consuming work. But practice shows that the presence of sensible instructions and advice from experienced professionals is often enough to replace this important part of the rear axle axle yourself. After reading this article, you will have the opportunity to evaluate your own abilities and capabilities. And make a decision: change the bearing yourself or send your VAZ-2107 to the station.
Purpose
The axle shaft is considered one of the important elements of the “seven” drive axle. It does not lose its functionality very often, but the bearing where it is attached is a problem area of the entire system.
The purpose of the element is simple. With its help, the axle shaft rotates smoothly when the car is moving. This part is located directly behind the brake system drum. Replacing the VAZ 2107 axle bearing will only be possible if the axle shaft is removed and the drum with brake pads is dismantled. There is no second option.
Signs indicating the need to replace the rear axle bearing on a VAZ classic
The described car bearing performs the important function of ensuring the movement and rotation of the parts of the rear axle shaft associated with it. Below are some of the main signs that may indicate that it is faulty.
- When driving on an uneven road at low speed, tapping sounds of varying frequencies appear in the area of the axle shaft. The sound may disappear or become muffled when driving onto smooth, level roads and upshifting into 4th and 5th gears.
- The appearance of an unusual constant increased hum when the car is moving from the rear wheels.
- The appearance of backlashes.
- Wobbly wheels.
- The appearance of unusual noises when accelerating, braking and turning the vehicle.
As a rule, the first signs of axle bearing wear appear after 100,000 kilometers. In this case, it is of great importance what routes the car was driven on. Uneven roads with holes and potholes require additional effort from the design of the drive axle axle shaft, which leads to early wear and failure of parts and connections.
How the owner cares for the car plays an important role. The bearing requires periodic lubrication, which can significantly extend its service life. It is not recommended to delay diagnostics and repairs. After all, if the bearing jams, the rear axle shaft with wheels may completely lose control.
Causes of failure
Every part on a car tends to become unusable. Rear wheel bearings are no exception, but any part has characteristic operational features. If the operating conditions are met, the part can serve for years, which is confirmed by the driving experience of current older drivers.
The main reasons for bearing failure are:
- careless driving;
- incorrect installation of the product;
- water and dust getting inside the hub;
- leakage of lubricant;
- long service life.
If a VAZ-2107 car is often operated in aggressive conditions close to off-road, then the need to replace the rear wheel bearing will not take long to occur. It is especially important to take into account the fact that the famous “seven” is a rear-wheel drive car. But how can you determine that a wheel bearing has failed and needs to be replaced? Let's find out in more detail.
Methods for determining whether a wheel bearing is faulty
Timely identification of a malfunction allows you to prevent unpleasant consequences that can provoke an emergency situation on the road. The part in question on the VAZ-2107 car plays an important role, since thanks to this product the wheel rotates easily. The car has 2 rear wheel bearings, one for each rear wheel.
The main way to determine the malfunction of an important part of the hub on a VAZ-2107 is to carry out the following manipulations:
- raise the rear of the car on a jack;
- swing the outer part of the wheel in different directions;
- if a knocking noise occurs and the wheel dangles, then the rear wheel bearing of the VAZ-2107 needs to be replaced.
What you need for work
The diagnosis is made and the owner of the “seven” decides to change the part himself. What is needed to carry out the work correctly?
- Hammer.
- Chisel.
- Electric angle grinder, popularly called an angle grinder.
- 80 or slightly less centimeters of pipe with an internal diameter of 32 millimeters.
- Socket head No. 32 and wrench No. 17.
- Open-end wrench No. 10.
- Engine oil: motor or transmission oil, 100 grams.
- Lithium grease.
- An anvil or an object that can replace it.
- Blowtorch or other similar type of torch.
- New working bearing.
- Locking bushing and a set of seals for the axle shaft.
- Jack.
- Stop shoes.
- Mount.
- Rags.
The design solution of the classic Zhiguli models is simple. It will not be difficult to understand the system. Take the instruction manual, it clearly describes what is where. In order to change a part, it is not at all necessary to stand on an inspection hole or lift the car with a truck crane. Although these devices can significantly facilitate and speed up the operation.
Preparation
First of all, you will need to remove the rear wheels, brake drums and the axle shaft itself.
- Place the car on a level surface (in case there is no pit or truck crane).
- The front wheels must be securely supported by chocks. Don’t forget that the “seven” has a rear-wheel drive and you can’t control its immobility by engaging a gear, it just won’t work.
- Using a jack, raise the rear of the car.
- Protect against accidental falls. You can place removed wheels, a metal canister or a safety bar under the body.
- Unscrew the bolts and remove the wheels.
- Use a 10mm end to twist the guides and remove the brake drums. You can help with a hammer, but be careful: you can only strike through a piece of wood.
- Wrench No. 17 removes the bolts securing the axle shaft and then removes it.
Most often at this stage, most mechanics are faced with the fact that it sits tightly in place and cannot be moved even a millimeter. In such cases, the following techniques may help:
- Install the wheel on a couple of bolts and use it to twitch the axle shaft several times. You need to make movements sharply in order to loosen the part.
- Spin it left and right several times until it loses immobility.
At this stage, the axle is inspected for distortions or deformations. Their presence is unacceptable.
Step-by-step instruction
- Loosen the wheel bolts, jack up and remove the wheel.
- Remove the brake drum.
Using pliers, remove the “soldiers” and remove the tension springs of the pads.
Remove the rear brake pads and set them aside.
Unscrew the 4 nuts securing the axle shaft. Head nuts for seventeen.
Push the hub towards you using the mounting lever and remove the axle shaft. If the axle shaft cannot be removed, use a three-legged puller.
Use a grinder to cut the retaining ring. It is better to make the cut a little not completely and cut through the remaining rings with a chisel. In order not to damage the axle shaft, make the cut very carefully.
Use a chisel or drift to knock the bearing out of its seat on the axle shaft. In our case, only the bearing race remained.
Place the bearing on the drive and use a pipe and a hammer to press it into place. As a rule, seating a bearing is quite easy.
- The bearing retaining ring is hot pressed. Take the ring and secure it to a piece of wire. Next, light the gas burner and heat the ring almost to red.
- Have a helper hold the axle shaft upright and keep the pipe and hammer handy. Next, use pliers to put the hot ring on the drive, and then, without hesitation, an assistant puts it in place using a pipe and a hammer.
Using a slotted screwdriver, remove the oil seal from its seat.
Using a piece of pipe along the outer diameter of the oil seal, press it into place.
- Install the rubber O-ring.
- Install the axle shaft into the seat until it stops.
- Fit the fastening nuts and tighten them in a cross pattern with a force of 50 Nm.
- Install the brake pads, drum and wheel.
You can see the procedure in this video:
Removing the old bearing
To replace the old bearing with a new one, you need to remove it from the axle shaft. How to do it? Take a chisel and a hammer, with which you remove the locking ring. Manipulations are carried out on an anvil, this makes it easier to create a rigid impact. If it was not possible to remove the stopper in this way, you can carefully cut off part of it with a disk using a grinder. The axle shaft is placed on the anvil so that its flange does not touch the steel surface.
Remove the unusable bearing using a chisel and hammer. To begin with, knock down the clip, knock out the separator and remove the bushing. If this cannot be done, you will have to cut everything off with a grinder. Before installing a new part, you need to thoroughly clean the “operating field” from any remaining dirt, dust, etc. You should check that the landing area is not deformed or damaged.
Important points
- You need to be very careful when cutting off the old bearing with a grinder so as not to touch the axle shaft itself. It is best to cut off only the outer ring of the bearing and the cage with a grinder. Only a few small cuts (not through) should be made on the inner ring. Then you can insert a chisel into these cuts and, with a few careful and precise blows, split the inner ring of the bearing without touching the axle shaft.
The inner ring of the bearing is cut off with a chisel
Replacing a bearing is a difficult task, but it can be done. The main thing here is to avoid damage to the axle shaft when cutting off the bearing and distortions when installing a new part. In addition, you should take into account the fragility of the bearing rings and use the hammer with extreme caution. Otherwise, the procedure is quite within the capabilities of even a novice car enthusiast, who, by doing it with his own hands, can save a significant amount.
Installation
A serviceable bearing should be checked for grease. If it is not there, which is sometimes done by unscrupulous manufacturers, you will need to lubricate the part yourself. Insert using a pipe, carefully hitting it with a hammer.
The stopper must be heated to a uniform gray color. Using pliers, place it on the base so that the widened part is directed upward. The ring is also pressed tightly into the pipe and quickly lubricated for cooling. It is appropriate at this stage to replace the oil seal. Using a pry bar, the old one is knocked out. The installation is done with a hammer and a socket number 32. At this point, the installation of the new bearing is completed, and the axle shaft is ready to “return” to the rear axle of the car.
Some advice from experienced motorists
Very often we are faced with the fact that the brake drum cannot be removed by any effort. There is a way to dismantle it, but it is a little dangerous and requires special care and attention.
- Make sure the car is securely immobilized and secured.
- Depress the clutch pedal and engage 2nd gear.
- Start the engine, gently accelerating for a while.
- Press the brake pedal periodically.
- The inertial force should cause the drum to move out of place, making it easier to remove.
To protect your eyes, cover the bearing being removed with auxiliary material, such as rags, soft rags, etc. Or wear special safety glasses.
When the locking sleeve heats up, wrap the bearing in a rag or rag. This manipulation will help avoid overheating, which can cause the lubricant to leak from the part.
In parallel with replacing the bearing, the car enthusiast is able to inspect some important components of the car: brake pads and cylinders, axle shafts, etc.
