One of the factors of human comfort and good mood is music. It has been proven that periodically listening to your favorite songs increases the level of serotonin, the main hormone of joy. However, modern man is constantly on the move - sitting in the office, driving to work, rushing to a meeting at the airport. Listening to music is far from the foreground - there is simply no time for this activity.
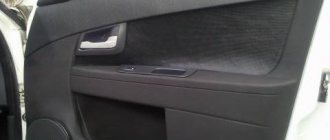
Installing a music system in a car is an excellent solution to this issue. One of the most common questions asked by car enthusiasts is “How to install speakers in the front and rear doors of a Priora?” In this article we will try to answer all questions related to installing and configuring speakers in a Lada Priora car.
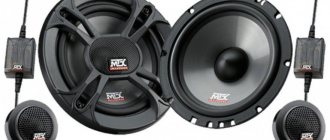
First, you need to figure out the desired diameter of the speakers: the larger the diameter, the higher the maximum possible volume. Priora's standard speakers have a diameter of 13 cm, which is not enough to obtain high-quality and loud sound. Fans of louder music are advised to install larger diameter speakers.
The subtleties of installing speakers on a Granta liftback that everyone should know
- To avoid additional manipulations with cutouts and extensions of standard holes in the doorway, install audio speakers with a diameter of 13.0 cm.
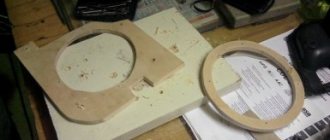
- If you want to improve the sound quality, increase the volume, frequency, install speakers in the front doors at 16.0 cm. Be prepared to widen the hole in the door structure. You can do this at a service center or yourself, armed with a metal jigsaw. From a ring with a radius of 6.5 cm, make 8.0 cm.
- When installing speakers of larger diameter, there is a high probability of glass coming into contact with the back of the speaker. As a result, vibrations are possible when lowering the glass to its lowest position.
Choosing an audio system
First you need to determine the dimensions of the speakers that will be installed in the standard holes prepared for them when assembling the car. All speaker systems that are offered to customers have several standard sizes. Speakers installed in cars by manufacturing companies sometimes have overall dimensions that occupy a middle position between the proposed standards. But it's not scary. In order to switch to selected speakers with a certain standard of overall dimensions, it is necessary to prepare podiums for them, replacing the former standard plastic ones with those chosen by the car owner.
Basic faults
The desire to install 16 cm speakers on the Priora arises due to the poor sound quality of the standard speakers. In addition to the complete lack of music due to faulty wiring, Prior owners with a factory speaker system have to deal with:
- Wheezing.
- Hissing at high volume.
- Not loud enough.
The problem can be solved by installing high-quality audio speakers, primarily in the front. This upgrade significantly improves the sound of the audio system without requiring significant costs.
Manufacturers and prices of analogues
Car audio systems are varied. Popular among Priora drivers:
- Mystery MJ-650, cost 2000–2500 rubles.
- Alpine SXE-1750s – price from 3000 rub.
- Kicx STC 6.3 – price 3000–3500 rub.
- Pioneer TS-A1600C, Price from 4000 rubles.
- Morel Maximo Coax 6 – approximately 4000 rub.
- Hertz DSK 165.3 – about 5,000 rubles.
Prices are for a set of two speakers. Of course, this is not a complete list. The choice of audio system is limited by the desires and capabilities of the car owner.
Rating of car speakers
| Photo | Name | Rating | Price |
| Coaxial car speakers | |||
| #1 | Speaker Morel Maximo Coax-5 | 99 / 100 6 — votes | |
| #2 | Speaker Alpine SPG-13C2 | 98 / 100 2 - votes | |
| #3 | Speaker KENWOOD KFC-PS1395 | 97 / 100 1 - voice | |
| #4 | AC Centek ST-8401-525 | 96 / 100 | |
| #5 | Speaker JVC CS-DR520 | 95 / 100 1 - voice | |
| #6 | AC MYSTERY MC 543 | 94 / 100 1 - voice | |
| Component type car speakers | |||
| #1 | Speaker Alpine SPG-13CS | 99 / 100 2 - votes | |
| #2 | Speaker Alpine SXE-1350S | 98 / 100 4 - votes | |
| #3 | Speaker SWAT SP-A5.2 | 97 / 100 1 - voice | |
| #4 | Speaker KENWOOD KFC-E130P | 96 / 100 1 - voice | |
| #5 | Speaker Pioneer TS-G130C | 95 / 100 3 - votes | |
| Broadband car speakers | |||
| #1 | Speaker JVC CS-V518J | 99 / 100 | |
| #2 | Speaker Ural AS-BV130 BULAVA NEO | 98 / 100 3 - votes | |
| #3 | Speaker Pioneer TS-1301I | 97 / 100 1 - voice |
Installation of front speakers 16 cm in diameter, installation of speakers without cuts and podiums
1. Installation of front speakers 16 cm in diameter
2. Installation of 16 columns in Priora without cutting
3. Installation of 16 speakers in a door without podiums
Installation of front speakers 16 cm in diameter
I finally got a radio. Inexpensive radio tape recorder SoundMAX SM-CCR3037.
I bought Mystery speakers.
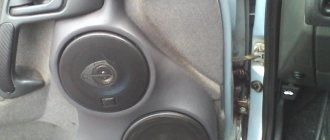
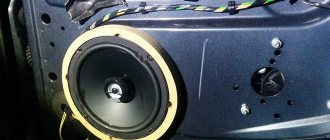
As a friend advised, I took 16, they should have better sound. But the question is how to install it in the door, because the size is standard for 13 speakers. Today I decided to install it myself. Below is a photo report of the installation process of the front speakers. To remove the trim you will need: a screwdriver and an asterisk wrench. Thanks to AvtoVAZ I will have to buy a set of asterisk keys. There are probably many more such pitfalls.
Looking ahead, the plastic, as well as the clips on the doors of the Priora, are not bad, compared with the former two-piece.
There is a standard place for speakers for 13. There is audio preparation - it’s correct to say two wires for the speakers are brought out.
This piece of paper was already included with the speakers, all I had to do was draw a circle in a convenient place.
For the future, you shouldn’t move the hole as in this picture. The outermost clip on the casing will touch the speaker. I made a hole on the second door without moving it higher to the side. It was inconvenient to attach, but the casing fit perfectly.
To securely attach the speaker to the door sheet, I used 9mm as a backing. plywood
To prevent the clip fastening on the casing from touching, I ground down the edge of the speaker.
Speaker on spacer
Speaker on plywood spacer
There was no suitable material for sound insulation, but there was one at hand - foil-coated isolon.
That's not a professional thing to say, I agree. But isolon is better than nothing at all.
Everything is ready, you can put on the trim.
Installation of 16 columns in Priora without cutting
The process itself is not complicated, I chose the music carefully, but not expensively, I think this option will suit many.
The basis was a Pioneer head, which I got from my father when I was still driving a 99. A nice thing with AUX and Bluetooth
I don’t remember the name, but it’s not so important, because now most tape recorders play “at the level”, that’s enough for me. The most important incident for me was the purchase of speakers, I walked around a lot, listened, chose
I settled on an Alpine SXE-1750s in the front and an SXE-69c2 in the rear. Good mids, not crunchy lows + tweeters included (albeit without crossovers, but it doesn’t matter, they pull). I read a huge number of blogs about installing 16″ speakers in the front doors. The vast majority of them in the text seemed to hint that the doors would have to be sawed and spacers made. I decided to buy spacers at the car market so as not to suffer and make a mistake. No problem, I thought, and armed with patience, a tool and a jigsaw, I went to the dacha.
In analysis, under the noise already, the bottom layer
Having disassembled the car (doors, sills, back seat), I began to make noise on the doors. For one door, a sheet of foil-coated isolon was enough (forgive me if I named this material incorrectly, the dealer sold it to me under that name). Next, having tried on the column itself in the standard 13″ position, I was pleasantly surprised that the core is almost completely hidden in the door and, together with the spacer, reassures us that there are no hard metalwork sculptures with Zhiguli metal.
Installation of front speakers 16 cm in diameter, installation of speakers without cuts and podiums
1. Installation of front speakers 16 cm in diameter 2. Installation of 16 speakers in Priora without cutting
3. Installation of 16 speakers in a door without podiums
Installation of front speakers 16 cm in diameter
I finally got a radio. Inexpensive radio tape recorder SoundMAX SM-CCR3037.
I bought Mystery speakers.
As a friend advised, I took 16, they should have better sound. But the question is how to install it in the door, because the size is standard for 13 speakers. Today I decided to install it myself. Below is a photo report of the installation process of the front speakers. To remove the trim you will need: a screwdriver and an asterisk wrench. Thanks to AvtoVAZ I will have to buy a set of asterisk keys. There are probably many more such pitfalls.
Looking ahead, the plastic, as well as the clips on the doors of the Priora, are not bad, compared with the former two-piece.
There is a standard place for speakers for 13. There is audio preparation - it’s correct to say two wires for the speakers are brought out.
This piece of paper was already included with the speakers, all I had to do was draw a circle in a convenient place.
For the future, you shouldn’t move the hole as in this picture. The outermost clip on the casing will touch the speaker. I made a hole on the second door without moving it higher to the side. It was inconvenient to attach, but the casing fit perfectly.
To securely attach the speaker to the door sheet, I used 9mm as a backing. plywood
To prevent the clip fastening on the casing from touching, I ground down the edge of the speaker.
Speaker on spacer
Speaker on plywood spacer
There was no suitable material for sound insulation, but there was one at hand - foil-coated isolon.
That's not a professional thing to say, I agree. But isolon is better than nothing at all.
Everything is ready, you can put on the trim.
Installation of 16 columns in Priora without cutting
The process itself is not complicated, I chose the music carefully, but not expensively, I think this option will suit many.
The basis was a Pioneer head, which I got from my father when I was still driving a 99. A nice thing with AUX and Bluetooth
I don’t remember the name, but it’s not so important, because now most tape recorders play “at the level”, that’s enough for me. The most important incident for me was the purchase of speakers, I walked around a lot, listened, chose
I settled on an Alpine SXE-1750s in the front and an SXE-69c2 in the rear. Good mids, not crunchy lows + tweeters included (albeit without crossovers, but it doesn’t matter, they pull). I read a huge number of blogs about installing 16″ speakers in the front doors. The vast majority of them in the text seemed to hint that the doors would have to be sawed and spacers made. I decided to buy spacers at the car market so as not to suffer and make a mistake. No problem, I thought, and armed with patience, a tool and a jigsaw, I went to the dacha.
In analysis, under the noise already, the bottom layer
Having disassembled the car (doors, sills, back seat), I began to make noise on the doors. For one door, a sheet of foil-coated isolon was enough (forgive me if I named this material incorrectly, the dealer sold it to me under that name). Next, having tried on the column itself in the standard 13″ position, I was pleasantly surprised that the core is almost completely hidden in the door and, together with the spacer, reassures us that there are no hard metalwork sculptures with Zhiguli metal.
Shelf, nothing interesting, cut with a jigsaw without problems, glued well
Having thought about it with my father, we decided to transform the little guy’s spacer, namely, we sawed it under the bend of the door and “oh, miracle.”, the column fit “like a glove,” the only thing was that we had to trim the plastic of the door a little from the inside, because touched a little and could create unpleasant rustling noises when moving.
Plastic, the main thing is not to overdo it and not touch the skin
There was no tool, the plastic was scratched a little, no big deal
Almost in original mounting holes
The place for tweeters was chosen solely from an aesthetic point of view, because... They don’t give any special highs, and I didn’t want to turn them up on the racks.
Our tips to help you choose car audio:
1. It’s better to buy more expensive car speakers in the front, but you can save money on the rear ones.
2. Be sure to soundproof the car (doors, especially the front ones), because this greatly improves the car sound from car acoustics.
3. Take only old, good and time-tested companies.
4. Never choose car speakers based on power. As a rule, many companies lie, both to a lesser extent and to a greater extent. Focus on the company's reputation and advice from sellers.
5. If you have chosen spaced car speakers (with separate tweeters), then try to ensure that these tweeters are “silk”. They play softer than iron or mica.
6. Be sure to consult with competent sellers. Still, choosing the right car audio system yourself is quite difficult. There are a lot of companies and it’s not easy to navigate.
7. You should not choose car speakers based on magnet size, appearance, diffuser type, etc.
8. You should not choose car speakers based on the number of bands. It is not at all necessary that three or four way car speakers will be better than two way ones.
9. If we are talking about expensive car acoustics, then you need to understand that correctly selected car speakers for 12,000 rubles from correctly selected speakers for 25,000 rubles will differ very little in sound quality (if at all), and the difference in price is large. In other words, car audio for 25,000 rubles is more designed for car sound competitions, when only branded test CDs are listened to, and great importance is paid to the quality of the installation.
10. On the other hand, car acoustics have the greatest impact (of all sound system components) on the quality of car sound. Therefore, it is not worth saving much on it. After all, car audio is the main thing in a music system.
11. Forward, try to take spaced car speakers (with separate tweeters), and back coaxial ones (with built-in tweeters).
12. Good car audio should also look good. The basket, tweeters, crossovers, everything should look good. The diffusers must be well sealed and there should be no leaks.
13. Unlike car radios, it is not at all necessary that new car audio models are better than old ones. There are old, very good models that have not been discontinued for years.
14. Any car audio system (and expensive ones to a greater extent) wears out over time and loses its original characteristics. Don't buy used car speakers.
15. In my opinion, European car acoustics play better than American ones. Its sound is softer and it looks more natural. But car subwoofers are the opposite.
16. Nowadays there are very cheap car speakers (250-500 rubles), and they don’t play particularly bad. But I don’t recommend taking these because of their unreliability. If you install these yourself, you will spend two or three hours, and if you do it at a service center, you will pay 1,000-2,000 rubles for the work, and suddenly they will break quite quickly. We'll have to do everything again. They can even replace such car audio for you in a store, but unfortunately, it is unlikely that anyone will return the time spent on installation or the money given to you for the work.
17. If car speakers are quite expensive, then, as a rule, they are designed for a car amplifier. Of course, they should not be neglected. With the right selection of components, it will seriously improve the quality of car sound.
18. Nowadays car speakers with neodymium magnets (very small but powerful) are being produced. Of course, they play clearly and correctly, but they are very demanding on the quality of installation (noise and vibration insulation of doors), and they do not have enough low bass. Their sensitivity, as a rule, is also weak. I advise you to take these with proper installation and the presence of a car subwoofer in the system.
19. The higher the actual power of car speakers, the lower their sensitivity, as a rule. Therefore, in systems without an amplifier, you should not take particularly powerful speakers; they will sound, but quietly. But you shouldn’t take very weak ones either.
20. Acoustics with paper (cardboard) diffusers have greater sensitivity and the bass from them is deeper, but also less clear. To make the right choice, you need to rely on the entire sound system as a whole, but in the vast majority of cases, so-called “paper” diffusers are most preferable. The exception is expensive systems with subwoofers and good installation.
21. In many cars, car speakers (if they are installed in the door) do not fit in the seating depth, but don’t be upset, there are supply rings that cost only 300 rubles per pair and with the help of them you can install almost any acoustics in any door.
22. Lately, a lot of new brands have appeared; they are sold quite expensively and are not worth the money at all. This also applies to some old and respected companies (it’s just that some very good companies have doubled the price, and some haven’t yet), so you need to choose carefully.
Order delivery, consult: tel. +7 (495) 782-54-97 or
Copyright © 2004-2020 Auto-magnitola.ru. All rights reserved.
Basic functions of the radio in Priora
Finding a suitable radio station is done manually or automatically. The search is carried out in the FM and VHF wave bands. You can remember the station you like and go to it by pressing buttons 2-6. Settings data is displayed on a small screen, the backlight of which is designed to match the lighting of the main instruments and sensors of the front panel.
The standard Priora radio is attractive because it allows you to easily adjust the equalizer. To do this, press the EQ button and begin selecting the appropriate sound type. It is possible to connect discs with MP3 audio files. Therefore, the driver and passengers of the car can listen not only to popular stations, but also include their own collections of interesting tracks.
https://youtube.com/watch?v=5PPX_YraIXU
The functionality of individual buttons differs when playing music from a radio station and from a media device. For example, using buttons 2-6, you can not only select a station stored in memory, but also switch to the next folder on the media, select playing tracks in a circle, or switch to playing in a mixed order.
All data on the operating mode, file name and other data will be displayed on the small screen of the radio. This allows you to select optimal system operation settings.
The standard Priora radio is equipped not only with a CD drive, but also with a USB output. This feature allows you to use it to play tracks from both regular flash drives and portable devices.
The uniqueness of the domestic car audio system is the ability to connect both mobile phones and portable hard drives. An external hard drive with a capacity of no more than 120 GB will be easily read by the standard audio system.
Hi-Fi and Hi-End circuits, where is the line?
Scheme 1.
head unit, front component speakers connected through a two-channel amplifier, rear speakers connected from the car radio. An undeniable advantage of this scheme. the ability to listen to music at full volume with minimal investment. Significant drawback. inability to reproduce the entire frequency range. There won't be enough bass. The main requirement for a radio tape recorder. presence of at least one linear output.
Scheme 2.
Contains a head unit, front component speakers and an amplifier with a subwoofer. The main difference between this scheme is that it is more flexible and allows you to achieve a higher sound level. The main disadvantage. at peak volume (since the acoustics will be connected from the radio). the appearance of “grunting”. This circuit is more suitable for those who, with the least investment, want to achieve a fuller spectrum of reproduced frequencies at average volume.
Scheme 3.
It contains a head unit and connected from amplifiers (either 2 two-channel or 1 four-channel) front component speakers and a subwoofer. The head unit must have at least 2 linear outputs. to connect an amplifier. The most commonly used scheme. The only drawback is, paradoxically, your ability to bring the system to perfection by investing in high-quality and professional installation, which includes: - choosing the optimal circuit diagram for a set of components - fine-tuning the interior elements and electrical equipment to the required acoustic properties and power requirements - post-installation adjustment acoustic parameters of the audio system.
What is Hi-End
It's even more difficult to answer. There is still no unified classification. if described in words. This is when the effect of the primary room is achieved, when you can hear Lennon swallowing his saliva, and Gilmour's loose part of the string on the pegs trembles. In other words . all for the sake of sound and no compromises.
Lada Priora tuning → Sedan, rear parcel shelf.
Folks, is it possible to avoid the noise of the rear stock shelf (with speakers installed). Or can everything be treated with just an acoustic shelf?
- Ivanesko_Klichkov
- October 21, 2012, 21:53
- Vengr_Koguhov
- October 21, 2012, 21:58
- v
- Nikolay_Gorkov
- October 21, 2012, 21:59
- v
- Nikolay_Gorkov
- 22 October 2012, 15:07
- v
- Ivanesko_Klichkov
- 22 October 2012, 20:32
- v
- Nikolay_Gorkov
- 22 October 2012, 20:34
- v
- Ivanesko_Klichkov
- 22 October 2012, 20:46
- v
- Stas_Dmitrenko
- 22 October 2012, 20:58
- v
- Oleg_Menschikov
- 22 October 2012, 21:15
- v
- Nikolay_Gorkov
- 23 October 2012, 20:48
- v
- Nikolay_Gorkov
- 23 October 2012, 21:08
- v
- Dma_Baydauz
- 24 October 2012, 08:44
- v
- Nikolay_Shteyn
- 24 October 2012, 15:14
- v
- Oleg_Menschikov
- 24 October 2012, 15:35
- v
#10 Pavel Gorkov Where did you buy it (if in Moscow, then tell me where) otherwise I don’t want to bother with noise)))))))
I am not from Moscow. I have a sedan body, with acoustic. The music on the shelf is simply amazing, I like it. I think if you want good music and no noise, then you shouldn’t bother with a standard shelf (trying to soundproof it and attach other devices to it). They installed a shelf for me from a VAZ 10 model, they didn’t even adjust it. collapse branch
Standard speakers - article number and price
The Lada Priora sedan was also equipped with radio speakers 2170-7901030 with a diameter of 16.5 cm (6.5 inches), mounted on the trunk shelf. Components 1117-1901030 were installed in the rear pillar of the Priora station wagon. Hatchbacks in the “Norma” configuration were produced with the same audio components located on the support of the trunk shelf. In the Priora “Lux” hatchbacks, speakers 2172-7901030 were installed instead, characterized by an expanded frequency range (64-18000) and a diffuser with fabric filling. The price for a pair of these parts is from 700 rubles.
The acoustics of the standard Lada Priora speakers satisfy only unassuming car owners. Fans of high-quality car audio assemble and upgrade the car's acoustic system.
Important nuances
Acoustic shelf for lada priora
You need to know the following. The acoustic shelf for a station wagon should have distinctive features and be different from the shelf from a sedan. In principle, the manufacturing does not have any special differences, but a number of subtleties are still present. Not only the sound element, but also the safety of the people inside the car will depend on them. The difference implies not only the mounting of the shelf and its features, but also a number of other differences. For example, it is impossible not to take into account the size of the car interior. A station wagon, as you know, is larger than a sedan, so you need to pay attention to this.
Removing the rear support
Using a 15mm spanner, unscrew the nut of the bolt securing the rear support to the engine bracket, holding the bolt with a wrench of the same size (for clarity, the rough road sensor with bracket and the solenoid valve for purge the canister have been removed). We take out the bolt.
Using a 15mm socket, unscrew the bolt securing the rear support to the body (the bolt is screwed into a cage nut installed in a closed body box).
...and remove the support. It is more convenient to start the assembly by installing the bolt securing the support to the body, since it is more convenient to center the cage nut while the support can move. Do not tighten the bolt. Then, aligning the holes in the support and in the engine bracket, insert the bolt. Tighten the nut of the bolt securing the support to the engine bracket and the bolt securing the support to the body.
Read more: How to connect the player to the radio
Welcome! The engine mounting cushions are located differently on all cars and the number of them is also different, on some there are only two, and on some there are up to 4 pieces (We are talking about VAZ models, on jeeps with large engines, the number of cushions is they mount the engine, much more or the same number, but they are simply larger in size), thanks to these cushions the engine does not vibrate much and, most importantly, the vibration is not transmitted to the car body, as is felt in some old Zhiguli cars in which the rubber of the cushions has already hardened and Instead of dampening vibrations, they rock the car itself and its engine.
Note! To carry out repair work, to replace the cushions, the smallest set of tools from the tool kit will be useful, in which you will need: A jack will be needed, a wrench and sockets for it, as well as an extension cord, we recommend stocking up!
Where are the engine mounts located? There are four of them in 16 valve engines (the largest number, by the way, 8 valves are mainly equipped with three cushions or just two lower ones), the two most basic ones that are present in any engine (These are the same lower cushions on which the engine sits) and more one (Additional) is located on top and one more (Also additional) below, we will not show photos of all the pillows, because you won’t be able to get one photo, you will have to take several at once, so as you read the article, you will get acquainted with all the pillows and find out where which one is located.
When do you need to change engine mounts? They change rarely and only because of their aging (rubber gets old and it begins to hold the engine poorly and therefore it shakes), there are isolated cases when the cushion has to be changed due to deformation, and this happens when you hit the engine hard on the road or when hitting a deep hole, due to which, in addition to the airbags, the windshields also burst.
Installation of speakers (music) - Tuning and repair of Lada Priora
I decided to install this music in my Priora:
There were no questions with installing the head unit: I pulled out the plug, connected the power connectors, antenna, tulips and put them in place
The speakers had to be redone, since the standard places are for 13-inch speakers, and I have 16-inch speakers. In the end I decided to install spacer rings.
We cut the metal of the door. It's a shame, but it has to be done
We install the rear shelf, making sure that nothing touches it. and enjoy good music! The wires from the radio go to the amplifier (unfortunately there are no photos), and from the amplifier they are routed to the speakers
Algorithm of actions
- First you need to remove the door trim (details in this article).
- We take measurements and estimate certain dimensions. The most convenient way is to pre-make a layout from cardboard.
- Based on the layout, we figure it out on the spot and see if the column fits into the door niche. We are trying to understand whether the glove compartment can open with this column, since the column may interfere with it.
- We cut out spacers, if necessary; below we will consider options for columns for which it is not necessary to make spacers.
- We cut out a decorative plug for the column on the door trim.
For convenience, you can first drill holes around the perimeter of the cut
We cut the trim with a utility knife.
Install and secure the spacer
Attach the column to the spacer
Modern podiums
Acoustic podiums yourself
Sound organization is a set of measures that includes not only sound insulation or installation of a subwoofer, but also installation in the front doors of the podiums. You don’t have to buy them, although you can find almost any option in stores today. You can make podiums with your own hands if you know the basic nuances of the operation presented in our instructions below. Modern acoustic podiums are not too different from those that came before. Although, this is at first glance, but if you take a closer look, you will see the following:
Modern podiums are made of high-quality material, which significantly increases their service life. If earlier they were made of plastic, which soon became covered with cracks and delaminated, today podiums are made of more durable material;
Modern acoustic podium
- Acoustically, modern podiums have an excellent and comfortable matte surface that does not leave dirty marks. High-quality plastic or plywood, from which modern podiums are made, is quite difficult to accidentally damage;
- The current podiums are made in such a way that they provide the opportunity to conveniently lay hidden electrical wiring to the speakers;
- Modern podiums are distinguished by a slightly modified configuration, which allows the installation of not one, but several speakers that reproduce different frequencies.
Acoustic podiums for yourself
Manufacturing
Priora acoustic shelf
As you can see, such shelves stand in different ways. But one thing is for sure - to have a good quality acoustic shelf, you will have to pay at least 1.5 thousand rubles. A fair question arises: is it possible to make such a shelf with your own hands, taking into account your own wishes regarding its design. The answer is clear - of course, it is possible.
First way
Here's what you'll need for this:
- Plywood – sheet 12 mm thick;
- Electric drill;
- Electric saw;
- Metal mesh;
- Material for upholstery (carpet);
- Stapler;
- Other tools such as screwdriver, pliers, etc.
Note. Let us note right away that the shelf can be made using different templates and technologies. You can find a template anywhere today. Fortunately, there are no restrictions on this. Just search on various sites.
Priora acoustic shelf
- First of all, the template of the future product must be transferred to plywood. Apply all dimensions correctly;
- Next, you will need to cut the plywood along the intended lines using an electric saw (it is very convenient to work with).
Advice. In this case, a drill can also provide an invaluable service. You can easily use it to cut holes for the speakers by making dots along the marked circle on the plywood. The saw will easily pass along such a circle.
- We cover the holes for the speakers with a metal mesh (thus, we give an aesthetic appearance and construct a kind of protection);
- We reupholster the shelf using carpet material. It is perfect for these purposes as it is easy to work with.
Note. Reupholstering involves fixing the carpet to the shelf using glue and a stapler. For high-quality reupholstery, it is recommended to first place pieces of burlap on the ends of the shelf, and only then carpet on top of them.
Acoustic shelf on Priora
To install the sidewalls, they can be fixed to standard fasteners or additional ones can be used. As a result, we get an excellent homemade shelf, the cost of which does not exceed a hundred rubles. The sound quality of the rear acoustics will improve significantly, which can be directed towards the rear window (thus, you can get the effect of reflected sound).
The second method with a folding part
Again, plywood is used, but 2 pieces are already cut out of it. The first piece of plywood can be cut according to the template of the factory standard shelf. It is recommended to leave the second piece 2 cm shorter. Let's get started:
- We fasten two wooden pieces together (glue or foam are ideal for this task). Don't forget to secure it with self-tapping screws.
Advice. It is advisable to use Moment or epoxy as glue. They are the most suitable for this type of work.
- We make the folding part of the shelf.
Note. You don’t have to make it again, but cut it off from the factory one and screw it to the new one.
- The final part of the operation is re-upholstery with carpet.
Stylistic design and features of using a radio in Priora
This style allows the radio to fit perfectly with both the front panel and other controls: heating and ventilation. The front panel of the unit is made of durable and reliable plastic and has a neat frame that allows you to easily install it in a car.
Adjusting the settings is easy and does not require much effort: all buttons and the encoder can be easily reached from the driver's seat. The arrangement of the switches is symmetrical, so the front seat passenger can also control the settings.
An attractive quality that the Priora's standard radio has is the optimal size and highlighting of the buttons. They protrude slightly above the trim, so when changing settings the driver will not accidentally touch the nearby switches.
Installation of 16 speakers in Priora
When installing non-standard speakers, change the speakers in the front doors of the Priora, then in the rear and on the trunk shelf. Additionally, audio components are mounted in the rear doors.
Speakers for the front doors of Priora
The first stage of installing the speakers is removing the interior trim in those places where the components will be installed, in this case the front door panels. For good sound, noise and vibration insulation (NVI) of the car body elements in which the radio speakers are installed is necessary. Therefore, in its absence, it is advisable to use the disassembled state of the front doors and glue vibration and noise insulation material.
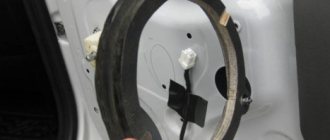
Installing the speakers from the front involves cutting metal, since the standard holes are designed to mount speakers with a diameter of 13 cm. The easiest way to do this work is to use a jigsaw with a metal file.
First you need to mark the metal of the front door, for which you use a template cut out of paper or cardboard according to the size of the column. Sometimes a ready-made template is included with the audio components. Move the center of the new hole straight up, in this case the 16 cm speaker will not interfere with the fastening of the front door trim.
After cutting out a piece of metal, to prevent corrosion, it is advisable to treat the edges of the hole made with an anti-corrosion compound, or better yet, prime and paint.
The place where the speakers are mounted is covered with noise and vibration insulation. If there is no material, foil-coated isolon is suitable. To prevent the transmission of vibrations from the speaker, it should be installed through a spacer made of plywood or similar material, which is also covered with sound insulation. The radio speaker is attached to the spacer with self-tapping screws.
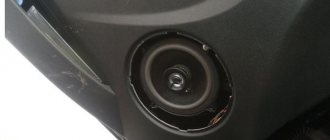
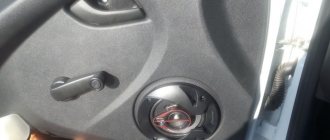
It is necessary to cut off the plastic edge of the door card located around the holes in front of which the radio speaker is installed. After that, all that remains is to connect the audio cables, assemble the casing, and you can enjoy the improved sound.
In addition to radio speakers, some audio systems include crossovers and tweeters (tweeters). As a rule, the crossover has a place on the front door map, and the tweeters are installed on the triangular elements of the interior trim opposite the place where the side mirrors are mounted. Advanced acoustic systems require the installation of tweeters on the A-pillars.
How to install speakers in the rear doors on a Priora car
There is no standard place for installing rear door radio speakers. Therefore, in order to install speakers in the rear doors, it is necessary to cut out part of the door trim. The internal space of the rear doors is limited; installation of speakers with a diameter of 16 and even 13 centimeters requires the manufacture of a spacer. If it protrudes beyond the door, it is sheathed with carpet, leatherette or other material.
Back to rear shelf
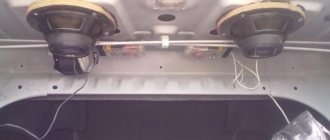
Rear shelf - space for oval speakers
Among the manufacturers, pay attention to JBL. If necessary, the holes on the shelf are cut to the size of the speakers to be installed
The material of this part is quite soft, so it cuts easily.
Courier delivery in Tolyatti
Available payment methods:
- Cash upon receipt
- Using cards Sberbank, VTB, Post Bank, Tinkoff
- Yandex money
- QIWI
- ROBOKASSA
Delivery time from 1 to 12 hours.
Pickup from our warehouse
Available payment methods:
- Cash upon receipt
- Credit, installments
- Using cards Sberbank, VTB, Post Bank, Tinkoff
- Yandex money
- QIWI
- ROBOKASSA
Pickup times must coincide with store opening hours.
Audio experts agree that the only effective thing you can do yourself when performing an operation to improve the sound quality of a car audio system is to replace the standard factory acoustic speakers immediately upon completion of after-sales warranty service. Nothing else will make your car audio sound clearer, brighter and more evenly distributed, allowing you to hear the smallest aspects of your favorite songs that you probably never even knew about. Of course, a complete replacement of the sound system, interior soundproofing, and new speakers are at the top of the list of components to be replaced. But let's turn to replacing the standard speakers for now.
The standard speakers installed in the doorway of the “tens” VAZ and Priora are designed to be 13 cm in size. If you want to update the front acoustics in a car with a diameter of 16 cm, the car enthusiast will encounter difficulty placing the new element, since the standard opening for the speaker in the front door is not designed for installation of speakers of a different size, therefore, to simplify the solution to the issue that has arisen, car enthusiasts install alternative podiums on the doors.
The difference in the sound of the speakers depends on the size of their diagonal. With a larger size, the speaker is able to better reflect low frequencies. Without going into details, the sound of an audio system as a whole depends on the diameter of the woofer. With the size of the front speakers being 10 cm, their ability to reproduce sound frequencies starts from 120 hertz; speakers measuring 13 cm are capable of providing wave vibrations through the air from 100 Hz; Dimensions of 16 cm allow the device to reproduce vibrations from 80 Hz.
The 13 cm diameter loudspeakers fit perfectly into the sound of the front system. But for lovers of bass shades of sound, listening to melodies will not be pleasant enough. Following the logic, we find out that high-quality isolation of low frequencies involves installing speakers of a different size than the standard ones. Only a subwoofer can provide full sound of low frequencies. This type of equipment belongs to rear acoustics, as it is located in the rear of the vehicle, in the trunk.
If your car has front-facing acoustics, the optimal solution would be to use 16-centimeter speakers, which will allow you to achieve a good level of sound in the bass tones of your favorite melodies. In our case, installing speakers of this size in a vehicle without problems will not allow the factory limitation of the mounting size for the speaker, but the solution to installing it yourself without the need to increase the opening for a larger speaker size is to install a spacer in the shape of the door for a VAZ of the tenth family and Priora for 16 cm speakers , which allows you to mount these speakers under the casing in standard openings, ensuring the same look with a different sound level.
What are the advantages of a homemade shelf in a hatchback compared to a purchased one?
- A homemade rear shelf will fit perfectly into the dimensions of the trunk,
- It is possible to choose the wiring diagram for the speaker system yourself, in which the sound of all musical compositions without exception will cause frantic joy,
What do you need to know before making an acoustic shelf for a Priora hatchback?
- For upholstery, experts advise using materials made from artificial and natural leather. This will give the shelf a solid look, and a high-quality finish will completely hide the new speakers from your fellow travelers.
- By choosing the right size and shape of the shelf, you can achieve maximum effect in sound and bass, even when purchasing budget speakers for Priora,
- When creating a layout for the rear parcel shelf, you must first calculate its dimensions according to the diameter and dimensions of the purchased speakers. Otherwise, at the installation stage you will have to redo the assembled circuit again.
Pros and cons of plywood shelves
| Wood significantly improves the acoustic effect | Plywood can be dangerous in the event of a rear-end accident |
| The appearance of the interior is noticeably improved | If the shelf is without sidewalls, then every time you load the trunk, on station wagons and hatchbacks you will have to unhook the speaker wires and remove the shelf |
| The effect of sound insulation of the trunk is increased, where a subwoofer can be installed | |
| You can use the acoustic shelf as a camp table during outdoor trips (all you have to do is add legs) |
More accurate information about the stages of creating a shelf with your own hands can be found in the video review. Photo materials will also be useful. Instructions for making a shelf can be viewed in other publications on the site.
Installation of 16 speakers in Priora
When installing non-standard speakers, change the speakers in the front doors of the Priora, then in the rear and on the trunk shelf. Additionally, audio components are mounted in the rear doors.
Speakers for the front doors of Priora
The first stage of installing the speakers is removing the interior trim in those places where the components will be installed, in this case the front door panels. For good sound, noise and vibration insulation (NVI) of the car body elements in which the radio speakers are installed is necessary. Therefore, in its absence, it is advisable to use the disassembled state of the front doors and glue vibration and noise insulation material.
Installing the speakers from the front involves cutting metal, since the standard holes are designed to mount speakers with a diameter of 13 cm. The easiest way to do this work is to use a jigsaw with a metal file.
First you need to mark the metal of the front door, for which you use a template cut out of paper or cardboard according to the size of the column. Sometimes a ready-made template is included with the audio components. Move the center of the new hole straight up, in this case the 16 cm speaker will not interfere with the fastening of the front door trim.
After cutting out a piece of metal, to prevent corrosion, it is advisable to treat the edges of the hole made with an anti-corrosion compound, or better yet, prime and paint.
The place where the speakers are mounted is covered with noise and vibration insulation. If there is no material, foil-coated isolon is suitable. To prevent the transmission of vibrations from the speaker, it should be installed through a spacer made of plywood or similar material, which is also covered with sound insulation. The radio speaker is attached to the spacer with self-tapping screws.
It is necessary to cut off the plastic edge of the door card located around the holes in front of which the radio speaker is installed. After that, all that remains is to connect the audio cables, assemble the casing, and you can enjoy the improved sound.
In addition to radio speakers, some audio systems include crossovers and tweeters (tweeters). As a rule, the crossover has a place on the front door map, and the tweeters are installed on the triangular elements of the interior trim opposite the place where the side mirrors are mounted. Advanced acoustic systems require the installation of tweeters on the A-pillars.
How to install speakers in the rear doors on a Priora car
There is no standard place for installing rear door radio speakers. Therefore, in order to install speakers in the rear doors, it is necessary to cut out part of the door trim. The internal space of the rear doors is limited; installation of speakers with a diameter of 16 and even 13 centimeters requires the manufacture of a spacer. If it protrudes beyond the door, it is sheathed with carpet, leatherette or other material.
Back to rear shelf
Rear shelf - space for oval speakers
Among the manufacturers, pay attention to JBL. If necessary, the holes on the shelf are cut to the size of the speakers to be installed
The material of this part is quite soft, so it cuts easily.
What size is optimal?
If your car has front-facing speakers, then it is optimal to use a 16-centimeter speaker. This diameter will allow you to achieve good sound with low bass. As a rule, speakers with this diameter can be installed in a car without problems, but in some cases the installation space may be smaller. In practice, this problem can be solved on your own or by turning to specialists at the installation center for help. It is only necessary to slightly increase the size of the standard space for mounting the loudspeaker (the author of the video is URAL Sound Russia - Official Channel).
It is worth considering one main feature that many of our compatriots neglect, in particular, we are talking about the differences between models of the same line. We are talking about speaker models characterized by advanced technical features. It should be noted that the cost of different models may not vary much.
If your vehicle is equipped with three-component acoustics, then the best option would be to use 20 cm speakers. They are especially suitable for reproducing mid-frequency ranges due to their size. However, it is the dimensions that are the main problem that may cause difficulties in installing loudspeakers, especially in the front of the car. Not so often, but still such speakers are used for two-component acoustic systems; in this case, it must be taken into account that the quality of mid-frequency playback leaves much to be desired. As practice shows, 20-centimeter speakers are most optimally suited for systems that do not have a subwoofer.
If we talk about the size of the speakers 13 cm, then they are perfect for installation in a car with a front-facing system. The best way to use 13 cm speakers is as rear devices. If there is not enough space in the vehicle interior, then 13 cm speakers can be used to equip the front system, but this may lead to too limited bass (video author - LOUD SOUND).
In coaxial acoustics, speakers with dimensions of 15x23 cm can be installed on the rear shelf; these dimensions allow you to provide the deepest low frequencies. But it should be noted that devices of this type have certain disadvantages, in particular, the quality of the coaxial design itself will be low, especially since the driver will not have the opportunity to change the subwoofer. And although such a speaker can produce deep bass, it will not be full and clear, let alone balanced tonal sound. If you like a good visual effect, then, in principle, you can find oval-sized speakers on sale that will provide it. However, in this case, the problem of choice is acute, since there are not many options.
If you don’t want to use standard acoustics because of their low quality, but at the same time you don’t have the opportunity to remodel the place to install good speakers, there is a way out. For example, you can install oval speakers whose size is 13x18 cm. As for 10-cm speakers, we do not recommend that our users fall for advertising.
Manufacturers often advertise this product as a quality product that allows you to achieve better sound, but in fact this is far from the case. Devices of this type, no matter how they are advertised, are characterized by poor playback quality in general and, even more so, poor bass. So if you purchase such speakers, the acoustics in your car must be equipped with additional low-frequency support. For example, you can use so-called midbass devices, which are best mounted in the front part of the cabin.
Of course, in terms of cost, small-sized speakers will always cost less, unlike others. However, if you want to achieve good sound, then when purchasing, you should only look at the quality of the speakers, and not at their cost. Often, car owners, trying to save money, end up with low-quality acoustics that cannot reproduce high-quality sound at high volumes.
Loading …
