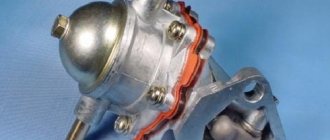
Bendix is a device without which you cannot start your VAZ-2109 or any other car. Its task is to transmit torque from the starter rotor to the flywheel crown. It includes only two parts: a gear necessary for transmitting torque, as well as an overrunning clutch that prevents the first element from rotating in the opposite direction. If any violation occurs in this system, you will no longer be able to start the car and you will need to replace the Bendix on the VAZ-2109. Today we will analyze the procedure for KZATE starters, which are used by AvtoVAZ.
How to replace Bendix VAZ 2109?
It’s worth talking about repairing this unit right away. It is impossible, since the bendix cannot be disassembled and failed parts replaced. The price of a Bendix VAZ 2109 does not bite, so it is easier to carry out a complete replacement than to try to restore a “dead” one. To carry out repair work you will need:
- Keys for 10 and 13.
- Phillips and flathead screwdrivers.
- New Bendix VAZ (choose the manufacturer yourself, based on the starter model).
- Pliers and hammer.
That's it, now all that remains is to prepare for the repair - remove the negative terminal from the battery. In the process, manipulations will be performed with power wires that are not protected by fuses and are located close to the body elements, engine and gearbox.
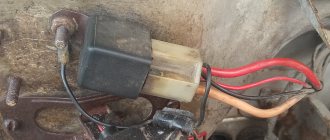
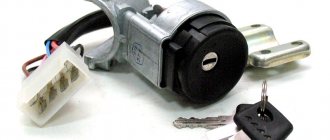
Pay attention to the VAZ 2109 starter solenoid relay; there are two bolts on it; a wire coming from the positive terminal of the battery is screwed to the top one. Remove it using a key number 13. Nearby you will find a thin wire that energizes the retractor winding when you turn the ignition key to the “Start” position. It must be turned off by pulling it towards the left wing.
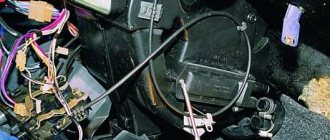
Now you need to unscrew three nuts with a 13mm wrench. They are located on the front side of the starter - below, above and in the middle. Only then can you remove the starter. Now the most difficult thing is that you need to disassemble it in order to get to the VAZ 2109 Bendix and replace it. It is immediately worth noting that it is advisable to carry out complete diagnostics and maintenance of the unit.
For example, look at the condition of the brushes, lamellas, motor windings and bronze bushing. If these elements become unusable, they need to be replaced. To disassemble the entire starter, you will need to follow these simple steps:
- Using a screwdriver, unscrew the two bolts that secure the cover to the housing.
- Unscrew the bolts securing the solenoid relay to the starter and the nut that makes contact with the power wire.
- Remove the retaining ring from the motor rotor.
- Using a 10mm wrench, unscrew the two studs.
- Using a screwdriver, unscrew the bolts that connect the brushes to the contacts.
- Disconnect the starter; it should split into three parts.
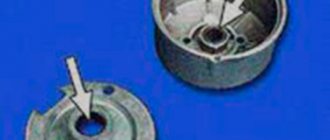
Now the most interesting part is removing the VAZ 2109 bendix. To do this, you need to take a hammer (small) and carefully knock the washer off the rotor shaft. Underneath there is a ring that can easily be opened and removed with a flat screwdriver. Only after this can you remove the VAZ bendix.
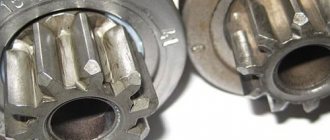
Do not lose small parts, they are very important for the normal functioning of the mechanism. Check the old bendix - try rotating the gear in one direction, then in the other direction. This is where knowledge of the properties of an overrunning clutch comes in handy! If the gear rotates in both directions, the unit must be replaced. Even if it starts to “grab” after a quarter turn, this is a sign of a malfunction.
Install the new one, apply a little grease to the rotor axle and install the ring. Now you can assemble the entire mechanism. And when the VAZ 2109 starter retractor is installed, you can even check its functionality by connecting it to the battery.
Now watch the video about replacing the Bendix on the VAZ 2109 starter:
For owners of domestic cars, self-repair or assembly of vital mechanisms is familiar and accessible; in this article we will try to improve our skill level and replace the VAZ 2109 starter with our own hands.
What do you need for work?
Let us immediately draw your attention to the fact that Bendix cannot be repaired. Accordingly, if it breaks, then you will definitely have to spend time and money to install a new one. Fortunately, its cost is not that high, so there is no point in trying to restore something that cannot be restored. Moreover, the installation procedure for a new device is not so complicated. The main thing is to have the necessary parts and tools at hand. For work you will need:
- positive and negative screwdrivers;
- open-end wrenches for 13 and 10;
- hammer;
- pliers;
- spare part.
Please note that not every Bendix will fit a specific starter. Therefore, you will need to buy a suitable part.
Starter circuit and purpose
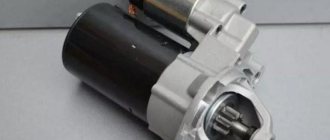
On all cars, without exception, and therefore on the VAZ 2109, the starter is responsible for starting the engine, or rather, spinning the crankshaft. Essentially, it is a small electric motor. The VAZ 2109 starter device includes a movable rotor, two windings, and a bendix with a set of brushes. How does it all work? Magnetic fields of opposite values are created around the starter and rotor windings, which drives the moving element into dynamics. It is quite easy to apply voltage to the starter, but for the rotor you need an intermediary - brushes consisting of graphite and copper.
What about the Bendix starter of the VAZ 2109, this element transmits movement to the flywheel. The part consists of the following parts: a fork connecting the mechanism to the retractor relay, an overrunning clutch that ensures movement in one direction, and a gear. Many motorists are familiar with the situation when this part is erased. The slipping of the Bendix is clearly audible and indicates that the installation of a new kit is inevitable. And although the cause is often contamination of the mechanism, cleaning it is not recommended. Due to dust and soot, Bendix is subject to wear, often unevenly, and even after washing it will no longer perform its function at the proper level.
There is a gear starter and a simple one. The scheme for transmitting torque to the flywheel is excellent. The gear starter has an additional element between the armature and the bendix. Many consider this design to be more productive and less voracious. True, the gear unit is more difficult to repair.
Part failure: reasons
Bendix is relatively reliable and often does not cause much trouble for car enthusiasts, but a breakdown cannot be ruled out. The gears and rollers can wear out - these parts experience serious loads when starting the engine and when moving off the car.
The main signs that the part is faulty:
- the engine does not start - the starter does not spin, but there are clicks;
- when the power unit is running, the bendix does not disconnect from the flywheel, that is, the starter continues to spin;
- smoke with a burning smell appears from the engine compartment;
- When you try to start the engine, you can hear the starter whirring. The engine can be started only after several attempts.
These symptoms may indicate that the Bendix needs to be replaced with a new one.
Starter mechanism malfunctions
If any difficulties arise with starting the car, this unit is the first to be suspected, but now, knowing the design of the VAZ 2109 starter, you will quickly figure out where to look. Various sounds similar to metal grinding should also alert you; it is quite possible that your VAZ 2109 will need to disassemble the starter. The reason may lie in the flywheel, and its crown will need to be replaced. In this case, the car will most likely start, just not right away.
But if the car does not start and there are no alarming sounds, then you may have to replace the clutch. Disassemble the starter and dismantle it, try turning it in both directions. If it rotates freely, then calmly throw away the failed part. You can understand that it is necessary to remove and replace worn starter brushes installed on a VAZ 2109 by a characteristic click, after which the expected engine start will not take place.
Expert opinionRuslan KonstantinovExpert on automotive topics. Graduated from Izhevsk State Technical University named after M.T. Kalashnikov, specializing in “Operation of transport and technological machines and complexes.” More than 10 years of professional car repair experience.
Dismantling
There should be no problems with the dismantling process. The main thing here is to remove the starter, since the required relay is held on it. Therefore, dismantling is carried out as an assembly.
- Turn on the handbrake, disconnect the battery by removing the negative terminal from it.
- A wire with a large cross-section goes from the battery to the contact of the relay. It can be turned off by unscrewing it using a 13 key.
- Remove the thin winding power wire from the solenoid relay.
- Using the same 13mm wrench, unscrew the three mounting nuts holding the starter to the clutch block.
- You can remove the device through the bottom or top. If you chose the top, then you need to slightly rotate the starter around its axis and remove it.
- The lower output is more difficult, since here you need to remove the crankcase protection. But if parallel work is carried out that requires similar manipulations, problems will not arise.
Repair
Next, you have a choice to make: replace the entire relay or try to repair it.
Only a relay that has a collapsible design can be fully repaired. It is not uncommon for cars to have a relay with a non-separable body. Repairs there are also possible, but only partial.
- Unscrew the pair of bolts that hold the relay on the starter, disconnect the core shackle from the upper end of the drive lever;
- Install a new solenoid relay in its place, thereby completing the replacement.
But if you want to save money or just like to tinker with your car, you can try to bring a damaged relay back to life. To do this, we offer you detailed instructions.
If this measure does not help, we will disassemble the case and repair it.
- The relay consists of a housing with a winding inside, a core with a return spring and contacts.
- The spring disconnects the starter rotor gears from the Bendix ring when the power to the relay winding is turned off.
- The back cover of the relay is fixed with screws to the body. Therefore, the first thing we do is remove this cover by unscrewing the corresponding fasteners.
- Both contact bolts have a nut, which you also unscrew.
- You will see washers under the nuts. Do not lose them so that you can return them to their place during reassembly.
- Unsolder both terminals of the winding using a soldering iron. Then remove the cover.
- If you find traces of carbon on the contacts, they can be removed with a small file.
- There is a rubber O-ring under the cover. Check it for elasticity and integrity. If the ring is damaged or worn, replace it with a new one.
- Remove the contact plate along with the rod.
- Use a flathead screwdriver to remove the return spring.
- If the spring is deformed or stretched too much, it will need to be replaced. Otherwise, a worn spring will not be able to guarantee the desired contact. As a result, the relay does not work properly.
- Disassemble the contact plate. To do this, you need to remove the retaining ring that insulates the washer. After this, the plate will fall out on its own due to the pressure created by the spring.
- Remove the contact bolts from the cover. Clean the surfaces of their contacts. Often, due to burning of the contact surfaces, the solenoid relay stops working normally.
- If the carbon deposits are too strong and cannot be removed with simple sandpaper, do not rush to buy new bolts. Just rotate them 180 degrees. So they will touch on the other side, where there is no carbon deposits.
- The relay windings are located in a non-separable housing. If they are damaged, you will have no choice but to completely change the relay.
- Replace all damaged and worn elements of the switching relay, and then put everything back into the housing. Reinstall the solenoid relay and check if the ignition returns to normal.
If the relay has a non-separable housing, many recommend replacing it. But if you wish, you can even repair such a unit. To do this, you need to flare the housing with pliers, then unsolder the contacts and remove the cover. Next, follow the instructions given above.
The last stage of replacement or repair is checking the winding resistance.
If the unit is working properly, the multimeter in ohmmeter mode will show you the following data.
If there is a significant deviation from the norm, replace the repaired relay or check a new one. It could be defective or counterfeit.
Sometimes, during long-term operation of a VAZ 2109 car, its owner may encounter a problem when starting the engine with a charged battery becomes problematic or even impossible. Most often, the cause of the breakdown will be a failure of the car starter, which will inevitably have to be replaced. Of course, you can take your car to a car service center, and they will gladly replace it for you at your expense. But if your hands are in the right place and you have free time, then it’s quite possible to replace the starter yourself.
In general, to make sure that the problem is really in the starter, you must know the signs of its malfunction and how they can manifest themselves.
Main signs of starter malfunction
When you turn the ignition key, the following events may occur:
- frequent tapping of the starter traction relay;
- the starter traction relay starts to work (you should hear a distinct click), but the starter itself does not respond at all;
- slow uneven rotation of the starter in the bushings. In this case, the lights on the instrument panel may dim;
- the starter itself engages, but the engine crankshaft does not rotate (a humming noise should be clearly audible);
- The starter does not respond at all to turning the key.
However, you must be sure that your battery is fully charged.
In general, it’s worth saying that replacing a VAZ 2109 starter is not so much difficult as it is inconvenient, and a repair pit in your garage or overpass will come in handy.
Before starting work
So, before proceeding directly with the replacement, you must:
- disconnect the electrical wiring and protect yourself by removing the negative terminal from the car battery;
- After this, you need to remove the engine crankcase protection (shield) located at the bottom of the car.
Removing and connecting a new starter
In absolutely any of the cases described above, you will be faced with the need to take a closer look at the device. It should be noted that with the release of the VAZ 2109, the question of how to remove the starter became more easily resolved, because in this model the arrangement of components under the hood is much simpler. So, you will need socket and socket wrenches and an inspection hole. Now, regardless of whether it is necessary to replace only the bushings or the entire VAZ 2109 starter, it must be removed. First of all, all the wires of the traction relay are disconnected, after which the block is dismantled. Don't forget to remove the high voltage wire from the battery.
The next step is to dismantle the engine crankcase protection; to do this, simply unscrew the mounting bolts. Then the approach to the mechanism of interest to us is cleared. To remove it, you need to unscrew three nuts - two on the block and one in the engine compartment. The connection diagram for the new VAZ 2109 starter is the same, only it is in the reverse order, so it will not cause any difficulties.
Disassembly begins with the fact that you need to carefully knock down the locking and restrictive ring, and then, unscrewing the fasteners of the back cover, remove it. Now we get to the graphite brushes, stator and armature. It should be noted that there may not be a gearbox in this part, in which case the stator is taken out after the armature. If the design still includes this element, then you need to act somewhat differently. Although it is not difficult to remember how to disassemble the gear starter on a VAZ 2109 if it fails. The scheme will just work in reverse - the stator itself is pulled out first, then the armature, and the gearbox comes last.
Be careful, disassembly is often complicated by the loss of the adjusting washer installed on the armature axis, and the loss of other small parts - there are not many of them, but the absence of even one calls into question the further operation of the mechanism.
Now you can imagine how to remove, assemble, install and connect the VAZ 2109 starter; you no longer need to bother the mechanic with such issues.
Home → Device → Electrical system → Starter →
To carry out repairs, maintenance or replacement of parts, the starter must be removed from the engine and disassembled. Let's see how to do this quickly - without wasting extra time and effort, using the example of disassembling starter 29.3708, which is widely used on VAZ 2108, 2109, 21099 cars.
Required Tools
— Slotted screwdriver (phillips)
- Hammer
— Wrenches (open-end or socket) for 10, 13 and 17 mm
— Retaining ring puller (optional)
— Pliers
Preparatory work
— Remove the starter from the car engine
The procedure for disassembling the starter 29.3708
— Remove the traction (retractor) relay
To do this, use a 13 mm wrench to unscrew the nut securing the tip of the starter winding output, and disconnect the tip from the contact bolt of the traction relay. Using a slotted screwdriver (screws for a Phillips screwdriver or a 10 mm wrench can also be used), unscrew the three screws securing the relay and disconnect it from the starter housing.
Remove the starter traction (retractor) relay
At the same time, we remove the relay core earring from engagement with the tip of the drive lever (Bendix).
Remove the solenoid relay core
Read more: “Removing the traction (retractor) relay from the starter on VAZ 2108, 2109, 21099 cars.”
— Remove the protective cover of the starter brush assembly
To do this, use a slotted (Phillips) screwdriver to unscrew the two screws securing it.
Removing the starter rear protective cover
Disconnect the cover from the starter housing. Underneath there is a rubber ring-gasket.
Remove the sealing ring of the protective cover
— We remove the axis of the starter drive lever (Bendix)
To do this, use pliers to squeeze the whiskers of its latch and use them to remove the latch from the hole on the axle. We knock the axle out of the hole in the starter housing. To knock out the axle, you can use a nail of a suitable diameter and a hammer.
We remove the bendix axis (starter drive)
— Remove the Bendix travel limiter ring
We knock it down with light blows of a hammer (you can use a 17 mm open-end wrench).
We knock down the bendix limit ring
We remove the retaining ring located under it with a puller or simply pry it off with a slotted screwdriver.
Remove the bendix travel limiter retaining ring
— Unscrew the two long screws holding the two halves of the starter housing together
To do this, you need a 10 mm wrench. We take out the bolts and separate the halves. If they do not separate, lightly hit the front half with a hammer.
Unscrew the starter housing pinch bolts
— Remove the starter drive (Bendix)
Remove the rubber plug from the slot in the front of the starter housing. Using a screwdriver, disconnect the legs of the drive lever from the protrusions on the drive itself.
Removing the starter drive ("Bendix")
We push the bendix forward and take it out.
Drive parts ("Bendix")
— Disconnect the armature and the starter housing
To do this, pry it up with a screwdriver and remove the locking half-ring on the armature shank. We also remove the washer located under it.
Remove the armature shaft retaining ring
If it is necessary to remove the stator windings, unscrew the screws securing them to the starter housing.
Remove the armature and starter stator windings
— Remove the brushes
If it is necessary to remove the brushes, unscrew the screws securing them and remove them.
Removing the starter brushes
Notes and additions
— How to quickly and correctly assemble a starter — “Assembling a starter 29.3708 for VAZ 2108, 2109, 21099 cars.”
— Another starter 5712.3708, installed on VAZ 2108, 2109, 21099 cars, has a slightly different design, and its disassembly differs from disassembling the starter 29.3708.
Twokarburators VK - More information on the topic in our VKontakte group, on Facebook Twokarburators FS , in Odnoklassniki - Twokarburators OK and in Yandex Zen - Twokarburators DZ
More articles on electrical equipment of VAZ 2108, 2109, 21099 cars
— How to replace starter brushes VAZ 2108, 2109, 21099
— On-off sensor for the fan of the engine cooling system of VAZ 2108, 2109, 21099 cars
— Starter device 5712.3708 for VAZ 2108, 2109, 21099 cars
— Starter 29.3708 for VAZ 2108, 2109, 21099 cars
— The wipers do not work on the VAZ 2108, 2109, 21099
— Checking the ignition switch on VAZ 2108, 2109, 21099 cars
Progress
We start with preparatory measures.
First of all, you need to disconnect the negative terminal from the battery. Replacing the Bendix will require manipulation of the electrical wiring, so disconnecting the battery is a mandatory safety requirement. Next we move on to the solenoid relay. You will see two bolts on it: upper and lower. The first is connected to a conductor connecting the relay to the battery. It will need to be turned off, here you will need a key set to 13. Nearby you will notice a small wire that provides power to the winding when you turn the key in the ignition. It will also need to be turned off; just pull it slightly to the left. Next we move on to the procedure for removing the starter. On the front panel you will notice three nuts, located from top to bottom. They can also be removed using a key number 13. Dismantling is completed, the starter needs to be pulled out and prepared to work directly with it. You will need to disassemble this element, remove the non-working bendix from it and install a new one. But first things first.
After you have removed the starter, inspect it. Assess the current condition of the bushing, rotor windings, brushes and lamellas. If you notice any damage to them, you will have the opportunity to replace them immediately. Now let's move on to disassembling the device. It is performed as follows:
- The cover is fixed to the body with two bolts. Let's remove them.
- Next in line for dismantling will be the bolts securing the retractor to the starter and the nut that ensures contact with the power cable.
- You can now see the retaining ring on the rotor. We dismantle it.
- We arm ourselves with a 10mm wrench and remove the studs.
- The brushes are connected to the contacts using small bolts. The screwdriver comes to our aid.
The starter can now be separated.
It will separate into 3 parts. Finally, we move on to the most important thing - dismantling the Bendix. To begin, you will need to carefully knock off the washer located on the rotor shaft. A small hammer will help you with this. There is a ring underneath that you will need a screwdriver to remove. And finally, the old bendix can be removed.
But what if the reason does not lie in the breakdown of this element? In fact, this is very easy to check. Try spinning the gear. If it grabs after 1/4 turn, then the bendix is working. If the gear rotates freely in both directions, you can safely throw away the Bendix. Installation is carried out in reverse order.
Source
DIY Bendix starter repair
Repairing a starter is a troublesome task, but by doing it yourself, you can save your family budget. During operation, the starter constantly experiences heavy loads and is exposed to dust, moisture, dirt and oil, which contributes to the rapid destruction of the electric motor insulation and breakdown of the drive mechanism.
We have already written about some signs of a faulty starter and about checking and repairing the solenoid relay. Another malfunction that leads to repair of the starter is slipping of the freewheel - Bendix, which occurs as a result of contamination of the grooves and rollers. In this case, when the starter is turned on, the noise of a rotating armature is heard, and the crankshaft stands still (this is well shown in the video instructions for repairing the starter at the bottom of the page). There is no way around this without renovations.
What is Bendix, and in what cases is it required to be replaced?
Bendix is a clutch used to engage the starting electric motor and flywheel when starting the engine. Externally, the element is an oblique gear and is located on the starter shaft. At the moment it is triggered, it moves forward with the help of a solenoid and connects to the flywheel.
When the power supply stops, the gear returns to its place, disconnecting from the flywheel. The amplitude of movement of the clutch is about 10 cm. The bendix is protected from excessive displacement by locking rings.
Signs of a malfunctioning clutch are clearly visible, so the question of how to check the starter bendix usually does not arise. The “symptoms” of a malfunction include:
- a grinding noise in the flywheel area when trying to start the engine;
- the starter rotates idle, without transmitting torque to the flywheel;
- a characteristic knocking sound at the moment the solenoid relay is activated, after which the shaft does not rotate.
» alt=»»> A faulty gear is usually not repaired, but replaced. Repairing the element is possible, but such actions are not justified in terms of financial and time costs. Therefore, if the coupling breaks, it must be replaced. If you still want to repair it, a detailed video will be at the end of the article.
Note: if the part extends, but does not engage with the flywheel, proceed as follows: put the car in 2nd gear and manually shift it a couple of centimeters. The position of the flywheel and helical gear changes, after which starting the engine becomes possible. Before attempting to start, the car is removed from gear.
This method is not a repair method, but it allows you to start the engine and get to your home or auto repair shop.
Starter mechanism malfunctions
If any difficulties arise with starting the car, this unit is the first to be suspected, but now, knowing the design of the VAZ 2109 starter, you will quickly figure out where to look. Various sounds similar to metal grinding should also alert you; it is quite possible that your VAZ 2109 will need to disassemble the starter. The reason may lie in the flywheel, and its crown will need to be replaced. In this case, the car will most likely start, just not right away.
But if the car does not start and there are no alarming sounds, then you may have to replace the clutch. Disassemble the starter and dismantle it, try turning it in both directions. If it rotates freely, then calmly throw away the failed part. You can understand that it is necessary to remove and replace worn starter brushes installed on a VAZ 2109 by a characteristic click, after which the expected engine start will not take place.