Modern cars are controlled and controlled by an on-board computer. The Lada Priora model line was no exception, the central control device of which is the ECU (electronic control unit). When controlling the engine from a computer, the latter needs to receive the most up-to-date information from numerous sensors located in the engine compartment and other places of the car. One of these important elements is the throttle position sensor or Priora TPS.
The importance of this element is due to its purpose - calculating the position of the damper at the current time.
When you press the gas pedal (connected to the throttle assembly using a special cable), the throttle opens exactly as much as you apply pressure. At the same time, the amount of fuel supplied to the cylinders also depends on the degree of pressure. In order for the ECU to calculate the amount of gasoline to supply, it queries the TPS, which records the required data.
TPS Priora, signs of malfunction
In fact, symptoms indicating possible problems with the sensor can be different. The most common of them are given below:
- floating speed and unstable engine operation;
- twitching and jerking when accelerating;
- loss of power;
- arbitrary increase in engine speed;
- unstable idle;
- increase in fuel consumption.
If during the operation of the car you observe one or more of the above signs, then first of all you should pay attention to the TPS.
“You should remember! The sensor cannot be repaired, but simply replaced with a new, working product.”
What other factors influence – Engine temperature
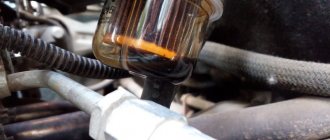
| Sensors on the Priora 16 valves where they are located As a rule, it is either the fuel pump that has worn out under the influence of tiny particles from low-quality fuel, or a clogged fine filter, or a mesh in the fuel pump. On the Priora with the 127 engine, in some trim levels, a robotic gearbox was installed, the consumption of which changed downwards during testing, but in fact it turned out to be the opposite; with the robot, the Priora consumed more gasoline than with the mechanics. |
| Lada Priora: fuel consumption - a comprehensive study of optimization factors Using engine braking, choosing the right gear on a manual transmission and driving only in the far right lane behind public transport will help reduce fuel consumption by 1.5-2 liters. Engine parts can hardly be called cheap by definition, but repairs from Priora will cost much less than cars from foreign manufacturers. |
- Hyundai Accent IV (2010) with an engine capacity of 1.4 consumes 7.6 liters per hundred in city mode. Accordingly, at idle it will consume 0.76 l/hour;
- Lada Granta according to documents consumes 8.7 l/100 km. In idle mode, it will “eat” - 0.85 liters per hour;
- Land Rover Freelander (2001), consumes 12.3 liters per 100 kilometers. Consumption per hour will be 1.23 liters; Separately, it makes sense to look at diesel cars:
- Ford Mondeo IV, equipped with a diesel unit, consumes about 7.5 l/100 km. Moreover, in an hour at idle it consumes 0.75 liters;
- Kia Rio III (1.4 D) consumes only 4.9 l/100. Therefore, per hour in idle mode it will consume 0.49 liters of fuel.
Self-check functionality
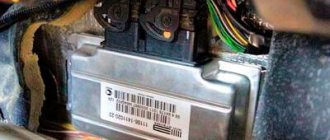
In most cases, when problems arise with the TPS, the “check engine” error is displayed. By connecting a diagnostic device, you can identify its code and causes of the error. It happens that for some reason the “check” does not light up, in which case you cannot do without using a multimeter for diagnostics.
The first step is to make sure that power is supplied to the sensor itself. To do this, you need to disconnect the chip with wires from the device and measure the contacts with the ignition on. If power is supplied, then the device itself is inspected.
Visual inspection of the sensor. In this case, we are talking about checking the internal components of the product. Most often, the slider loses contact with the resistive layer.
As mentioned above, if the causes of malfunctions in the sensor are identified, it must be replaced.
Purpose and principle of operation © Fuel consumption VAZ
However, the problem may remain unresolved even after taking all the indicated measures, cases of factory defects in Lada Priora cars, regardless of the year of manufacture, are very common. Possible causes of the malfunction Troubleshooting The internal hinge is worn out Replace the hinge or drive assembly The intermediate shaft is deformed Replace the drive assembly The intermediate bearing is worn out Remove the intermediate support bracket, check the play in the bearing.
| 5.5 l/100 km | 9.1 l/100 km | 6.9 l/100 km |
| 5.6 l/100 km | 8.9 l/100 km | 6.8 l/100 km |
| 5.5 l/100 km | 8.5 l/100 km | 6.6 l/100 km |
Replacing the throttle position sensor (Priora)
The removal and installation procedure is quite simple. All you need is a screwdriver.
The device for determining the position of the valve is located directly on the throttle assembly and is secured with just two bolts.
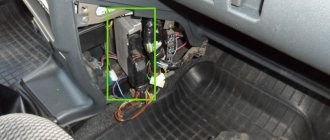
- The first thing you need to do is disconnect the contact wires from the product body. The plug is held in place by a small plastic clip that must be released when removed. Before carrying out work, do not forget to turn off the power to the on-board network in the car, first disconnecting the negative terminal of the battery.
- Using a screwdriver, unscrew the two bolts and remove the product from its mounting location.
- When reinstalling, pay attention to the special foam sealing ring. Make sure it is not damaged.
- This completes the replacement of the TPS for the Priora.
If we consider the issue of the price of the sensor, then the cheapest product on the market is sold at a price of 300 rubles, and the most expensive reaches an amount of more than one thousand rubles.
Total
The factory fuel consumption figure for Priora with 16-valve engines is 6.6-6.9 liters per mixed “hundred”. In reality, the appetite ranges from 8 to 14 liters. in winter and 5.5-11 l. in summer.
Increased fuel consumption can be caused by malfunctions in the fuel system, in the ECM, a clogged air filter, a clogged catalyst, incorrect operation of the air purge valve, or air leaks. Tire pressure and driving style also determine energy consumption.
Sooner or later, the euphoria from the new car wears off, and the owner begins to pay more and more attention to the fuel level needle, comparing the manufacturer’s stated figures with the real state of affairs. The dependence of these values on tire pressure or problems with the ignition system is clear even to novice motorists. But this is not always the root cause of excessive fuel consumption; sometimes the sources of the problem have to be looked deeper.
Removing the crankshaft position sensor
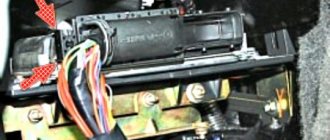
We remove the sensor to check or replace. The sensor is installed on the oil pump cover boss. Remove the right mudguard of the engine compartment (see “Removing the mudguards of the engine compartment”). With the ignition off, press the lock of the engine control system wiring harness block...
...and disconnect the wiring harness block from the crankshaft position sensor. Using a 10mm spanner, unscrew the sensor mounting bolt...
...and remove the sensor from the hole in the boss of the oil pump cover. Checking the crankshaft position sensor and its circuits is shown in the “Fault Diagnosis” section. Install the crankshaft position sensor in reverse order.
Lada Priora fuse box under the instrument panel
F1 25 Electric radiator fan of the cooling system F2 25 Heated rear window Priors F3 10 High beam right F4 10 High beam left F5 10 Sound signal F6 7.5 Low beam (left) F7 7.5 Low beam (right) F8 10 Alarm signal F9 25 Heater Priors F10) 7.5 Interior lighting, instrument cluster, brake light F11 20 Windshield wiper F12 10 Terminal 15 devices F13 15 Cigarette lighter F14 5 Left side light, license plate light, trunk light F15 5 Right side light F16 10 Terminal 15 ABS F17 10 Fog light (PTF) left F18 10 Fog light (PTF) right F19 15 Heated seats F31 or F27 30 Electrical package control unit
Removing the phase sensor
We remove the sensor when checking and replacing it. Checking the phase sensor is shown in the “Fault Diagnosis” section.
Location of the phase sensor on the engine : 1 - right support of the power unit; 2 — front timing drive cover; 3 — cap of the fuel rail fitting; 4 - phase sensor; 5 - rear timing drive cover With the ignition off, release the latch of the wiring harness block of the engine management system...
...and disconnect the block from the phase sensor.
Using a 10mm socket, unscrew the two sensor mounting bolts (one bolt is not visible in the photo)…
...and remove the sensor from the hole in the rear timing cover. The connection between the sensor and the rear timing cover is sealed with a rubber ring. If the ring is damaged...
...remove it... ...and replace it with a new one. Install the phase sensor in reverse order.
We remove the coolant temperature sensor to check or replace it. Checking the coolant temperature sensor is shown in the “Fault Diagnosis” section. We carry out the work on a cold engine. Remove the plastic engine cover. Drain the coolant from the engine cylinder block (see “Replacing the coolant”). With the ignition off...
...we release the clamp of the engine management system wiring harness block... ...and disconnect the wiring harness block from the coolant temperature sensor.
Use a 19mm spanner to unscrew the sensor...
...and remove it from the hole in the thermostat housing.
The connection between the sensor and the thermostat body is sealed with a copper washer. Install the sensor in reverse order. Add coolant to normal level.
The throttle position sensor is removed for replacement. Checking the sensor and its electrical circuits is shown in the “Fault Diagnostics” section. With the ignition off, release the lock of the engine management system wiring harness block and disconnect the wiring harness block from the throttle position sensor.
Use a Phillips screwdriver to unscrew the two sensor mounting screws.
Remove the sensor from the throttle valve axis. The connection between the sensor and the throttle assembly is sealed with a foam ring. If the foam ring is damaged, it should be replaced. Before installing the sensor, make sure that the throttle valve is completely closed. We install the sensor on the throttle assembly so that the shank of the damper axis fits into the groove of the sensor. We fasten the sensor with screws and connect the wiring harness block to it.
We remove the mass air flow sensor for replacement. With the ignition off, release the block clamp (the clamp is located at the bottom of the block) of the engine management system wiring harness...
...and disconnect the wiring harness block from the sensor.
Use a Phillips screwdriver to loosen the clamp securing the air supply hose to the throttle body...
...and remove the hose from the mass air flow sensor pipe.
Oxygen controller
The device evaluates the quantitative indicator of unburned oxygen in the exhaust. The device has several names:
- O2 Sensor;
- Oxygen Sensor;
- Lambda probe.
Not everyone who knows which sensors affect the level of fuel consumption is aware that after processing the signal received from the Oxygen Sensor, the ECU issues a command to optimize the fuel mixture. This operating scheme allows you to comply with standards for harmful emissions, as well as prevent excessive fuel consumption.
Based on reviews of the converter's operation, we can conclude that it rarely fails. But knowing about checking it won't hurt. To do this, a digital voltmeter is connected to the device terminal. The base voltage should be around 0.45V . In the future, you can simulate certain situations, for example, if you suspect an enriched mixture, artificially create an air leak.
Why is there an adsorber in Priora?
Modern domestic cars equipped with an injection engine have an adsorber. The device resembles a large black jar, which is filled with a filtering compound, this is ordinary activated carbon. The device contains such a part, called the adsorber purge valve. The device is located next to the filling tank and absorbs gasoline vapors.
With the help of this device, the released vapors are able to condense and be redirected back to the automobile fuel system. Regular ventilation is required for the entire system to function properly. To ensure proper ventilation and collection of condensate, a special sensor is required - this is the adsorber purge valve.
When the car is idling, especially in winter, the sensor operates, making a sound reminiscent of a chirping sound. Most car owners mistakenly believe that this sound indicates an obvious malfunction of the gas distribution mechanism or rollers. This is easy to check; all you need to do is press the gas hard. Continuous chirping sounds are signs of a malfunction.
Common problems
The fuel volume control system in the gas tank is susceptible to the following malfunctions:
- the pointer indicator lies at zero regardless of the amount of fuel remaining in the tank;
- the device does not display the fuel level correctly - it is lying up or down;
- the needle “jumps” or changes readings in a short period of time;
- The yellow minimum fuel indicator indicator does not light up.
Reference. In some domestic car models, the fuel sensor is lying from the factory. An example is the Chevrolet Niva SUV of the first releases, where the device greatly underestimates the actual level of gasoline. The driver, guided by the sign, pulled into a gas station, only to discover that the tank was full to the top.
There are several reasons why the needle drops to zero:
- Sticking or jamming of the lever.
- The float lost its seal and sank to the bottom.
- An electrical circuit is broken due to oxidized contacts or a wiring problem.
- Failure of the indicator itself or the lever sensor - potentiometer.
Typically, incorrect readings and “jumps” of the needle are a consequence of contamination of the rheostat and slider. On a car with high mileage, these parts can wear out - the thin layer on the plates wears away, causing contact to disappear between them and the runner.
The fuel level sensor in the tank sends conflicting signals that are reflected on the dashboard.
One of the reasons for the minimum level indicator not working is a burnt-out light bulb on the instrument panel. Less common are problems with the end contact located inside the tank, or a break in the electrical wiring. In the newest systems, the lamp even lights up at the command of the controller when the resistance of the lever potentiometer reaches a certain value.
Product delivery options
Note! Below are the shipping methods available specifically for this product. Payment options may vary depending on the shipping method. Detailed information can be found on the “Delivery and Payment” page.
Parcel by Russian Post
Available payment methods:
- Cash on delivery (payment upon receipt)
- Using cards Sberbank, VTB, Post Bank, Tinkoff
- Yandex money
- QIWI
- ROBOKASSA
Shipping throughout Russia. Delivery time is from 5 to 12 days.
Parcel by Russian Post 1st class
Available payment methods:
- Cash on delivery (payment upon receipt)
- Using cards Sberbank, VTB, Post Bank, Tinkoff
- Yandex money
- QIWI
- ROBOKASSA
Shipping throughout Russia. Delivery time is from 2 to 5 days. More expensive than regular delivery by Russian Post, approximately 50%. Parcel weight up to 2.5 kg
Express Parcel EMS
Available payment methods:
- Cash on delivery (payment upon receipt)
- Using cards Sberbank, VTB, Post Bank, Tinkoff
- Yandex money
- QIWI
- ROBOKASSA
Shipping throughout Russia. Delivery time is from 3 to 7 days. More expensive than regular delivery by Russian Post, approximately 100%.
Transport companies
Available payment methods:
- Using cards Sberbank, VTB, Post Bank, Tinkoff
- Yandex money
- QIWI
- ROBOKASSA
Delivery is possible to any locality where there is a representative office of the transport company. Delivery time is from 2 to 10 days. Sending large parcels is approximately 50% more profitable than by Russian Post.
Pickup from our warehouse
Available payment methods:
- Cash upon receipt
- Credit, installments
- Using cards Sberbank, VTB, Post Bank, Tinkoff
- Yandex money
- QIWI
- ROBOKASSA
Pickup times must coincide with store opening hours.
We’ll tell you a little secret, just don’t tell anyone else about it so as not to make people sad. All Lada cars are equipped with decorative plastic engine covers from the factory. But where they go on the way from the factory to the final buyer is the question. Buyers of Lada cars still have to deal with such relics of the past.