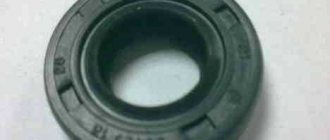
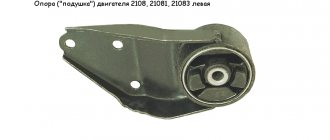
To prevent the engine from detonating, special rubberized parts were invented - supports. They reduce vibrations at any speed. The cushion, also known as the engine support for the Lada Priora with 16 valves, can be: lower, upper, left and right - they provide connection between the power unit and the body and limit its movement.
The price of parts starts from 500 rubles. Read the article to the end, it will tell you about which companies produce Priora engine mounts. Let's talk about analogues, their article number and price. How to replace supports on a 16 valve motor and what keys to prepare for the job!
The top guitar looks like this
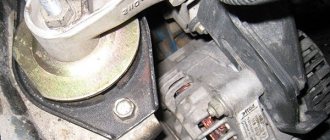
Removing the right support
Remove the generator drive belt (see “Replacing the generator drive belt”). We install an adjustable stop under the engine oil pan.
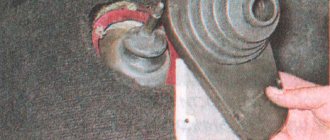
We put a “17” socket on the nut securing the right support to the engine bracket, and then...
...insert the extension into the head... ...and unscrew the nut.
Using a 15mm socket, unscrew the three bolts securing the support bracket to the body side member. Having lowered the bracket with the support down, we remove the threaded part of the support bolt from the hole in the engine bracket and, moving the assembly forward...
...take out the right support with the bracket. Use a Torx E-10 head to unscrew...
...two screws securing the support to the bracket... ...and remove the support from the bracket. To disassemble the support...
... use a 15mm wrench to unscrew the cushion coupling nut, holding the bolt head with a wrench of the same size.
Right support parts
:1 - nut;2 - upper limiter;3 - cushion;4 - lower limiter;5 - bolt. The cushions of the left and right supports are interchangeable. When assembling the right support, the flanging rings (see the left support) should be facing upward, and the flats of the upper and lower stops, as well as the cushion coupling nut, should be parallel to the axis of the support mounting holes. We assemble the support with the bracket by tightening two screws. We install the right support with the bracket in the reverse order, while...
...the coupling nut 2 of the cushion must be placed in the rectangular socket 1 of the engine bracket.
Where are the engine mounts located?
First, let's look at where the supports are located in the engine.
- The right airbag is located near the timing belt. It connects the engine to the body, creating the necessary shock absorption, helping to dampen vibrations. In addition, such a support does not allow the engine to make longitudinal movements under the hood.
- The left cushion is installed between the car body and the gearbox. Its functions are the same as those of the right support.
- Top cushion (also called "guitar" because of its shape). Reliably fixes the engine, preventing it from making lateral movements. Made of durable metal and rubber. It is located at the right side of the strut near the support bearing.
- The lower “guitar” is structurally no different from the upper one, since these parts are interchangeable. This support is located under the power steering or air conditioning pump. It is attached to the motor bracket, and on the other side to the beam.
In 8-valve Priora engines, the last two airbags are replaced by one. It is attached to the gearbox and the bottom of the car.
Do-it-yourself replacement of engine mount cushions on a Priora
On an 8-valve engine:
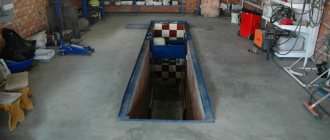
- The car must be prepared for repair work; for this purpose it is placed on a flat surface; it is imperative to place stops under the rear wheels and remove the protection of the power unit.
- Cl. 13” remove the bolt holding the generator belt tensioner. We remove the belt.
- We install a jack under the “engine” of the LADA Priora, not forgetting to place a thick board under it, or a regular beam will do. The power unit must be raised so that there is no load on the supports.
- Cl. 15” unscrew the nut of the so-called central fastening directly to the pillow on the right.
- We remove the cl. 13” bolts securing the pillow on the bracket.
- Unscrew the plug. 17” 3 bolts that secure the bracket to the car side member. You can find these bolts on the side of the right arch directly below.
- At this stage, we remove the bracket and replace the old pillow with a new one.
- In the reverse order, we put everything back in its place in exactly the same order.
- Next we jack up the gearbox.
- Cl. 15” unscrew the nut of the so-called central fastening on the left cushion.
- Cl. 13” unscrew the 2 existing bolts securing the supports we are considering.
- We replace the pillow with a new one and assemble everything, observing the sequence in reverse order.
- Cl. at 17”, unscrew the 2nd nuts, they are the ones that secure the support cushion to the body, then the 2nd nuts on the side where the cushion is attached to the gearbox.
- It's time to remove the rear support.
- Cl. 19” unscrew the only nut securing the support pad to the bracket. We replace the pillow with a new one, then collect it in the reverse order.
Replacement work on a 16 valve engine:
The 16 valves located on the side of the engine mount on the LADA Priora are removed and replaced in the same way as on 8-valve engines. In order to replace the pillow from below, you need to work from underneath.
- Cl. 15” remove the only bolt that secures the so-called lower support bar, which is located in front, to the suspension cross member, also located in front.
- Using a pair of 15” wrenches at once, unscrew the nut securing the metal. support to the motor bracket. We remove the bolt with ease.
- We remove the old support, change the pillow, or, if desired/necessary, the entire structure.
- And, don’t forget to collect everything in the reverse order of the given one.
- Under the hood, you need to unscrew the bolt connecting the upper front support and part of the body. We use cl. by 17”, and it is recommended to hold the nut by hand.
- We take out the nut and bolt.
- Cl. 15” unscrew the existing bolt connecting the upper front support and the power device bracket. We remove the nut and, accordingly, do not forget about the bolt.
- We then carry out the now familiar replacement and assemble everything, following the reverse instructions.
When the entire 16-valve engine mount has been replaced, or even if the engine has 8 valves, you need to start the engine and check if vibration is present. If the engine mount is installed correctly and properly secured, then vibration should be completely absent or minimal; detailed instructions can be found here.
What problems do pillows have?
How can the owner of a Lada Priora understand that the engine mount, and its main element - the cushion, have already completely become unusable? When the engine operates in its usual mode, the body begins to rattle quite noticeably, plus vibration, which cannot be ignored, is transmitted to the steering rack, as well as the dashboard, and even to the pedal block. If you notice this, then know for sure that it is the pillows that have worn out and will certainly need replacement.
As a rule, a slight vibration is present when the engine starts, and it is felt when it is completely turned off. When the pillows are completely worn out, a knocking sound often begins to be heard, and it appears due to the contact of the motor with the support.
In order to be completely sure that this is where the problem lies, you need to open the engine compartment and inspect the supports and, without exception, all the pillows. You can feel the force of vibration if you place your palm on the “engine”.
What could be the reasons why the support cushions we are considering fail:
- Due to fairly rapid temperature changes and the natural aging of rubber, cushions lose their elasticity.
- Trace factors influence: temperature/mechanical stress or it happens that deformation is inevitable due to the spent resource
- All kinds of chemical liquids also act, and cracking and even delamination occurs.
When and why do you need to replace pillows with Priora?
There are no specific recommendations on whether it is advisable to replace the support cushions on the most popular Lada Priora at the moment. However, if you are sure that the faulty airbag is obvious, then you should not delay replacing it. Strong vibration significantly reduces driving comfort in a Priora and inevitably leads to negative consequences in the power unit or gearbox.
When deciding to make repairs, you need to decide whether the pillows will be replaced or the supports will be replaced. By and large, if the support, we remind you, which is always made of metal, is not damaged, then there is no need to replace it; it will be enough to purchase and install a worn-out support pad.
On a domestic Lada Priora, a set of support cushions costs around 1.3 thousand rubles. rub. If you purchase assembled supports, it will cost you approximately 2.5 thousand rubles. rub. Plus, you need to calculate the work of a specialist who will carry out the replacement; as a rule, services charge 300 rubles for 1 pillow. However, you can also carry out the replacement yourself. Below we provide detailed step-by-step instructions on how you can do this.
Replacing the left support is done in two ways
The first involves removing the part assembled with limiters. To complete it you need:
- Tighten the nut from the bottom of the car, which secures the part to the gearbox bracket;
- Unscrew the bolts securing the rod to the body and remove it.
To implement the second option, in which the consumable is disassembled, you will need:
- Unscrew the pillow nut from above;
- Remove the upper limiter;
- Unscrew the bolts securing it to the body;
- Remove the part, then the lower stop;
- Assembly is performed in both cases in reverse order.
Priora: features of the sedan body
Note that the Priora hasn’t changed much in appearance after the facelift. The difference between it and its pre-restyling version can only be determined by a professional who will immediately notice other body kits and optics.
But much more innovations appeared in the cabin. The dashboard has been changed, a new steering wheel and an ergonomic armrest have been installed. As for the seats, the driver’s seat received comfortable lateral support and an increased range of adjustments by 20 mm. The passenger seats also received the same innovations, where additional airbags were also installed.
VAZ car body structure
A pre-heater from Eberspäscher was introduced into the new Lada Priora. Note that all heater elements are now located behind the bumper, directly under the left front headlight. On the one hand, this is convenient, but on the other hand, in the event of a head-on collision, it will be almost impossible to avoid damage to the element.
The galvanization of the sedan body remained at the same level as before. True, the manufacturer now officially recommends the use of an anticorrosive composition that increases resistance to external influences. This is especially true on city roads, where deicing compounds are used in winter.
Improved paintwork. Paint is now supplied to AvtoVAZ from the number 1 company in the world - PRG, whose products can hardly be suspected of poor quality. On the other hand, many contradictory reviews are posted in forums, where for the most part owners of new Priors complain specifically about the paintwork. The paint is weak, and after driving, even for a short time, small chips appear on the body, which subsequently rust very quickly.
As for the suspension, an independent MacPherson strut is installed at the front and a beam at the rear. At the production stage, elastic elements of shock absorber struts were used in the suspension assembly. They have increased rigidity at the end of the compression stroke.
The main drawback, as always, is the level of ShVI. The roar of the engine can be heard in the cabin even at idle, and when driving the noise almost completely drowns out the music at medium volume. In addition, rear row passengers also hear the wind whistling outside the window. Without additional testing, it is better not to get into the new Priora, just like the old one.
VAZ car body diagrams
Another weak point is the plastic lining of the cabin, which makes extraneous sounds even in the initial stages of operation. The door trim and gear knob rattle the most, the eyeglass case and rear parcel shelf rattle less.
As for the price for revision and modernization, it varies. So, to install an additional shvi, you will only have to spend about 20 thousand rubles to eliminate rattling. Although, if you manage to carry out proper sound insulation with your own hands, the procedure will cost several times less.
The cost of painting a Priora body part will cost 10.5 thousand rubles. But to paint the entire body, you will need to part with 55 thousand rubles.
Today, when purchasing a Priora at dealerships, the client is provided with a wide range of additional equipment, including not only anti-corrosion treatment of the underbody and hidden areas of the body, but also treatment of the fender liner.
Body of lada 2170 priora
The trunk of the new Priora is just as roomy. Up to 430 liters of cargo can be placed here. The ground clearance is 16.5 cm, which allows the body to travel off-road in the countryside without any danger to the body. The Priora is easy to drive on snow, although this largely depends on the condition of the tires.
What is a Priora airbag?
Typically, this Prior safety element will work in the event of a frontal impact or an angular impact, which occurs at an angle of no more than 30° at a higher required speed.
This indicator is also important: everything will depend on how rigid the object with which the collision occurs. If it is capable of deformation, then the system will come into action at a speed that exceeds 25 km/h, only with frontal interaction.
The so-called airbag is a whole coherent system that has the following elements:
- the gas generator itself;
- a special label with a barcode;
- a housing in which the folded inflatable pillow will be placed;
- fasteners; connector with fuse and igniter at the gas generator part;
- facing cover.
The essence of the action of the gas-generating element located in the pillow is as follows:
There are two types of gas generators:
The first will consist of a body that will be filled with a solid pyrotechnic substance and the igniter itself. As for the second, it will consist of a casing material containing compressed gas of inert origin, as well as all the components already listed above.
- When struck, an electrical signal will be generated.
- The electrical resistance will heat up and ignite the pyrotechnic substance.
- The rest of the mass ignites.
It is very important that the facing cover covering the airbag itself is intact. The purpose of this part in the Prior is to cover the folded element near the pillow during normal times, and it will rupture during gas filling at the moment of collision. This will happen along the structural seam - it is located along the back side on the cover itself.
This will happen along the structural seam - it is located along the back side on the cover itself.
- sensor responsible for acceleration;
- an electronic circuit that generates signals entering the control.
The control unit itself is designed to convert and process information that comes directly from the sensor responsible for acceleration. In the future, it will generate a signal of electrical origin sent to the fuse.
The airbag responsible for safety in the Priora must be coordinated in its future operation with the belt. When the person driving is not wearing a seat belt, it simply will not work.
- At the moment of impact, the pillow will inflate very quickly and press the person to the seat with great force.
- In the case when the driver is not fastened, the body involuntarily swings forward and is met with a huge blow from the airbag. This is fraught with additional major injuries.
The status of the airbag on the Priora is regulated by a special sensor located on the dashboard. The light will indicate each existing fault. If it lights up, it helps to monitor the airbag data, as well as keep these systems in working order, which will be the key to saving the driver’s life on the road.
Do-it-yourself replacement of engine mount cushions on a Priora
On an 8-valve engine:
- The car must be prepared for repair work; for this purpose it is placed on a flat surface; it is imperative to place stops under the rear wheels and remove the protection of the power unit.
- Cl. 13” remove the bolt holding the generator belt tensioner. We remove the belt.
- We install a jack under the “engine” of the LADA Priora, not forgetting to place a thick board under it, or a regular beam will do. The power unit must be raised so that there is no load on the supports.
- Cl. 15” unscrew the nut of the so-called central fastening directly to the pillow on the right.
- We remove the cl. 13” bolts securing the pillow on the bracket.
- Unscrew the plug. 17” 3 bolts that secure the bracket to the car side member. You can find these bolts on the side of the right arch directly below.
- At this stage, we remove the bracket and replace the old pillow with a new one.
- In the reverse order, we put everything back in its place in exactly the same order.
- Next we jack up the gearbox.
- Cl. 15” unscrew the nut of the so-called central fastening on the left cushion.
- Cl. 13” unscrew the 2 existing bolts securing the supports we are considering.
- We replace the pillow with a new one and assemble everything, observing the sequence in reverse order.
- Cl. at 17”, unscrew the 2nd nuts, they are the ones that secure the support cushion to the body, then the 2nd nuts on the side where the cushion is attached to the gearbox.
- It's time to remove the rear support.
- Cl. 19” unscrew the only nut securing the support pad to the bracket. We replace the pillow with a new one, then collect it in the reverse order.
Replacement work on a 16 valve engine:
The 16 valves located on the side of the engine mount on the LADA Priora are removed and replaced in the same way as on 8-valve engines. In order to replace the pillow from below, you need to work from underneath.
- Cl. 15” remove the only bolt that secures the so-called lower support bar, which is located in front, to the suspension cross member, also located in front.
- Using a pair of 15” wrenches at once, unscrew the nut securing the metal. support to the motor bracket. We remove the bolt with ease.
- We remove the old support, change the pillow, or, if desired/necessary, the entire structure.
- And, don’t forget to collect everything in the reverse order of the given one.
- Under the hood, you need to unscrew the bolt connecting the upper front support and part of the body. We use cl. by 17”, and it is recommended to hold the nut by hand.
- We take out the nut and bolt.
- Cl. 15” unscrew the existing bolt connecting the upper front support and the power device bracket. We remove the nut and, accordingly, do not forget about the bolt.
- We then carry out the now familiar replacement and assemble everything, following the reverse instructions.
When the entire 16-valve engine mount has been replaced, or even if the engine has 8 valves, you need to start the engine and check if vibration is present. If the engine mount is installed correctly and properly secured, then vibration should be completely absent or minimal; detailed instructions can be found here.
Where are the engine mounts located?
First, let's look at where the supports are located in the engine.
Right engine mount. Left engine mount. Top support (guitar).
- The right airbag is located near the timing belt. It connects the engine to the body, creating the necessary shock absorption, helping to dampen vibrations. In addition, such a support does not allow the engine to make longitudinal movements under the hood.
- The left cushion is installed between the car body and the gearbox. Its functions are the same as those of the right support.
- Top cushion (also called a “guitar” because of its shape). Reliably fixes the engine, preventing it from making lateral movements. Made of durable metal and rubber. It is located at the right side of the strut near the support bearing.
- The lower “guitar” is structurally no different from the upper one, since these parts are interchangeable. This support is located under the power steering or air conditioning pump. It is attached to the motor bracket, and on the other side to the beam.
In 8-valve Priora engines, the last two airbags are replaced by one. It is attached to the gearbox and the bottom of the car.
Operational and technical characteristics
The VAZ 2171 Priora station wagon is a budget car and its technical parameters do not stand out in any way from the general background of AvtoVAZ products.
Power unit
The Priora 2171 station wagon was equipped with two VAZ-made engines with technical characteristics:
| Power unit type | VAZ 21116 | VAZ 21126 |
| Options | Meaning | |
| Volume, cubic cm. | ||
| Power, l. With. (6000 rpm) | ||
| Torque, Nm | 140 (at 3800 rpm) | 145 (at 4000 rpm) |
| Number of valves per cylinder | ||
| Supply system | controlled multipoint fuel injection | |
| Gasoline AI-95 | ||
| Fuel consumption, l/100 km. (city/highway/mixed) | ||
| Motor resource, thousand km |
When assembling the engines, American-made parts and components were used:
- 39% lighter connecting rod and piston group - manufactured by Federal Mogul;
- The timing belt and tensioner pulley are from Gates Rubber Company.
The engines are powered by a standard VAZ 5-speed manual transmission with a reinforced clutch. The gearbox drive is made on closed type bearings.
Chassis
The chassis is structurally a long-proven, but somewhat modernized, “figure-of-eight”. The independent front suspension of the VAZ 2171 - McPherson with barrel springs - is made according to a scheme with straight forged arms and diagonal reaction rods. At the rear there is a torsion beam with new shock absorbers and springs that are stiffer than those of the sedan. Anti-roll bars are installed at the front and rear. According to experts, the chassis of the VAZ 2171 Priora station wagon is ideally suited to the domestic road surface. Its stability is not affected by changes in the profile of suburban highways, and you can drive along a road covered with potholes without slowing down.
Important! During vigorous maneuvering at high speed, the body begins to sway strongly, but this driving style is not the standard mode of a family station wagon.
Operating parameters of the VAZ 2171 Priora
| Parameters of VAZ 2171 Priora | Unit | Meaning |
Overall dimensions of VAZ 2171 Priora:
| ||
| Wheelbase of VAZ 2171 Priora | ||
| ||
| ||
| Fuel tank capacity | ||
| Maximum speed | ||
| Acceleration up to 100 km/h | ||
| Tire size: | 185/65 R14 86(H) 175/65 R14 82 (H) 185/60 R14 82 (H) |
When to change the gearbox mount?
Manufacturers indicate about 100,000 km. the lifespan of a pillow, but the truth is that how long they will be truly effective depends on many factors. During operation, pillows, as we have already noted, withstand very heavy loads, are exposed to various temperature influences, and all this has an extremely negative effect on their effectiveness.
Over time, the metal begins to wear out, microcracks appear, and the seal loses its elasticity and collapses, and this leads to the need to replace the transmission gaskets.
Car body stiffness table
| car model | Hardness, Nm/deg |
| Alfa Romeo 147 3d | 18800 |
| Alfa Romeo 147 5d | 16250 |
| Alfa Romeo 156 | 18800 |
| Alfa Romeo 159 | 31400 |
| Alfa Romeo 166 | 24400 |
| Alfa Romeo MiTo | 17650 |
| Aston Martin DB9 Convertible | 15500 |
| Aston Martin DB9 Coupe | 27000 |
| Aston Martin Vanquish | 28500 |
| Audi A2 | 11900 |
| Audi A8 D2 | 25000 |
| Audi A8 D3 | 36000 |
| Audi A8 D4 | 45000 |
| Audi R8 | 40000 |
| Audi TT Coupe mk1 | 19000 |
| Audi TT Roadster mk1 | 10000 |
| Audi TT Roadster mk2 | 22000 |
| Bentley Azure | 18000 |
| Bentley Continental Supersports | 24000 |
| Bentley Flying Spur mk2 | 36500 |
| BMW 7 series E65 | 31200 |
| BMW 7 series F01 | 37500 |
| BMW E34 | 17200 |
| BMW E36 Touring | 10900 |
| BMW E39 | 24000 |
| BMW E46 Convertible | 10500 |
| BMW E46 Coupe | 12500 |
| BMW E46 Sedan | 13000 |
| BMW E46 Wagon | 14000 |
| BMW E60 | 24000 |
| BMW E90 | 22500 |
| BMW F10 | 37500 |
| BMW F30 | 25000 |
| BMW X5 E53 | 23100 |
| BMW X5 E70 | 28000 |
| BMW Z3 mk1 | 5600 |
| BMW Z4 Coupe mk1 | 32000 |
| BMW Z4 Roadster mk1 | 14500 |
| BMW Z8 | 40000 |
| Bugatti EB110 | 19000 |
| Bugatti Veyron | 50000 |
| Chevrolet Corvette C5 | 9100 |
| Chrysler Crossfire | 20140 |
| Citroen Picasso mk1 | 17000 |
| Daewoo Lanos 3d 1997 | 10500 |
| Daewoo Nubira 1997 | 14500 |
| Dodge Durango mk1 | 6800 |
| Dodge Viper Coupe mk2 | 7600 |
| Ferrari 360 Spider | 8500 |
| Ferrari 575M Maranello | 14700 |
| Ferrari F50 | 34600 |
| Fiat Brava | 9100 |
| Fiat Bravo | 10600 |
| Fiat Punto 3d | 19700 |
| Fiat Tempra | 6700 |
| Ford Fiesta 3d 1995 | 6500 |
| Ford Focus 3d mk1 | 19600 |
| Ford Focus 5d mk1 | 17900 |
| Ford GT | 27100 |
| Ford GT40 MkI | 17000 |
| Ford Maverick 5d 1995 | 4400 |
| Ford Mustang 2003 | 16000 |
| Ford Mustang 2005 | 21000 |
| Ford Mustang Convertible (2003) | 4800 |
| Ford Mustang Convertible (2005) | 9500 |
| Jaguar XK mk2 | 16000 |
| Jaguar X-Type Estate | 16300 |
| Jaguar X-Type Sedan | 22000 |
| Koenigsegg Agera | 58000 |
| Koenigsegg Agera R | 65000 |
| Koenigsegg CC-8 | 28100 |
| Lamborghini Aventador | 35000 |
| Lamborghini Gallardo | 23000 |
| Lamborghini Murcielago | 20000 |
| Lancia Kappa Coupe | 27350 |
| Land Rover Freelander 2 | 28000 |
| Lexus LFA | 39130 |
| Lotus Elan | 7900 |
| Lotus Elise S2/Exige (2004) | 10500 |
| Lotus Esprit SE Turbo | 5850 |
| Maserati Quattroporte 2008 | 18000 |
| Mazda CX-5 | 27000 |
| Mazda CX-7 | 23700 |
| Mazda Rx-7 FD | 15000 |
| Mazda Rx-8 | 30000 |
| McLaren F1 | 13500 |
| Mercedes SL R230 | 16400 |
| Mercedes SL R231 | 19400 |
| Mercedes SLS Roadster | 18000 |
| Mercedes E-Class W212 | 29920 |
| Mercedes S-Class W221 | 27500 |
| Mercedes S-Class W222 | 40500 |
| Mini (2003) | 24500 |
| Nissan Micra 1995 | 4000 |
| Nissan Prairie 4×4 5d 1995 | 7500 |
| Nissan Sunny 3d 1995 | 8200 |
| Opel Astra 3d 1998 | 10500 |
| Opel Astra 4d 1998 | 11900 |
| Opel Astra 5d 1998 | 11700 |
| Opel Combo 1999 | 18500 |
| Opel Corsa 3d 1995 | 6500 |
| Opel Corsa 3d 1999 | 8000 |
| Opel Omega 1999 | 13000 |
| Opel Vectra 4d 1999 | 8800 |
| Pagani Zonda C12 S | 26300 |
| Pagani Zonda F | 27000 |
| Pagani Zonda Roadster | 18000 |
| Peugeot 206 CC | 8000 |
| Peugeot 407 | 22700 |
| Porsche 911 Carrera S 991 | 30400 |
| Porsche 911 Turbo 993 | 13500 |
| Porsche 911 Turbo 996 | 27000 |
| Porsche 911 Turbo 996 Convertible | 11600 |
| Porsche 911 Turbo 997 | 34000 |
| Porsche 959 | 12900 |
| Porsche Carrera GT | 26000 |
| Porsche Cayman 981 | 42000 |
| Porsche Panamera | 25000 |
| Range Rover mk3 | 32500 |
| Renault Sport Spider | 10000 |
| Renault Twingo 1995 | 14200 |
| Rolls-Royce Phantom | 40500 |
| Saab 9-3 Cabriolet mk2 | 11500 |
| Saab 9-3 Sedan mk2 | 22000 |
| Saab 9-3 Sportcombi mk2 | 21000 |
| Seat Leon 2005 | 23800 |
| Toyota Corolla 3d 1995 | 10500 |
| Toyota Prius 2001 | 22700 |
| Toyota Starlet 5d 1995 | 7600 |
| Volkswagen Fox 2007 | 17900 |
| Volvo S60 mk1 | 20000 |
| Volvo S80 mk1 | 18600 |
| VW Golf V GTI | 25000 |
| VW Passat B6 | 32400 |
| VW Phaeton | 37000 |
| VAZ-1111E Oka | 7000 |
| VAZ-21043 | 6300 |
| VAZ-2105 | 7300 |
| VAZ-2106 | 6500 |
| VAZ-2107 | 7200 |
| VAZ-21083 | 8200 |
| VAZ-21093 | 6800 |
| VAZ-21099 | 5500 |
| VAZ-2110 | 8000 |
| VAZ-21102 | 8400 |
| VAZ-21106 | 12200 |
| VAZ-21106 (racing) | 51800 |
| VAZ-21108 Premier | 10500 |
| VAZ-21109 Consul | 14300 |
| VAZ-2111 | 7400 |
| VAZ-2112 | 8100 |
| VAZ-2115 | 5500 |
| VAZ-2120 Nadezhda | 10000 |
| VAZ-21213 Niva | 8900 |
| VAZ-2123 Chevy Niva | 12000 |
| VAZ-2131 Niva | 7400 |
| GAZ-M20 Pobeda | 4600 |
| MZMA-400 Moskvich | 2500 |
Of course, torsional rigidity of the body is one of the most important indicators of a modern car. Let's hope that over time, our engineers will come up with more efficient designs and improve the design so that domestic cars occupy the top positions in the ranking of the best cars in the world for this indicator.
What is needed for this
- Drive the car with the previously dismantled protection into the garage or onto an area with a flat floor covering.
- Raise the car by placing a jack under one of the front (or, if you have a rear engine, the rear) wheels.
- Place the existing support under the engine so as to remove the load from the engine mount. After making sure the support is secure, lower the jack.
- Using a tackle or something else, get under the car and begin inspecting the condition of the engine mounts.
Station wagon body 2111
The department of the main design bureau of AvtoVAZ came up with the newest model of the body, which immediately received the trust of designers and became a kind of base for all body modifications of the 10th family. It was on the station wagon that a new type of glazing was first implemented.
VAZ 2111 body
Unlike the previous station wagon, a different steering wheel was installed in the new one. This one was much softer and safer. As for the interior, its equipment was made in accordance with European standards and safety requirements.
As for the luggage compartment of the new station wagon:
It made it possible to transport a considerable load, and if the rear sofa and the front passenger seat were folded, the car turned into a real truck, where you could put pipes up to 170 cm long and calmly close the back door.
VAZ 2111
The huge advantages of the station wagon over other models could not but affect its cost. From the moment the car was released, the price was high: in the range from 212 to 240 thousand rubles. As for competition with foreign cars, the 2111 station wagon was significantly cheaper than foreign models similar to it in class and body style.
The “conveyor” career of the 2111 station wagon ended at the Togliatti plant at the beginning of 2009, when it was decided to produce another station wagon - the Lada Priora.
The license to produce the station wagon is being purchased by the Ukrainian Bogdan. Only the Ukrainian version of the station wagon differed from the Russian one: the door panel trim was different, as was the dashboard.
Watch an interesting video about the body of the VAZ 2111
https://youtube.com/watch?v=KoVgxS0pbKs
VAZ bodies continue to be modernized today. Time does not stand still. Every year new technologies are introduced, equipment is changed, staff are retrained and retrained. Videos and photos will help you learn more about VAZ bodies. As for repairing damaged parts with your own hands, step-by-step instructions are provided for this, posted on our website.
How to check the condition of the gearbox mounts?
The first thing you can do is visually inspect the pillows. To do this, lift the car on a jack or lift and inspect the cushions for cracks, tears or hardening of the rubber.
Checking the mounting bolts will also not be superfluous. (If the problem is the bolts, you'll know it by a sagging transmission).
It might be a good idea to try to move the tampon by hand. Sometimes everything may look good on the outside, but if you try to tug it with your hand and feel something moving inside the pillow, that's an indication that you need to replace it.
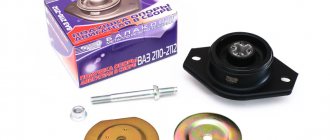
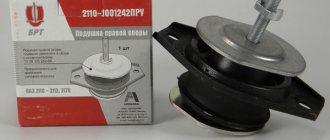
Manufacturers and prices of analogues
Powertrain cushions for Lada Priora are produced by many manufacturers. The most common brands are:
- BRT - parts from the famous Balakovo Rubber Products Plant;
- Lada Detal – original Lada spare parts from conveyor suppliers, in particular AvtoVAZ subsidiary VIS;
- Riginal is a fairly young brand of PKF Niagara.
Technologies of the future - rods of a new type are produced under this brand.
The cost of spare parts from these manufacturers is approximately the same, the difference in price depends mainly on the specific store. Some companies supply kits for replacing all suspension elements of the power unit at once. Such a purchase is usually more profitable than purchasing spare parts separately.
Why does it wear out?
Many motorists ask this question. Signs of faulty engine mounts can vary. This is primarily due to natural wear and tear that occurs due to vibrations. The resource of these elements is about 150 thousand kilometers. The stronger the vibration, the greater the load on the support (especially if one of the engine cylinders is not working).
If you think that the resource directly depends on the mileage, you are mistaken. The cushion wears out even when the car is parked in the garage. Over time, the rubber dries out. Microcracks appear. Another negative factor is oil. It is necessary to change the seals in time to prevent leaks.
Oil negatively affects the life of the engine mount. Signs of a VAZ 2110 malfunction may also be in the driving style. So, with a sharp start with slipping, a colossal load is placed on the support.
Replacement
The process of replacing Lada Priora engine mounts is described below, as well as the tools that will be needed to carry out this work. By following these step-by-step instructions, work on replacing the Priora engine mounts can be carried out without much effort in the shortest possible time.
Required tool:
- Ratchet with 13, 15, 17mm heads. Head Torx E10;
- Open-end or socket wrenches 13, 15, 17 mm;
- Jack;
- Part of a wooden board;
Replacing the right support
If the car has a crankcase protection installed, it must be removed.
We jack the engine into the crankcase, placing the support through a wooden board.
Unscrew the central nut securing the support to the engine bracket.
Unscrew the fastenings of the support to the body.
Lower the engine slightly with a jack. This is necessary for easier dismantling of the unscrewed support.
Install the new support in reverse order
Replacing the left support
Replacing the left support is done in the same way as the right one, only the jack must be installed under the gearbox. The emphasis must be made through a wooden lining.
Replacing guitars
Replacing guitars is quite simple and effortless.
Using a 15 mm wrench, unscrew the bolt securing the guitar to the car body and remove it.
Using a 15 mm wrench, unscrew the bolt securing the guitar to the engine bracket and remove it, and then the support itself.
Install the new support in reverse order.
Replacing the lower guitar follows similar instructions.
Tightening guitars must be done with the engine running.
Replacing the lower support on 8-valve internal combustion engines
Work on replacing the lower support on 8-valve engines must be carried out from the inspection hole.
We unscrew the 2 nuts securing the rubber part of the cushion, which is attached to the car body.
Unscrew the two bolts securing the cushion to the gearbox housing and remove the cushion.
Installation is carried out in reverse order.
Source
Installing an additional gearbox cushion
The Priora already has the holes necessary to install this pillow, so in addition to the spare part itself with article number 2110-1001280, you will only need fasteners:
- 2 bolts M12x75.
- 2 self-locking nuts M12.
- 4 washers for M12 bolts.
- 2 bolts M10x30 with a thread pitch of 1.25 (for some cars a thread pitch of 1.5 is suitable).
- 2 engravers for M10 bolts. 8 wide washers for M10 (can be replaced with a smaller number when using thick washers, for example, from the cylinder head).
The replacement technology itself
- The part is attached to the gearbox bracket using M12 bolts with self-locking nuts.
- The washers are placed under the bolt head and under the nut.
- M10 bolts are screwed into the body. Between it and the rod body, you need to place washers so that the rubber rod does not touch the body.
To replace this rod, which will also be required over time, just unscrew the fasteners and replace the old one with a new one.
The good condition of the Priora engine mounts is the key to comfortable movement. At the same time, if you have a suitable tool, replacing components will not be difficult.
Salon
The interior design, even for 2007, was already outdated. Almost every car enthusiast has said this. The front fascia design is reminiscent of early 2000s Fords. The steering wheel is four-spoke, without buttons. The instrument panel is pointer, with a digital odometer. On the center console there is an analog clock (similar to the “tenth” family) and a heater control unit. The radio was not present - only audio preparation (and regardless of the configuration of the Lada Priora station wagon). The seats are fairly flat, but there is a small center armrest. There are two airbags. Expensive versions have air conditioning and an alarm system. The latter caused many problems for the owners. So, sometimes the central locking did not work. After pressing the button, some of the doors did not close or open.
Another problem of the Lada Priora (including the station wagon) is poor sound insulation. This disease has been plaguing VAZ cars for more than one year (fortunately, this chain ended at Vesta). The plastic rattles loudly inside, the door trim, the drawstring and the rear parcel shelf vibrate. Almost every owner of the Lada Priora station wagon tried to overcome this problem on their own. But in order to “make noise” around the car, you need to spend at least ten thousand rubles on materials. In this case, you will have to completely disassemble the interior. And at a service station the price of such a service will be about 20 thousand rubles.
Another problem is the stove. The Priora uses a motor with micromotor gearboxes that switch the dampers. These gearboxes often fail, causing the stove to blow in only one direction. Sometimes the dampers themselves jam. As a result, air is pumped by the motor, but cannot enter the cabin (or it does, but poorly).
How to replace the engine mount
Due to wear and tear on your vehicle, it may be necessary to replace your engine mounts at some point. The number of engine mounts depends on the vehicle. Follow these steps to successfully replace a faulty motor mount.
Step 2 - Attachment
The engine bridge may suffer from wear and tear associated with starting the vehicle. Examine your engine and note the fastenings that need to be replaced.
Step 3 - Components
Look at the fasteners as well as other components. Typically, the bolts holding the mount in place are also affected. You will need to remove them to begin the installation.
Step 4 - Battery
Once we've installed the mounts and components, it's time to turn your attention to the battery. The black wire or negative cable must be disconnected from the battery
Step 5 - Raising the Vehicle
For better access you need to raise the car. Use a jack to raise the car and place jack stands to support the car.
Step 7 - Safe Storage
It is necessary to remember the unscrewed components what goes where, this will save a lot of time when reinstalling.
Step 8 - Engine Support
When replacing the mount, you may put pressure on other parts of the brackets. This additional pressure may damage some parts. Therefore, it is recommended to support the side part with a socket. The jack must be placed close to the anchor point.
Step 9 - Removing the Bolts
Learn how to remove all the bolts from the mount you want to replace. Some bolts can be easily removed from the bottom. Depending on how the assembly is mounted, sometimes a screwdriver will not be useful. You will need to use a wrench.
Step 12 - Final Stage
Return the vehicle to ground level. Connect the black wire to the battery.
You have successfully replaced the engine mount on your car. Now you can take your car for a test drive
Source
Lada Priora (2013+). Removal and installation of the VAZ-21126, -21127 engine
We carry out work when it is necessary to repair the engine or replace it.
Relieve the pressure in the engine power supply system (see “Replacing the fuel filter”) and disconnect the fitting of the fuel supply tube to the ramp from the tip of the fuel hose (see “Removing the cylinder head”).
Disconnect the wire terminal from the negative terminal of the battery. We drain the engine oil (see “Changing the engine oil and oil filter”) and coolant (see “Replacing the coolant”).
We disconnect the engine control system wiring harness block from the canister purge solenoid valve, remove the valve from the plastic engine cover (see “Removing the canister purge solenoid valve”) and move the valve to the side without disconnecting the hoses from it.
We remove the air filter along with the mass air flow sensor (see “Removing the air filter”) and the air supply hose to the throttle assembly.
Disconnect the end of the throttle drive cable from the drive sector (see “Replacing the throttle drive cable”).
Remove the vacuum brake booster hose from the intake manifold (see “Removing the intake manifold”). Remove the fuel vapor supply hose from the throttle assembly fitting (see “Removing the throttle assembly”).
We disconnect the wiring harness blocks of the engine control system from the idle speed regulator and sensors: oxygen concentration, detonation, low oil pressure indicator, coolant temperature, coolant temperature indicator, phases, crankshaft position, throttle position, rough road (see the corresponding chapters : “Engine”, “Power system”, “Engine control system”).
Remove the rough road sensor together with the bracket from the right mudguard cup (see “Removing the rough road sensor”).
We remove the generator (see “Removing the generator”). Remove the crankcase ventilation idle circuit hose from the cylinder head cover fitting and disconnect the engine management system wiring harness brackets from the cylinder head cover (see “Removing camshafts and replacing valve lifters”).
Unfasten or cut two layers of mass clamps securing the wiring harness of the engine management system to the rear timing cover (see “Removing the coolant pump”).
Disconnect the end of the ground wire of the engine management system wiring harness from the cylinder head and remove the end of the ground wire coming from the battery from the thermostat housing mounting stud (see “Removing the cylinder head”). We move the wiring harnesses away from the engine to the side.
We disconnect the pipe of the additional muffler from the catenary collector (see “Replacing the gasket in the connection between the catalytic collector and the additional muffler”). We remove the gearbox (see “Removing the gearbox”), the “basket” and the driven clutch disk (see “Removing clutch parts”).
Use a Phillips screwdriver to loosen the clamp securing the radiator supply hose...
...and remove the hose from the thermostat housing pipe. Similarly, remove the radiator outlet hose from the thermostat cover.
Use a Phillips screwdriver to loosen the clamp securing the inlet hose of the expansion tank...
...and remove hose 1 from the thermostat housing pipe. Similarly, remove the heater inlet hose 2 from the thermostat housing pipe, and the heater outlet hose 3 from the coolant pump inlet pipe.
Having removed the hood stop from the socket in the fender, and placing a rag between the hood and the windshield, set the hood to a vertical position.
To attach the lifting chain...
Having tightened the chains, we remove the adjustable stop from under the engine, which supported it when removing the gearbox.
Disconnect the front and rear supports from the engine brackets.
We unscrew the three bolts securing the right support bracket to the body side member without disconnecting the support from the engine bracket (see.
“Removing the power unit supports”).
Before removing the engine, you need to check that all hoses, tubes, and wires are disconnected from the engine and laid aside.
Using a lifting device, remove the engine from the engine compartment. We install the engine on the car in reverse order.
5.9. Replacement of power unit supports
The power unit (engine and gearbox) is mounted on two rubber cushions at the front and rear, secured through brackets on the engine and gearbox housing. These supports are designed to transfer the weight of the power unit to the body and limit its longitudinal movements. On the right and left there are supports with rods that limit the lateral movements of the power unit.
| Rice. 5.5 . Power unit suspension: 1 – bracket on the right side member of the body; 2 – lower limiter of the pillow; 3 – upper support cushion; 4 – upper limiter of the pillow; 5 – pillow fastening nut; 6 – spacer washer; 7 – support fastening nut; 8 – front support bracket; 9 – left support rod; 10 – left support bracket; 11 – rear support cushion; 12 – nut with washer; 13 – rear support bracket; 14 – bracket for the right lower support; 15 – right support rod |
The suspension parts of the power unit are shown in Fig. 5.5. You will need: keys “13”, “15”, “17”, a jack or similar lifting mechanism. 1. Hang the front of the car on supports or lift the car on a lift. 2. Remove the engine splash guard (see “Removing and installing the engine splash guard”).
| 3. Before removing the power unit rear support cushion, install a jack or hydraulic stand under the gearbox housing (see photo). | 4. To replace the rear support cushion, use a 15mm wrench to unscrew the nut securing the support to the bracket. |
| 5. Remove the upper cushion stop. | 6. Using a 13mm wrench, unscrew the two bolts securing the rear support cushion to the body... |
| 7. ...and remove the pillow. | 8. Remove the lower cushion stop. |
| 9. To replace the rear support bracket, use a 13mm wrench to unscrew the two nuts securing the bracket to the rear of the gearbox housing... | 10. ... using a 13mm socket wrench, unscrew the upper mounting bolt and remove the bracket. |
11. Install the bracket and cushion of the rear support of the power unit in the reverse order of removal.
| Notes The upper 1 and lower 2 stops of the rear support cushion differ in shape. Do not mix them up during installation. Install the support pad with its conical part up and its cutout towards the front of the car. Install the support pad mounting pin with the shoulder facing down. |
| 12. Before removing the front support cushion of the power unit, install a jack or support under the engine oil sump. | 13. Using a 17mm wrench, unscrew the nut securing the front support cushion to the bracket and use a 13mm wrench to unscrew the two bolts securing the cushion to the body. Remove the cushion restraints and the cushion itself. |
| 14. Install the front engine mount cushion in the reverse order of removal, oriented with the conical part up and the cutout towards the rear of the car. | 15. To replace the right support rod, use a 15mm wrench to unscrew the bolt securing the rod to the cross member (the generator has been removed for clarity)… |
| 16. ...and to the support bracket... | 17. ...then remove the barbell. |
18. To replace the right support bracket, which is also a generator bracket, remove the generator (see “Removing and installing the generator”, page 212), unscrew the three bolts securing the bracket to the cylinder block with a 15mm socket wrench...
19. ...and remove the bracket. 20. Install the parts in the reverse order of removal.
| 21. To replace the left support rod, use a 15mm wrench to unscrew the bolt securing the rod to the body... | 22. ... using a 15mm wrench, unscrew the nut securing the rod to the support bracket and remove the rod. |
23. Install the rod in the reverse order of removal.
| Note Install the right and left engine mount rods with the arrows on the rubber mounts pointing away from the engine. |
Product delivery options
Note! Below are the shipping methods available specifically for this product. Payment options may vary depending on the shipping method. Detailed information can be found on the “Delivery and Payment” page.
Parcel by Russian Post
Available payment methods:
Shipping throughout Russia. Delivery time is from 5 to 12 days.
Parcel by Russian Post 1st class
Available payment methods:
- Cash on delivery (payment upon receipt)
- Using cards Sberbank, VTB, Post Bank, Tinkoff
- Yandex money
- QIWI
- ROBOKASSA
Shipping throughout Russia. Delivery time is from 2 to 5 days. More expensive than regular delivery by Russian Post, approximately 50%. Parcel weight up to 2.5 kg
Express Parcel EMS
Available payment methods:
- Cash on delivery (payment upon receipt)
- Using cards Sberbank, VTB, Post Bank, Tinkoff
- Yandex money
- QIWI
- ROBOKASSA
Shipping throughout Russia. Delivery time is from 3 to 7 days. More expensive than regular delivery by Russian Post, approximately 100%.
Transport companies
Available payment methods:
- Using cards Sberbank, VTB, Post Bank, Tinkoff
- Yandex money
- QIWI
- ROBOKASSA
Delivery is possible to any locality where there is a representative office of the transport company. Delivery time is from 2 to 10 days. Sending large parcels is approximately 50% more profitable than by Russian Post.
Courier delivery in Togliatti
Available payment methods:
- Cash upon receipt
- Using cards Sberbank, VTB, Post Bank, Tinkoff
- Yandex money
- QIWI
- ROBOKASSA
Delivery time from 1 to 12 hours.
Pickup from our warehouse
Available payment methods:
- Cash upon receipt
- Credit, installments
- Using cards Sberbank, VTB, Post Bank, Tinkoff
- Yandex money
- QIWI
- ROBOKASSA
Pickup times must coincide with store opening hours.