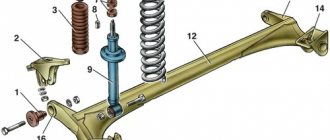
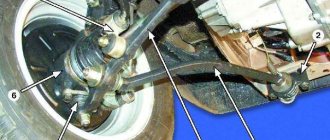
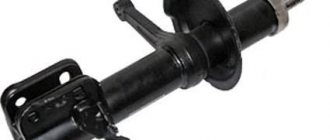
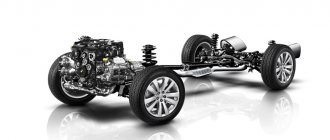
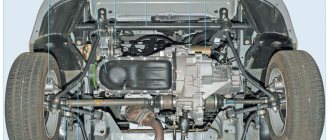
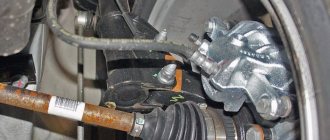
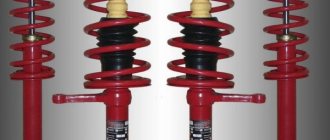
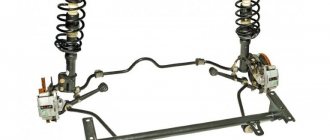
The first photo shows the chassis of the VAZ 21099, typical of front-wheel drive cars produced in the 80s of the last century. Below you will find an image of a MacPherson front suspension with telescopic struts and wishbones with braces and a stabilizer. The rear suspension of the VAZ Sputnik has shock absorbers located inside coil springs and trailing arms connected to each other by an elastic beam.
Repairing the chassis of a VAZ 21099 car with your own hands is not very difficult. The main thing is to have the necessary tools and be able to correctly identify faults.
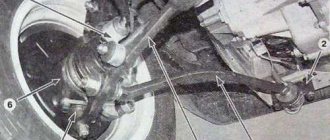
Front suspension diagram of the VAZ Sputnik-Samara.
- Telescopic stand.
- Screw.
- Bolt with eccentric.
- Another nut.
- Rounded fist.
- Drive shaft.
- External CV joint cover.
- External CV joint.
- Cross arm suspension.
- Ball.
- Decorative cover.
- Hub.
- Support disk.
- Protective cover.
- Swivel lever.
- Lower spring cup.
- Coil spring.
- Rack cover.
- Compression buffer.
- Upper spring cup.
- Upper strut bearing.
- Rack support.
This diagram does not show the braces and front stabilizer.
Device Features - Front Suspension
Shock absorber support
The front suspension is independent, telescopic, with hydraulic shock absorber struts, coil springs, lower wishbones with braces and a stabilizer bar.
Rice. 4.1. Front suspension assembly: 1 – upper support of the telescopic strut; 2 – upper support cup; 3 – compression stroke buffer with protective casing; 4 – compression buffer support; 5 – suspension spring; 6 – lower spring support cup; 7 – steering rod ball joint; 8 – steering knuckle; 9 – telescopic stand; 10 – eccentric washer; 11 – adjusting bolt; 12 – rack bracket; 13 – steering knuckle; 14 – front brake protective cover; 15 – brake disc; 16 – retaining ring; 17 – wheel hub cap; 18 – splined shank of the wheel drive hinge housing; 19 – guide pin; 20 – wheel hub bearing; 21 – ball joint; 22 – suspension arm; 23 – adjusting washers; 24 – stabilizer strut; 25 – stabilizer bar; 26 – stabilizer bar cushion; 27 – stabilizer bar mounting bracket; 28 – body bracket for mounting the suspension arm; 29 – suspension arm extension; 30 – bracket for fastening the extension; 31 – protective cover of the ball pin; 32 – ball pin bearing; 33 – ball pin; 34 – ball pin body; 35 – suspension strut rod; 36 – outer body of the upper support; 37 – inner body of the upper support; 38 – upper support bearing; 39 – rubber element of the upper support; 40 – travel limiter of the upper support; 41 – protective cap of the upper support
The main element of the suspension is a telescopic, hydraulic shock absorber strut 9 (Fig. 4.1), the lower part of which is connected to the steering knuckle 13 with two bolts. The upper bolt 11, passing through the oval hole of the strut bracket, has an eccentric collar and an eccentric washer 10. When the upper bolt is turned, the camber of the front wheels changes.
The following are installed on the telescopic rack: a coil spring 5, a polyurethane foam buffer 3 compression strokes, as well as the upper support 1 of the rack assembled with a bearing 38.
Rice. 4.2. Telescopic stand: 1 – compression valve body; 2 – compression valve discs; 3 – throttle disk of the compression valve; 4 – compression valve plate; 5 – compression valve spring; 6 – compression valve cage; 7 – recoil valve nut; 8 – recoil valve spring; 9 – recoil valve plate; 10 – recoil valve discs; 11 – throttle disk of the recoil valve; 12 – piston; 13 – bypass valve plate; 14 – bypass valve spring; 15 – plunger; 16 – plunger spring; 17 – rod guide bushing with a fluoroplastic layer; 18 – guide bushing cage; 19 – sealing ring of the rack housing; 20 – rod seal; 21 – oil seal cage; 22 – gasket of the rod protective ring; 23 – rod protective ring; 24 – nut of the strut body; 25 – compression buffer support; 26 – rod; 27 – spring cup; 28 – rotary lever; 29 – rod limit sleeve; 30 – rack body; 31 – cylinder; 32 – drain tube
The upper support is secured with three self-locking nuts to the body mudguard strut. Due to its elasticity, the support ensures that the strut “swings” during suspension movements and dampens high-frequency vibrations. A bearing built into it allows the rack to turn along with the steered wheels. Parts of a telescopic hydraulic shock absorber, shown in Fig. 1, are mounted in the strut housing. 4.2.
A hydraulic recoil stroke buffer is installed in the upper part of the cylinder, consisting of a plunger 15 and a spring 16. It limits the movement of the rod during the recoil stroke.
The lower part of the steering knuckle 13 (see Fig. 4.1) is connected by a ball joint 21 to the wishbone 22 of the suspension. Braking and traction forces are perceived by longitudinal braces 29, which are connected through rubber-metal hinges to transverse arms 22 and brackets 30. At the junction of the brace with the lever and bracket, adjusting washers 23 are installed, which adjust the longitudinal inclination of the turning axis.
A double-row angular contact bearing 20 of a closed type is mounted in the steering knuckle, on the inner rings of which the wheel hub is mounted with interference. The bearing is tightened with a nut on shank 18 of the outer wheel drive joint housing and is not adjustable. All front and rear wheel hub nuts are the same and have right-hand threads.
The anti-roll bar is a bar 25, the knees of which are connected to the transverse arms 22 of the suspension through struts 24 with rubber and rubber-metal hinges. The middle (torsion) part of the rod is attached to the body with brackets 27 through rubber pads.
Front axle
The front axle has an independent telescopic suspension, which uses both hydraulic shock absorbers and coil springs. The wishbone is the lower one with braces. The chassis is equipped with a stabilizer bar. The suspension device of the VAZ 2109 is almost identical to that of the VAZ models 2108, 21099.
Components and parts of the front axle chassis
The front axle of the VAZ 2109 is perhaps the most complex element of the chassis, this is due to the fact that the car’s transmission is front-wheel drive, but the number of main components in its structure is not so large. This:
- Strut with shock absorbers;
- Rounded fist;
- Cross arm;
- Stretch marks;
- Mounting units for the chassis to the body and transmission;
Description of the front suspension design
The chassis of the front axle of the VAZ 2109 contains quite a lot of elements, but everything is typical for cars of this class and its design has something in common with many cars of the same type. The main part is a telescopic stand with a hydraulic shock absorber. A coil spring with a stroke buffer is installed on top of the hydraulic cylinder. The upper support is also made of polyurethane and ensures the rack swings and vibration damping. The device for fastening the rack to the body (with three bolts) allows you to dampen vibrations. There is also a ball bearing inside the support, which ensures that the stand rotates together with the wheel. At the bottom of the steering knuckle there is a ball joint for connection with the lower suspension arm.
To compensate for the forces, there are stretchers with rubber-metal hinges. To install the wheel hub, a double-row thrust bearing is mounted in the steering knuckle. The hub is secured with one bolt. The suspension device also includes a stabilizer; it is connected to the lower suspension arms through struts with rubber hinges.
Replacing silent blocks in the front suspension
Chassis front and rear suspension VAZ 2110 2111 2112 Removing the lever and extension of the front suspension VAZ 2110 2111 2112
Now let’s talk about how to replace the silent blocks of the front levers of the VAZ-2109. For this:
- We hang up the front wheel and remove it;
- Unscrew the fastening of the lever to the ball joint;
- Unscrew the nut securing the stabilizer link and remove it from the lever;
- Loosen the fastening of the lever to the body bracket and remove it from the car;
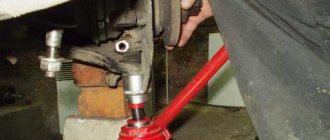
- The silent block of the front lever of the VAZ-2109 can be removed in several ways - burn it out, knock it out or press it out with a puller or a vice;
- We prepare the hinge seat - clean it of rust and rubber residues with a file. Afterwards, generously lubricate it with soapy water;
- We make a small chamfer on the silent block and center it in the eye of the lever;
- We do the pressing using a vice. We install the lever with the silent block between the jaws of the vice, align the position of the hinge relative to the hole, and then slowly tighten the vice, while periodically checking whether the hinge fits evenly.
- After the silent block bushing rests against the jaws of the vice on both sides, remove the lever and finally seat the hinge in place;
After that, we put the lever on the car. We carry out a similar operation on the other side of the front of the car. After all work, check the tightness of the fasteners. Even if you do all the work yourself, you can complete it in 1 day.
Visual fault diagnosis
Among the methods for identifying faults, the visual method is good because it allows you to identify minor damage to parts long before they lead to a serious breakdown. In this case, emergency repairs to the front suspension will not be required, and most importantly, there will be no risk of creating an emergency situation.
It is better to inspect the chassis parts of the VAZ 21099 on a clear sunny day. If this is not possible, you should prepare a powerful flashlight. In addition, it is necessary to have a rag and a brush with soft bristles in advance to wipe off dust and dirt from the surfaces being inspected.
- First, drive the car onto a lift or pit. If this is not possible, raise the front of the car with a jack. Don't forget to put the car on the handbrake and support the rear wheels.
- For convenience, remove the front wheels.
- Carefully inspect the protective covers of constant velocity joints, ball joints, as well as stabilizer pads and silent blocks. If ruptures, cracks or one-sided bulging of rubber are detected, replace the damaged parts.
- Inspect metal parts for cracks and bends. If problems are found, supply new spare parts.
- Check for oil leaks on the struts. If there are any, replace the shock absorbers or entire struts.
- Inspect the compression buffer and spring for cracks. Replace them if necessary.
- Measure the distance A (in the above diagram) between the support plate and the front suspension arm. If, when rocking the travel distance, the distance increases by 0.8 millimeters or more, replace the ball joint.
- Rock the hub left and right and up and down. If it sways and a knock is heard, the car needs to be repaired and the wheel bearing will have to be replaced.
Replacing suspension silent blocks
If no damage is found, don't feel like you wasted your time. Such an inspection must be carried out every 5,000 kilometers. It will help you avoid serious problems while driving.
If you don’t want to waste time, do a little tuning - install a front stabilizer from a Lada Priora during diagnostics. It is perfect for the VAZ 21099. With it, the chassis of your car will become more rigid, but the car’s stability at high speeds will improve.
Where to start repairing the chassis? That's right, by inspecting all the components))) After the inspection, I determined what I would need to buy for repairs and made a list:
1) Steering rod puller and ball. supports 2108 zinc AK-2 = 234 RUR - decided not to take it yet 2) Device for pressing in torque rod bushings VAZ AVTOM = 146 RUR 3) CV joint boot 2108-09, 2170 internal and external BRT (set - lubricant + clamp) = 177+ 172r 4) Hinge extension 2109-10 chamomile (set 4 pcs) BRT = 155r 5) Silent block of lever VAZ 2108-10 in pack. (set of 2 pcs) boost. Savy-Sport = 117 RUR 6) Stretch bracket (crab) 2108-099 Chance+ (set of 2 pieces) = 213 RUR - I found out that these crabs are bad, they burst quickly, as soon as I have the money I’ll take good ones (mine are still intact, they look like) 7) Bushings stabilizer VAZ-2108 (set of 2 pieces) Poleur. yellow SY-20 comfort = 60r Stabilizer strut 2108 (eggs) reinforced. SEVI = 195r 9) Lubricants (solidol/litol), fastening bolts (if needed) and so on = ?r
What does flat mean when it comes to a car?
An electromagnetic car suspension has been developed – Car Suspension Electromagnet
The concept of “wheel alignment” implies three parameters: camber, toe and caster of wheels.
- Toe refers to the angle between the axis of symmetry of the car and the plane of the wheel. Toe-in is called positive when the wheels are “turned” inward, so to speak, “clumsying.” With negative toe-in, the wheels seem to move apart.
- The angle between the vertical plane and the plane of the wheel is called camber. The camber is positive when the wheels are arranged like a house - the upper part is inclined towards the inside.
- Caster is the pitch angle that is formed when the steering axis is projected onto the longitudinal plane of the car axis.
A true specialist, who has seen sports cars more than once, will first of all ask, for what purpose is the car needed?
- It’s one thing if it’s a so-called “ride” - such cars have become especially popular recently. In this case, it remains to be seen what the specifics of these amateur competitions are - will it be circuit or rally racing, track or sprint. Among other things, you need to decide on the surface - will it be asphalt, soil or snow.
- It’s a completely different matter if the car is used for daily, albeit dynamic, driving around the city. In the first case, more radical tuning options are needed, and everything else, for example, comfort and safety of rubber, becomes secondary.
Let's consider the second option, which assumes that the "eight" will be used every day and it is planned to get maximum pleasure from driving it
In this case, a real specialist pays attention to the castr - the longitudinal angle of inclination. Manufacturers recommend setting the caster at +1 degree
And although we need to listen to the opinions of manufacturers, we will shift this parameter to a value of +3 degrees. This will ensure that the vehicle moves as straight as possible. It will be so stable on the road that the driver can calmly let go of the steering wheel to, say, smoke, without having to be afraid that the car will pull to the side. It should be noted that some athletes go even further, setting the caster to +5 degrees. Setting this parameter becomes possible thanks to changes in the body in relation to the mounting points of the engine and gearbox. But it is always necessary to be guided by common sense, which suggests that such an enhanced parameter will lead to regular replacements of “grenades”. Such a car will not bring much pleasure to every car owner. Thus, caster +3 degrees for a sporty urban G8 is the best option.
It's a completely different matter when you own a Mercedes. On Mercs, the longitudinal inclination is set within 10-12 degrees, because this brand has always strived for straight-line cruising movement thanks to rear-wheel drive.
Experts also pay attention to wheel alignment. The standard option for the “eight” is “zero” with a tolerance of 30 minutes in any direction
In order for the car to behave better when cornering, some suggest turning the camber down to minus for up to 45 minutes. It is important to remember that we are talking about minutes, not degrees!
- Turning to the experience of athletes, we can recall circuit cars in which the camber of the wheels is a complete “house”. A 6-7 degree camber allows you to set the trajectory much better, but in this case the tires will only be enough for one race.
- However, not everyone and not always needs such extreme sports. Also, we must not forget about one more negative point - during intense acceleration, the drive wheels turn inward. In order to understand in practice how this works, you can try riding a motorcycle or even a bicycle, slightly tilting the vehicle. It is not difficult to understand that when tilted, a two-wheeled vehicle always tends to turn in the direction of its tilt. To reduce this “wrapping” effect, it is necessary to adjust one more parameter - toe. The standard value is zero, but in order to compensate for negative camber, positive toe-in of 0.5-1 mm is necessary.
Signs of wear or damage to the undercarriage
- Leaks under the car in the area where suspension parts are located. Cars of the VAZ 2109 model, as a rule, already have a long service life (and the design of the hydraulic cylinders is designed for a certain resource, which they may have exhausted a long time ago). There is a high probability that the oil seal or shock absorber rod mirror may wear out, so pay attention to possible leakage of hydraulic fluid (in principle, you need to be careful about any leaks from the car);
- Knock when driving. Yawing on the road is the most common sign of trouble. As a rule, this indicates wear or loosening of the components; carefully inspect the suspension, or best of all, contact a workshop;
- When acting on the suspension (try pressing on the hood or, conversely, lifting your car, experienced auto mechanics, when first getting acquainted with passenger cars, not only the VAZ 2109, roughly assess the condition of the chassis), the suspension does not provide sufficient resistance - the first sign of malfunction hydraulic cylinders. There can be many reasons - insufficient amount of fluid, leakage due to wear of the seals, fluoroplastic bushing, wear of the rod, malfunction of the valve mechanism. It is necessary to replace worn parts, replenish the oil in the cylinders, or eliminate the malfunction of the valve mechanism;
- When driving (especially on uneven roads), hard shocks with a characteristic sound occasionally appear, which can even be felt on the steering (the so-called “breakdown” of the suspension). The appearance of this symptom indicates that the springs (most often the rear chassis) have lost their properties due to metal fatigue; hydraulic shock absorbers may also not work properly. In any case, it is necessary to inspect the structure of your suspension and make repairs.
We have not yet mentioned the uneven wear of tires - if your wheels are adjusted for wheel alignment and balanced, and the CV joints (since the VAZ 2109 is assembled according to the front-wheel drive scheme) work correctly, then the reason is the chassis, there is a breakdown somewhere, unnecessary backlash or wear.
In conclusion, it should be noted that although the chassis of the VAZ 2109 is not subject to such overloads as a similar truck unit, its design is still quite complex and requires constant attention; fortunately, the suspension design allows for maintenance and repair without large material costs.
Rate the usefulness of the article!
- Why do brake pads squeak when braking and what to do about it
- Replacing engine mounts on VAZ and other cars
- Car rental: what you need to know when choosing
- What does the braking distance depend on and what formula can it be calculated by?
- How well do you understand car emblems?
- How to remove the outer CV joint and replace a torn boot
- How to independently replace the internal grenade on VAZ cars
- Wheels for rotating the car in place 360 degrees
- In 3 years, diesel engines will become a luxury
- Review of the most expensive Hyundai Solaris ever
- Test drive Lamborghini Huracan from Mikhail Petrovsky
Rear suspension VAZ 2109 device, diagram, replacement
A fairly large number of VAZ-2109 owners prefer to repair their car themselves, since the design of the “nine” is distinguished by its simplicity. But before you start working, you must first find the cause of the problem, and, of course, know the sequence of actions.
VAZ-2109 - what the rear suspension consists of
All of the above fully applies to the chassis. Neither the front nor the rear suspensions are complex in design. Accordingly, repairs and troubleshooting should not cause any problems. In this article we will look at the design features of the rear suspension of the VAZ-2109.
First, let's list its elements:
- hub;
- spring and its cups - lower and upper;
- lever mounting bracket;
- shock absorbers and their cushions;
- silent blocks;
- compression progress buffer;
- lever connector;
- rubber gasket;
- beam arm and connector;
- stock;
- spacer;
- support washer.
Generally speaking, the rear suspension of the “nine” is independent, torsion bar. Due to the not very high quality of domestic roads, especially in the outback, it is the chassis that bears the most serious load. Every hole or pothole that a wheel hits is a very noticeable blow to the suspension. You can understand that there are some problems here by hearing. In this case, you will hear an extraneous knock. It can be either deaf or voiced. Experienced professionals use it to make a “diagnosis”, and with very high accuracy. Accordingly, as soon as you hear that something is knocking in the suspension, you should immediately start looking for the problem.
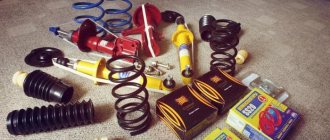
By the way, many car owners strive to improve this component of the car. As a rule, the most common tuning is spacers, which increase the already fairly decent ground clearance. Stock springs and shock absorbers are also often replaced. There are some nuances here. If you change springs, make sure that they have the same stiffness front and rear. However, in this case there is still one exception. The springs at the front may be softer than at the rear, but not vice versa.
When doing such work, you should remember that we are talking about your safety. Accordingly, all installed parts must be of high quality. Products from well-known brands cannot be cheap - otherwise they are fakes, the installation of which can easily result in loss of control of the car while driving.
Another point - when tuning the rear suspension, you don’t need to make it too hard or too soft. In both the first and second cases, this will only bring discomfort to driving. Also, don't lift up the rear too much. It is quite possible that someone really likes this appearance. However, such a design change significantly worsens handling.
Content
The chassis of a VAZ 2109 car; all elements responsible for the mutual action of the car’s wheels and its body part fit this definition. This includes the suspension part, axles and wheels. In what cases is it worth paying attention to the chassis of the 2109 and starting to repair it?
- When the car's controllability decreases
- If there is unusual noise from the shock absorbers or brake system
- Fluid leaking (brake fluid or other)
If there is a separate indicator or all of them together, it is necessary to begin diagnosing the 2109 chassis and take corrective action.
To prevent incorrect operation of the VAZ chassis, the best means is still timely maintenance and diagnostics. Such procedures will help to replace individual parts of the chassis in a timely manner and avoid breakdown of the system as a whole. Elements requiring periodic diagnostics:
- All spirals, chassis springs of car 2109
- Support elements and holders
- Suspension and brake system
- Clutch
- It is also important to monitor the performance of working fluids.
Chassis repair is the replacement of old, poorly functioning elements. In this case, restoration of old parts is not provided in order to avoid more severe consequences.
VAZ 2109 front suspension diagram
The front suspension of the VAZ 2109 is an independent element of the car, which allows each wheel to work separately from the other. This moment is a very important emphasis in driving a car. Due to this, the VAZ 2109 handles better and feels the road, allowing you to perform complex maneuvers and elements of extreme driving.
The main element of the front suspension of the VAZ 2109 is a telescopic shock absorber strut. There are racks:
- Buttered ones are soft and comfortable. A good choice for bad roads. But on the highway you will be thrown around at high speed.
- Gas - rigid racks. A good choice for highways, highways and roads without holes and potholes. With such struts, the car holds the road well at high speeds.
- Gas-oil ones are something between the two previous racks. Usually they install just such racks, since they are not too hard and soft.
The racks are equipped with coiled springs for rigidity, which also determines your comfort. The top of the strut is secured with 3 bolts along with a support bearing that allows the strut to turn with the car's wheels.
- Shock absorber strut.
- Rod bracket.
- Traction.
- Front lever.
- Spherical bearing.
- Rotary cam.
- Front stabilizer
- Stabilizer bar
The next most important mechanism in the front suspension is the steering cam. Its lower part is connected to a ball joint, which allows us to rotate our mechanism. The top of the steering cam is connected by two bolts to the bottom of the strut. The top bolt allows you to adjust the camber. A thrust bearing is attached to the rotary cam itself, on which the hub is in turn attached.
The anti-roll bar is a rod, which is attached to the car body through silent blocks using a bracket (popularly called crabs), and on the other side to the lower suspension arm.
Front suspension of VAZ 2109 diagram.
- Upper suspension strut support.
- Top cup.
- Progress buffer.
- Buffer support.
- Coil spring.
- Lower spring support cup.
- Ball traction control.
- Rotary lever.
- Shock absorber strut.
- Washer.
- Adjustment bolt.
- Rack bracket.
- The cam is rotary.
- Protective casing.
- Brake disk.
- Retaining ring.
- Hub cap.
- Grenade.
- Guide pin.
- Wheel bearing.
- Ball bearing.
- Lever arm.
- Washers.
- Front stabilizer.
- Stabilizer bar.
- Stabilizer silent block.
- Internal rod bracket.
- Crab. (outer rod bracket)
- Lever stretch.
- Bracket for fastening the brace.
- Silent block of the lever hinge.
- Suspension spacer.
- Stock.
- The upper support housing is external.
- Internal upper support housing.
- Upper support bearing.
- Rubber element for upper support.
- Travel limiter.
- Protective cap.
- Extension joint bushing.
- Stretch joint cushion.
- Washers.
- Stabilizer link joint.
- Rear hinge.
- Ball joint housing.
- Ball bearing.
- Ball pin.
- Protective cover.
Replacing rubber joints on the rear suspension
More on how things are changing. First, let's look at how to replace the rear silent blocks of a VAZ-2109. To perform the operation you will need:
- Inspection hole;
- Jacks;
- Tools (key sets, hammer, attachments);
- Bench vice;
- Mount;
- Spring ties;
- Soap solution;
- Pullers for rubber joints;
First, the silent blocks of the rear beam of the VAZ-2109 are replaced. For this:
- We put the car in a pit, jack up the rear on one side, remove the wheel;
- Unscrew the nut of the bolt securing the beam to the body, remove the bolt;
- Using a pry bar, we press the beam down to remove it from the bracket, fix it in this position (by installing a wooden spacer between the beam and the body);
- Using a hammer, carefully knock out the worn hinge;
- Using a device (a long bolt with a nut, two wide washers and a piece of pipe), we press in a new element, having previously generously lubricated the seat and the hinge itself with soapy water;
- We install the beam into the bracket and fix it with a fastening bolt;
After this, the silent blocks of the VAZ-2109 rear pillar are replaced:
- Unscrew the fastening of the rack to the body (top) and beam (bottom);
- We press the beam down so that the stand goes down and the spring relaxes;
- Remove the stand;
- Using a silent block remover, remove the hinge from the rack body (bottom);
- We press in a new silent block using a vice;
- We tighten the springs with ties, then put the stand in place and secure it;
- Remove the ties;
Similar operations are carried out on the other side of the rear of the car. After assembly, you should check the tightness of all fasteners that have become loose. This should be done again after a couple of days of using the car.
Description of design
The front suspension is independent, with telescopic hydraulic shock absorbers, coil springs, lower wishbones with braces and a stabilizer bar.
The basis of the suspension is a telescopic hydraulic shock absorber strut. Its lower part is connected to the steering knuckle with two bolts. The top bolt that goes through the hole in the strut bracket has an eccentric collar and an eccentric washer. By turning this bolt, the camber of the front wheel is adjusted.
The telescopic strut is equipped with: a coil spring, a polyurethane foam compression stroke buffer, as well as an upper strut support assembly with a bearing.
The upper support is secured with three self-locking nuts to the body mudguard strut. Due to its elasticity, the support allows the rack to swing during suspension movements and dampens high-frequency vibrations. A bearing pressed into it allows the rack to turn along with the steered wheels.
Parts of a telescopic hydraulic shock absorber are mounted in the strut housing. If it fails, a repair cartridge can be installed in the rack housing.
The body of the VAZ-2108 rack is slightly longer than the VAZ-2110, so using an externally similar cartridge from the VAZ-2110 is impossible.
The lower part of the steering knuckle is connected to the lower suspension arm through a ball joint. The support is secured with two “blind” bolts. When unscrewing these bolts, be careful: with significant force they often break, so before disassembling, tap their heads in the axial direction.
Braking and traction forces are perceived by longitudinal braces connected through rubber-metal hinges to the lower arms and brackets. At the connection points (at both ends of the brace), adjusting washers are installed for the longitudinal inclination of the steering axis.
A double-row angular contact ball bearing of a closed type is secured in the steering knuckle with two retaining rings. The wheel hub is installed with tension in its inner rings. The bearing is tightened with a nut on the shank of the outer wheel drive joint housing and is not adjusted during operation. The wheel hub nuts are the same, with right-hand threads.
Anti-roll bar - spring steel rod. The ends of the stabilizer are connected to the lower suspension arms through struts with rubber-metal hinges. The middle part of the rod is attached to the body with brackets through rubber pads.
About malfunctions 2109.
Visual factors that indicate the need to repair the VAZ chassis are stains on the shock absorbers. In this case, it is necessary to replace the shock absorbers with new ones. The malfunction of the constituent elements (discs, valves, bushings and springs) will be confirmed by low return during compression.
Seals.
It is necessary to replace the rubber elements of the system if an unpleasant creaking or periodic knocking occurs in the chassis. It is better to change elements in pairs. After all, when one element fails, more pressure is placed on the other, which contributes to its faster wear. Ball joint 2109 is one of the weakest points of the suspension. In order to identify the causes of the malfunction of this part, it is necessary to remove the wheel, as well as the plugs. Depth measurements should provide indicators of eleven point eight millimeters. Otherwise, it is necessary to replace the supporting part. This will help prevent the ball from flying out completely if there is a strong impact on the upper part of the body. Here, it is especially important to pay attention to the end of the lever and the middle of the supporting part, they are especially weak.
Bearings.
A wheel wedge indicates “dead” bearings or a damaged VAZ hub. These elements must be replaced every 130 thousand km. You should not wait until these elements are completely worn out to extend the life of your chassis. The main symptoms of this malfunction are; additional noise when cornering and braking.
Replacement is also carried out in pairs - on the front and rear wheels, to reduce the frequency of replacing elements. For cars with rear-wheel drive, it is necessary to lubricate and change the rubber hub holders, with the replacement of brake discs - every 40 thousand km. For this type of car, if fluid gets on the brake discs, you need to pay attention to the hubs. Cars with front-wheel drive do not require periodic lubrication of bearings.
Replace bearings in a specially prepared and clean place using a clean tool. Even a small amount of dirt and sand tends to cause the element to break down and cause premature damage. To increase the service life of bearings, it is important to prevent dust from entering it. We use the lubricant recommended by the manufacturer. It is better not to save money to maintain long-term functioning. It is important not to overdo it with efforts on the surface (no hammer blows, etc.). If the hub assembly moves, it will be necessary to change the bearing again.
The sealing surface also requires careful attention. Sharp tools can break the seal of the element. Corrosion and moisture entering the element contribute to its failure. Depending on the make and model of the car, brake repairs vary. For general instructions on this type of work, you must refer to the instructions (for a specific model).
Suspension and clutch.
The front suspension is always the main control element of the car. She primarily reacts to the condition of the road. Elements of the front chassis periodically fail. If the upper arm is faulty, then the entire axle must be replaced (upper and lower arms). If the suspension knocks, it means that the structure of the seals has been damaged. The issue can only be resolved by completely replacing the rubber components. The clutch is checked with the engine off. It is necessary to press the pedal several times to detect extraneous sounds. If the data is available, then this is a direct signal about the need for repairs. The pedal travel (from the floor to the state, without pressure) should be one hundred forty-six millimeters. The smoothness of the pedal stroke is also a significant indicator of the proper operation of the clutch. If increased pressure on the pedal is required, repair is required. If, when you engage gear R, an unpleasant sound occurs, the clutch discs are faulty.
Carry out timely diagnostics of your car to prevent serious damage to the chassis. Timely maintenance will ensure the safety of you and your passengers.
Rear suspension of VAZ 2109
The rear suspension of the VAZ 2109 and its modifications is quite simple. Its design is torsion-lever dependent, that is, the rear wheels are rigidly connected by a beam, which is the main part of the rear suspension. It is on it that all other structural elements are installed. The beam is attached to the car body using rubber-metal hinges, which ensure the movement of the suspension in the vertical plane. This is the oldest type of pendant.
The main design elements of the rear suspension of the VAZ 2109
| 1 | Rear wheel hub |
| 2 | Rear suspension arm |
| 3 | Suspension arm mounting bracket |
| 4 | Rubber bushing for lever joint |
| 5 | Arm joint spacer |
| 6 | Rear suspension arm mounting bolt |
| 7 | Body bracket |
| 8 | Support washer for fastening the shock absorber rod |
| 9 | Upper suspension spring support |
| 10 | Spacer |
| 11 | Suspension spring insulating gasket |
| 12 | Rear suspension spring |
| 13 | Shock absorber rod mounting pads |
| 14 | Compression Progress Buffer |
| 15 | Shock absorber rod |
| 16 | Shock Absorber Protective Cover |
| 17 | Lower suspension spring support cup |
| 18 | Shock absorber |
| 19 | Lever connector |
| 20 | Hub axle |
| 21 | Cap |
| 22 | Wheel hub nut |
| 23 | Sealing ring |
| 24 | Bearing washer |
| 25 | Wheel bearing |
| 26 | Brake shield |
| 27 | Retaining ring |
| 28 | Mud deflector |
| 29 | Control arm flange |
| 30 | Shock absorber bushing |
| 31 | Lever bracket with shock absorber mounting eye |
| 32 | Rubber-metal suspension arm joint |
Looking at the figure, we can distinguish three main components of the rear suspension:
- beam with levers and fastenings
- hydraulic shock absorbers with springs
- hubs
As you can see, the main element is the beam. Levers are welded to it, and brackets with eyes for attaching hydraulic shock absorbers are welded to them. The shock absorbers are fastened with one bolt in the eye of the beam bracket, and are connected to the body by fixing a nut on the shock absorber rod through bushings.
Springs are installed on shock absorbers. For the VAZ 2109 there are two types of springs: class A (hard and high) and class B (less stiff and lower). It is advisable that the car has springs of the same class installed. However, it is allowed to install class A springs on the front suspension, and class B springs on the rear suspension. If you often transport heavy loads in the trunk or in the back seat, then it is better to install class A springs on the rear suspension shock absorbers. This will allow the car to “squat” less when well loaded. It is worth noting that it is prohibited to use class A springs at the front and class B at the rear.
Hubs are attached to the flanges of the beam using four bolts, to which the rear wheels of the car are subsequently attached. The rear suspension hub of the VAZ 2109 has a double-row angular contact sliding bearing, which allows the rear wheels to rotate on their axis.
What problems can there be and how to fix them
The condition of the front suspension should be monitored regularly. The most common damage is abrasion of the joint covers. These damages are classified as mechanical. Among the malfunctions of this element of the car, unevenness of the lever located on the suspension or on the stabilizer bar is noted. This may result in incorrect and inaccurate operation. In all these cases, you need to check the parts and then simply replace them with new ones.
Among the malfunctions there may be minor ones that should be eliminated using a regular repair kit. For example, loosening the bolts of the stabilizer bar or the nut of the support. You should tighten them tighter.
If you hear the suspension making sounds (knocking, creaking), then this indicates more serious damage. First you need to determine where the sound is coming from. You can use a jack for this. Rock the wheel in a vertical plane; if there is a knock in the center of the wheel, then most likely there is a fairly large gap in the bearing. It is better not to change the bearing yourself, as it can be destroyed. It is better to contact a car service center that has special equipment for these purposes.
We draw conclusions: it is better to diagnose and prevent your car and protect yourself while driving than to invest in tuning.
Rear axle
- It is also necessary to adjust the toe and camber here. It is assumed that enough money has been allocated for tuning the car. This means that the rear drum brakes have been replaced by disc brakes.
- It is also possible to install a kind of stand designed to adjust the camber of the wheels. This makes it possible to adjust parameters on the rear axle over a much larger range than can be done on the front. So, the camber can reach -1.5 degrees.
- The rear axle is subject to the same forces as the front. This means that wheel camber will be compensated in the same way as in the case of the front axle - toe, for which its value is set within +2-4 mm.
As an example for comparison, we can take BMW models with traditional rear-wheel drive. The camber of the rear axle is -2.5 degrees, and the toe-in as a compensating factor is +2 mm.
Judging by such a comparison, the improved “eight” will “run” more predictably, quickly, swiftly, even sharply. The car strictly adheres to the required trajectory, the main thing is to ensure reliable adhesion of the wheels to the asphalt. But still there is one “but”...
Firstly, the owner of the G8 now requires greater concentration and attention. In serial VAZ-2108, wheel alignment is adjusted every 10-15 km under normal operating conditions, without replacing suspension parts or special shocks
The maximum mileage between settings in our case is 10 thousand km. Of course, you can drive longer, but we must not forget that these settings are on the verge of common sense. It is also necessary to take into account the condition of domestic roads, which inevitably affect the settings. All this affects the behavior of the car, as well as the condition of the tires. Thus, a strong impact on a hatch or curb stone can lead to a change in caster by 10 degrees and toe by 5 millimeters. This will make it more difficult to turn the steering wheel in place, and the reason for this will be adjustments made without specialists. The consequence of changes in toe and caster can be “oversteer” - the car’s independent “diving” into a turn. Among other things, the above-described settings reduce the vehicle's run-out - when the clutch is disengaged, due to inertia, it travels a shorter distance, unlike the production model. All this means that timely maintenance and checking the wheel alignment settings will extend the life of your car.
- Do-it-yourself tuning of VAZ-2109 and VAZ-2108
- Tuning VAZ 21099 comparison with music
- Different approaches to tuning VAZ 2109 and 2108
- Carbon car wrap
How to check the health of a car's suspension
Perhaps the most critical component after the steering and braking system that influences safe operation is the vehicle's chassis. Therefore, it is necessary to constantly monitor its condition. Of course, in a passenger car, the wear of this unit is not as severe as in a truck, but most often (and VAZ cars are no exception) designers plan for the stability and durability of the suspension scheme taking into account the soft mode.
For a qualified conclusion that the suspension is in good or faulty condition, it is better to contact a service station. where they will be able to fully diagnose the condition of your car at special stands, and the technicians, for whom the suspension diagram has no secrets, will be able to accurately identify a breakdown or minor malfunction. But still, even without knowing the device thoroughly, you need to know the most important symptoms that something is wrong with the machine. It is advisable to pay close attention to the slightest changes in the behavior of the car on the road, which may be symptoms of faulty bridges.
