Remaking the panel of Priora 1 into Priora 2
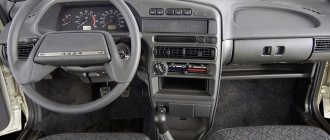
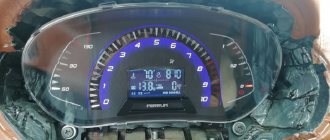
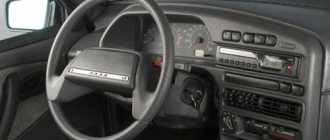
Many owners of Lada Priora 1 cars update the appearance and decorative elements of the interior by installing parts from Lada Priora 2. We also did not ignore the instrument panel , so we present to your attention a set of parts with which you can convert the old panel into the panel of a new one sample.
All parts are factory and suitable for installation on the first Priora. During installation, minor modifications to some seats may be required. Please note that the installation process is somewhat labor-intensive.
The price is for a set that includes:
- Instrument panel upper trim,
- New-style central console (glossy) with emergency warning button,
- The upper wall of the glove compartment (differs from the old one in the presence of a hole for USB),
- Air duct with an intermediate nozzle for joining with the central nozzle of Priora 2,
- 4 air ducts
- Special metal brackets that attach the “central visor” to the “top trim”
The instrument panel of the new model does not include an ashtray, which in the first modification was located in the lower part, so if necessary, you can purchase a portable cylindrical ashtray from a Renault car, Lada Granta (see figure below)
Panel (torpedo) for Lada Priora 2 assembled (standard+)
Front panel (torpedo) assembly in the “Norma+” configuration for LADA Priora cars.
Front panel (torpedo) assembly in the “Norma+” configuration for LADA Priora cars.
Equipment:
- Mounting block - 1 pc.;
- Under-panel wiring harness - 1 pc.;
- Instrument panel - 1 pc.;
- Instrument cluster - 1 pc.;
- Heater control unit - 1 pc.;
- Glove compartment lid - 1 pc.;
- Center console assembly
- Light control unit
The online auto market CAR-TEAM.RU offers to place an order for products from our catalog, from which you can buy “Panel (torpedo) for Lada Priora 2 assembled (norm+)” at the most affordable price.
“Panel (torpedo) for Lada Priora 2 assembled (norm+)” was developed using the latest technologies and is of high quality.
“Panel (torpedo) assembly for Lada Priora 2 (norm+)” has a long service life, however, like many automotive products, it needs periodic replacement.
to buy “Panel (torpedo) for Lada Priora 2 assembled (norm+)” in the online car market CAR-TEAM.RU . Through the “Cart” you can place an order for any purchased product in just a few simple steps.
You can also place an order for “Panel (torpedo) for Lada Priora 2 assembled (norm+)” at any time by simply calling us at the number listed on the website. We will arrange delivery of the goods to the address you specified.
CAR-TEAM.RU provides a guarantee for products from its catalog. The products of our online car market have the necessary quality certificates. “Panel (torpedo) assembly for Lada Priora 2 (norm+)” will work properly for its intended purpose.
For any additional questions, you can contact our managers at the phone number indicated in the header of the site. We will advise you on any chosen product and provide the necessary information.
Source
Description
Many owners of Lada Priora 1 cars update the appearance and decorative elements of the interior by installing parts from Lada Priora 2. We also did not ignore the instrument panel , so we present to your attention a set of parts with which you can convert the old panel into the panel of a new one sample
Installed to replace the old panel trim.
Completeness:
— Center console assembly (emergency warning button, compartment for buttons, plug)
— Air ducts (central with guides, side nozzles — 2 pcs.)
Hi all! The winter was long, and we had a lot of time to think about our future plans. Something is already on the schedule;) Spring is gaining momentum, the season is coming =) Today about one of the future changes. On the agenda is “A set of parts for the Priora 2 instrument panel for the conversion of Priora 1 to Priora 2.”
Why a kit and not a finished torpedo?
There are several “buts” that significantly influenced my choice.
1)
The most important! Previously, a torpedo of the first edition was already purchased in excellent condition, minimal mileage and manufactured in 2013 (under the Panasonic climate). Bought for reasonable money + several spare parts were delivered at once. At the time of the search it was like this:
Before the purchase, it was sold with a black fuse box cover and a dark glove box...
They reduced the price and added gray parts from the 10th year. Now I bought them a replacement and black ones!
2)
It was difficult to find a Priora 2 panel in the desired condition and configuration. The item is popular and so are the prices! Plus, all the offers are far from my city, delivery costs about 1500-2000 rubles. And don’t forget about the risk of damage during transportation... Ps: the first one arrived without any jambs.
3)
“A set of parts for the Priora 2 instrument panel for the conversion of Priora 1 to Priora 2” are completely new, factory parts and a guarantee of an almost perfect appearance. Delivery from the store. Relatively inexpensive delivery due to its smaller size and volumetric weight (an important criterion for assessing the cost of transporting TC). In addition, it was possible to purchase other necessary items in one order.
So far I don’t see any significant downsides to such a purchase. There are still some issues with mounting it on the frame and removing the old cover. I would like to do it according to the factory and no worse =) In any case, it can be solved!
I’ll add (03/13/2016) Additional problems have come to light! The central part of the buildings (where the instruments and radio are) is different and 100% there will be problems with installing the Priora 2 tunnel, inserting the upper air ducts, and the upper and middle fastening of the console trim. As sad as it may be, “refinement with a file” is planned...! Previously, I thought the frames were completely identical and, according to the comments of the stores, they should be 1 in 1.
About the prerequisites that led to thoughts about the Prioro Salon.
Anyone in the know knows about the already installed Euro torpedo to replace the S.O. torpedo. Selection: Part 1 Other parts: Frame, Differences in wiring, Buttons, Assembly nuances, Installation of gear motor 2170., Pads and wiring, In the car
During the process of alterations, I answered a large number of questions on the topic of choice and I will say that now my position has not changed. Externally, I continue to like both options; the euro is good in its own way.
Design (appearance) is the first factor that often forms the first impression of a thing. The other side of the coin is the technical features and mechanical part. According to this criterion, the Priora torpedo is ahead.
Everyone evaluates external attractiveness in their own way, there is no point in arguing here because people have different tastes, but constructive solutions can be considered more objectively.
I will describe the most important ones for me.
1)
Air flow distribution system. Now the climate control is Panasonic, the flow direction pattern does not coincide with the standard geometry of the air ducts and damper complex. For example, by turning the handle of the unit to the foot blowing position, you get a direction towards the windshield. It is not possible to use the defroster (the function of blowing dry and warm air onto the windshield).
I think it’s clear) The electronics work correctly, but the mechanical part does not match the plastic.
2)
Internal air ducts in the form of pipes.
More powerful air flow, good performance due to a minimum number of joints and losses. Compactness.
3)
Fuse box compartment. Here it is radically changed, there is more space and a huge plus - a removable lid! Convenient access to electrics thanks to a completely open space.
Installation of a panel from Priora-2 and a conflict with NVS-car shop.
I have long dreamed of installing a parpriztorpedo panel from Priora-2 in my Priora, in addition to the steering wheel and seat trims. According to the showdown, there is not much to buy for adequate money, or from a damaged car it’s a pig in a poke - I didn’t want to. And then I came across in one of the groups, on tuning for our cars, a set of panels from Priora-2, along with a console from Priora-2, a visor and everything else. The installation is complicated because it’s long, it took me 12 hours, without cookies or other power enhancers. In real life it looks like it's blowing a tower, but in the photo you don't notice much. I recommend everyone to take it, but not to NVS-carshop, I will explain in detail later, I consider their behavior unacceptable towards me.
As soon as I unpacked it, I immediately tried on the glove compartments, albeit from pre-Restyle, but there are no others yet. By the way, it even looks cool.
Installation:
There is nothing difficult except unhooking the wiring from the old console.
1) Remove the front seats. 2) We disassemble the central tunnel (by the way, it fits quite well with the Priora-2 panel). 3) Remove the glove compartment, fuse cover, air ducts, center console, instrument cluster) 4) Unclip the wiring from all the places we can see. 5) Unscrew all the screws that hold the panel, by the way, under the glove compartment, there is an iron fastener that is not visible, but also secures the panel. ATTENTION:
having seemingly snapped off everything that is possible, do not forget to disconnect the plug from the air distributor damper; it is located in the recess of the place where the instrument panel stood on its right side. 5) We take out the panel and move the air distributor from the old panel to the new one, it is not included in the kit.
And now the review itself and the conflict, if anyone is interested. For those who have a short lunch break and don’t have time to read a lot of words: NVS-car shop messed up, but the conflict was resolved positively and I’m happy with them.
For others reading later: 1. Delivery time. I paid for the order, yes, in such online stores 100% prepayment is normal, it’s still November 2, then they told me the delivery time was 2-4 days. Okay, that's okay. And the long wait began, if we omit the details, the period while I was waiting just for the shipment was a MONTH
. But there will be an important caveat here, this is not NVS’s fault; in addition to the panel, the console, the emergency button, the air duct in the face, the side air ducts, the top flap of the glove compartment, they also have an air duct in the legs of the “new model”. There was no way the factory could send it. After 12 days of waiting, it turned out that they were not receiving it from the supplier, the plant promised tomorrow. Okay, tomorrow is tomorrow. I decided not to pester Nikolai with constant questions about “when and when,” but after 7 days my patience ran out and lo and behold, they promised to pick him up “tomorrow.” Tomorrow never came to AvtoVAZ or NVS, as I later realized was the norm, although I wrote every three days - without response. And on the 30th they still sent me the panel, but without the air duct in the legs, promising to send it as soon as it arrived. Okay, I thought, I’m probably a busy person, and they stopped making air ducts when the Priors were removed from the assembly line. However, I wrote to another group, where I took the Prior-2 steering wheel, heated seats and seat trims, I won’t name names. They have this air duct there, but they don’t send it separately (I wanted to order everything from them initially, but there is no such product, just a bare frame and everything else has to be purchased separately) and now to the next point.
2. I don’t know whose fault it is, and honestly, I don’t care after the next point, but that’s not the point: My parcel arrived in a huge crate measuring 3 by 2 by 1.5 meters... It’s the size of a Jacuzzi, just a huge box! Despite the fact that the panel there occupied less than a third of the space. That is... I only got 23 delivery costs for sending fresh Tolyatti air, which, as a student, is very affordable for me, considering that I earn every penny myself. TK is making money off of us...
3. I ordered a kit with a Dummy passenger airbag, because I wanted my standard+ to look like a luxury one, but what I received was a plug. Although I paid more for the dummy (on the website there is a choice with or without the dummy). What I found out after unpacking the parcel at TC...
I immediately wrote to the group, to which I received (after some time) some sour response that this plug was a dummy, but I was wrong and they say they don’t make dummies anymore. ALTHOUGH, on their website they have the position “Airbag plug”, and there is a “dummy airbag” (I’ll probably even attach pictures). That's what he eats
I learned about the fact that they sent me a stub instead of a dummy, since they supposedly don’t make them anymore upon receipt, and not immediately, this is the attitude towards a person who makes a purchase from you for one of the most expensive goods, thank you, I’m so pleased)
By the way, I asked how these air ducts differed, to which they told me to send pictures of the old and the new, but since “tomorrow” has not yet come, I’m still waiting)
After all this, I went and installed the entire panel and my pre-restyling air duct in the legs fit without the slightest problem) After which I wrote again, asking to return the money to me for the dummy pillow and the air duct in the legs, because we all know very well that there is no point in another month , two, six months, a year, wait for this air duct. After all, tomorrow never came at NVS-carshop. To which, a few days later, they asked me for my card number, ignoring the questions to the dummy) I sent it off, and the message hung unread for almost a week. Read the outcome in UPD
Morality,
Everyone makes mistakes, we all make mistakes, even you and I while working at our jobs. But it is important, having messed up, to offer a solution to the problem so that the client is satisfied in the end. This could be a free small gift, for one acoustics manufacturer it is a free replacement of a failed defective speaker immediately in any store without examination, it is a certificate for free pizza, in case of a long delivery by courier, or even less, any pleasant gesture towards the client. This is the prestige of the company, to act nobly towards the client at a loss to oneself, I did not notice this here. This may be my one such case, but he is not alone, I have encountered similar situations in this group. If everything was fine with this group, okay, but I won’t remain silent. An angry review and a lack of desire to order more is what I have now, for all their jambs, if they resolve the issue, I’ll add about it below.
UPD:
Today the NVS company contacted me and we resolved the conflict. Just as I scolded them for their mistakes, I will praise them for solving them. That is, as I wrote in the morality column: everyone screws up, the main thing is to resolve the conflict. 1) They apologized to me for the whole situation, which was very nice. 2) They returned the money that I asked for for those parts that did not arrive/raised questions. 3) They offered a very nice bonus for the entire situation.
To summarize
Perhaps now I will change my opinion in light of my specific situation: - Parts have been delivered, - Problems have been resolved, - Bonuses for the entire situation have been received
what I would expect from any good parts delivery service. So, using my example, you can conclude that the NVS-carshop company cares about its name and they are interested in customers for longer than one delivery, all the arguments are in front of you, I haven’t embellished anything, the whole situation is before your eyes, I’ll give you any proof in PM . Order spare parts for our favorite cars, and I’m in a good mood about the whole situation.
All the best, see you in the next blog.
Source
Online store of VAZ and Lada spare parts NVS-Car
The NVS-Car online store offers to buy spare parts for VAZ (Lada) cars with delivery from Togliatti to other settlements of the Samara region, as well as throughout all regions of Russia and the CIS. In our electronic catalog you will find all categories of parts, spare parts, assemblies and components for popular models of the Volzhsky Automobile Plant. Repairing domestically produced cars is a simpler task compared to a similar task for a foreign car, since all spare and consumable items are in unlimited access and are sold at reasonable prices without import markups.
You can order spare parts for VAZ (Lada) for all parts of the car:
- engine and brake system;
- transmissions and suspensions;
- electronics and exhaust system;
- fuel system and wheelbase;
- optics and glass.
You can buy these and other components, as well as body parts, tuning elements, auto chemicals, mats and other little things in one place, thereby saving time on searching and ordering the right product. Whoever you are - a private motorist, the owner of a car service or tire shop, a tuning specialist - you can always count on us! We guarantee high quality products, secured by guarantees, as well as prompt processing of your orders.
Favorable prices for Lada spare parts
Selling spare parts for VAZ in our store also means loyal and favorable pricing. By collaborating directly with trusted suppliers and the manufacturer, we do not inflate the cost of products. Moreover, we offer generous discounts when ordering multiple items, and also give you the opportunity to save on shipping.
Order the required number of VAZ parts, make a purchase on the website and pay for the goods in a convenient way. Russian Post, PEC and other transport companies with which we cooperate on an ongoing basis guarantee optimal speed of delivery to the specified address. Before shipping, the goods will be checked for quality and carefully packaged so that the part or spare part reaches you safe and sound.
If you have any questions, call the manager on the hotline or request a call back by filling out the contact form, or write to a specialist on VKontakte directly from the website. Take advantage of any of the opportunities provided to obtain important information about your order.
Characteristics
- Post office. Delivery to your locality depends on the distance from Tolyatti. On average 5-14 days in Russia. Delivery cost from 200 rub.
— Russian Post 1st class. Delivery to your locality depends on the distance from Tolyatti. On average 2-6 days in Russia. Cost from 250 rub. and the weight of the parcel is no more than 2 kg.
- Transport companies . We cooperate with many transport companies. During our work, we found out which companies carry out their activities efficiently and inexpensively. Transport companies deliver within 1-10 days across Russia and 5-14 days to Kazakhstan.
— TK PEK (pecom.ru) — One of the large transport companies. Many branches throughout Russia. Delivery from 300 rub.
— TK Ratek (rateksib.ru) — Shipments throughout Russia and Kazakhstan
— TC Business Lines (dellin.ru) — you must send your passport details
— GTD (Former KIT)
— Dispatch across Russia and Kazakhstan.
— ZhelDorExpedition (jde.ru)
— Energy (nrg-tk.ru)
— Pickup . You yourself come and pick up the goods from our office/warehouse. Only by prior appointment.
Notification: Upon dispatch, we will notify you and send you an invoice number (identifier) by which you can track your cargo. Upon arrival at the transport company's branch warehouse, managers will notify you about the arrival of the cargo, the delivery amount and the address by phone and/or SMS.
Russian Post. An arrival notification will be sent to your email address.
2) Online payment via Yandex:
Source
Conversion of Priora 1 torpedo into Priora 2
It's been so long since I wrote anything... a long time ago... does anyone miss you?
Well, okay, let’s get straight to the point)) I’ll say right away that work is going on and by the way, work is not only on the panel, it’s slow for certain reasons, but things are going and that’s the most important thing))
At the time of purchasing the Priora panel, there was a rush to install the panel from Priora 2, but since it is expensive, and the panel from Priora 1 came across to me very cheaply for my area, so I didn’t even think about refusing)) besides, I immediately had an idea do like Foks91 - buy a kit for converting Priora 1 into Priora 2 - Torpedo Priora 2. Upgrade kit. However, the price stopped me)) and I also didn’t like the fact that the monitor was installed a little far away, which would not be very convenient when using a tablet, and then I accidentally came across people making a visor for a tablet from a Kalina 2 Lux visor - this option interested me, if anyone is interested, I can provide a link send it to the VK group, this is not an advertisement))
Everything seems to be fine, but I liked the option that was a concept, but they didn’t sell it due to a large number of alterations, so the decision immediately came by itself - that means I’ll do it myself)) I took the huskylab post in which he described the alteration as the basis for the alteration for your panel - Installing a Kalina 2 visor on a Priora, thank you very much for your advice on my questions))
In general, after that, I started looking for a visor with nozzles, but when I saw the prices, I was a little taken aback - the prices were 1400-1800 rubles for a visor without nozzles + delivery, and the nozzle separately was not found anywhere... We started thinking about buying a ready-made one, then, suddenly, by chance in Krasnoyarsk in LADA-Detal I found a visor assembly for 725 rubles - I just grabbed it without hesitation))
Torpedo for VAZ 2110 from Priors for VAZ
result!
Today my story is about installing a “torpedo” panel from a Lada Priora. All of you (who drive VAZ 2110,2111,2112)
do you know what advantages this panel has, how convenient, practical and also technologically sophisticated it is (possibly), someone just wants to install it, someone installs it and is happy, someone modifies it, and someone immediately installs the panel from “ Priors No. 2."
But due to the pricing of our valiant “showdowns” as well as Avito users and the not particularly high availability of purchasing the panel
Priora 2,
it was decided to purchase a panel from
Priora 1.
04/26/2018 After searching, I found the right option and made an appointment. The path was not easy, I had to go to another city “Perm - Kungur” 115 km. from my location to the city. Well, okay, on the road - the road! As always happens on the road, strange things happen that you don’t even expect. More precisely, on the road, my engine temperature gauge began to jump spontaneously, up and down! ! ! I’m alone, I’ve already driven more than half the way, I don’t know what to do. I stopped to look under the hood, opened it - everything is in order, there is fluid in the barrel, there are no fluid leaks, the connector on the sensor is in place, in order to make sure that everything is in order, I removed the connector - put it in place, checked the instrument panel
— everything is in order, the arrow is at 90* degrees.
We close the hood, get into the car and drive on, BUT! The arrow starts jumping again!
We “forget” this and move on, but we don’t put the problem off for a long time, we will look into it, most likely the “sensor” of the engine coolant temperature has failed - we need to replace it.
An hour's journey and we are there. Meeting, we look at the product, we discuss the terms and price, handshakes and I become the owner of the “Prior 1” panel
, Hurray, comrades, Hurray.
The kit consisted of - the panel itself, the tidy, a tunnel, a harness under the panel, fastening screws and bolts, a ceiling lamp + a pocket for glasses, a ceiling harness, a central (passenger) lamp, rear windows (left-right), door trims (front-rear) ) + accessories for them.
We pack everything into the car and hit the road to work.
I went to work, laid everything out and went home. 04/27/2018 The next day I collected the material I needed, tools, installation instructions, as well as electrical diagrams. I set myself up to collect it day and night, or rather, I’ll start on Friday, continue on Saturday, and most likely on Sunday I’ll try to go home by car! And so the end of the shift is 17:00.
I decided to wash the whole thing since everything was covered in dust and a little dirt. Let's put it in order
While everything dries after washing, we go to disassemble the car.
Let's begin!
What chaos and a lot of dirt!
It’s so dirty, you’ll need to vacuum everything!
After tidying up the cabin, I began to remove the panel. This turned out to be not particularly quick and pleasant; a lot of bad and unkind words were said, BUT!
Things went as they should, time flew
sooooo
fast!
I didn’t take much pictures of how I took off the panel, it wasn’t that convenient and I most likely forgot. After I took it off I started fiddling with the wires and circuits.
This miracle without a panel)
We cut, implement, merge. We are waiting for a miracle!
At some point I decided to take a break with coffee and a snack, collect some information from the Internet and hit the road again.
Om nom nom
Let's sketch out the panel from the Priora.
fitting.
replacement
replacement
wire layout.
At some point I started to get bored with everything, since this whole process is still long and tedious, laughter-wire-scheme-wire and so on. I no longer took pictures of what I did and how I did it, how I connected the devices, the stove control, the alarm system and everything else. I was very exhausted, my head was hard to think, there were problems with starting, but I quickly solved them because I thought that I had mixed up the wires, but no, I just forgot to connect one contact from the alarm system, because of this contact I got blocked, but everything worked out and after a while At that time, I threw on the seat, screwed what was needed, went home and only on the way I remembered that I had to at least somehow show that the panel was standing, the instruments were working, I took a photo on the way.
Left the workshop.
All that remains is to install various types of plastic, put the interior back together and resolve the issue of some light bulbs on the dashboard.
And so, of course, it’s good that everything worked out, but without experience, everything took a very long time to assemble and install, there were difficulties and all sorts of nuances,
BUT! everything is decided - everything is established.
Appearance
Currently, tuning for VAZ cars has a wide range of choices. Since Russian-made cars are quite inexpensive, this attracts their buyers. Tuning for Lada cars is also available and can be found in almost any city.
Tinted glass
To give your car a beautiful appearance, the first step is to tint it. Car tinting is relatively inexpensive, ranging from 2,000 to 3,000 rubles. But after tinting, your car will shine with new colors. It is legally possible to tint car windows only from the rear. Since the light transmittance of the film is not so high, viewing in the evening will be difficult.
Lip installation
To give the car a stylish look, you can install a lip on the front instead of the standard fangs under the bumper. There are several types of lips. The rubber lip “Samurai” and the plastic lip from the Chevrolet Cruze fit perfectly on the Priora bumper. The lip should be secured under the bumper with self-tapping screws. The price of the lip is from 500 to 1000 rubles.
Lipspoiler
In the days of the nines, when our fathers raised the rear of the car by installing spacers under the rear shock absorbers and installing huge spoilers like in Need For Speed. Nowadays, it is stylish to lower a car; by the way, you can read how to properly lower a car on our website, and install a small spoiler that is glued to double-sided tape. The price of such a spoiler varies within 1000 rubles.
Alloy wheels
Everyone knows that the wheels of a car are the floor of the car, so the wheels of your car should be beautiful and you like them. On the Lada Priora you can install wheels with a radius ranging from R14 to R17. When installing R16 and R17 wheels, you will have to buy low-profile tires, which is very expensive and not practical, but at least beautiful. When installing disks with a large radius, comfort is lost and the chassis begins to work rougher since the rubber does not “eat up” minor road irregularities.
It is best to install R14 and R15 wheels. Such wheels are relatively inexpensive and the tires for such a radius are high profile. It follows that the comfort of driving a car will not be lost.
SE caps and mirror repeaters
In order to give your car a little luxury, you can install turn signal indicators in the prior mirrors and turn signal plugs in the wings on the SE. This modification is relatively expensive, but it significantly changes the appearance of the car and gives it a certain “richness”.
Sabers and bars
This is an amateur modification and is most often suitable for cars with a dark body color. The rear chrome-plated trunk saber and the front chrome-plated hood saber are painted matte black. This modification is very cheap and simple, but it has its own zest and is relevant when the chrome on sabers begins to swell, which is very common on Priors.
Improvements in the interior
Lux salon
If your car is not luxury, then you can give it this manually by purchasing an additional interior lamp from Priora Luxury, installing heated seats, sun visors from Luxury with a mirror. All these spare parts and accessories are sold in any car spare parts for Lada Priora.
Cases
Every car owner would like his car to remain in new condition for as long as possible. During use, seats are subject to a lot of wear and tear. In order to preserve the original appearance of the seats, it is best to put covers on them. There are a large number of different covers for taste and color. The cost of covers for a Priora varies from 1,500 rubles to 5,000 rubles, depending on the quality of the materials.
Steering wheel cover
With active driving, by 100,000 km, the steering wheel of the Priora begins to wear out. In order to protect it from wear and tear and an unsightly appearance, it is best to put a braid on the steering wheel. There are two types of braids that are put on the steering wheel and that need to be sewn together. Slip-on braids are easy to install, but do not completely cover the steering wheel. Stitched braids completely cover the steering wheel and protect it from damage, but are quite difficult to install.
Replacing Heater Switches
The interior heater switches in the Prior are not very nicely designed. In order to give them a more modern and beautiful look, they can be replaced with switches from Ford Focus. Such switches are not expensive and fit into the place of the standard Prior ones without any modifications. You can order them on AliExpress.
Rugs
Most of the time a person is inside a car. Therefore, it is important to maintain the frequency there. To do this, we will be helped by special EVA mats that perfectly retain moisture, unlike standard ones, and do not allow it to spill outside the mat. This is very important in winter, since snow that gets into the car with your feet begins to melt and form puddles in the cabin that can spill and an unpleasant smell of dampness in the cabin cannot be avoided.
Side mats
You can also install side mats between the door and the seat to protect your carpet from dirt. Such rugs are not expensive, around 400 rubles.
Technical improvements
Firmware or chip tuning
In order to improve the speed and agility of your car, you can flash the ECU of the Lada Priora for not very much money. This is done by qualified specialists. Using the firmware, you can customize the car as you wish, whether it is an economical car or a fast car.
Exhaust installation
As you know, a catalyst was installed on the Lada Priora. On cars with high mileage, it often gets clogged and fails, which slows down and slows down the car; replacing it is quite expensive. But there is a way out: replacing the exhaust with a spider without a catalyst. After replacing the catalyst with a spider. The Priora ECU will need to be re-flashed. For a more complete tuning of the Lada Priora exhaust, you can lay out the entire exhaust route. Which is not a cheap activity.
Replacing camshafts
Replacing camshafts with sports ones will increase the speed of the car and make it easier to accelerate and improve dynamics. Such work should be carried out in trusted service stations with subsequent adjustment of the electronic engine control unit.
Lightweight flywheel
Installing a lightweight flywheel will allow the engine to spin faster, thereby gaining speed faster. It was noted that when installing a lightweight one, the car has to move away at higher speeds.
Perforated brake discs
When replacing brake discs, it is best to immediately install perforated brake discs for the Lada Priora. These discs are very well ventilated, which allows them to heat up less and protects the pads from rapid wear.
Self-locking differential
A self-locking differential is installed in the gearbox, which allows both front wheels to spin simultaneously. As a result, a more reliable start from a place is ensured. Installing such a differential is quite difficult; the difficulty lies in adjusting it.
Reworking the backlight
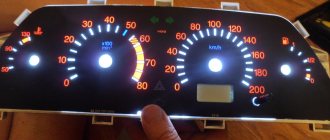
Tuning the instrument panel primarily involves changing the backlight of the scales and the background of the panel.
Cleaning up pollination
To do this, the overlay, which is coated with paint from the inside, must be made completely transparent. We remove all pollination (usually green on the inside where the numbers are) using a sharp, rounded knife. After this, you need to wipe the pad with alcohol - it is better to use a cloth rather than a cotton pad.
In order not to spoil the overlay, it makes sense to first clean off a small part and see how the numbers show through.
Next, let's move on to the lighting itself. It's better not to use 3mm LEDs. They are not very reliable and burn out quickly, but they are best for shooters.
Laying LED strip
If in the future you plan to make a smooth ignition of the light, then already at this stage you need to take all the tapes in the panel of the same type 12-volt, single-color or multi-color. They will need to be cut. Only about 70 cm of such tape will be needed for illumination. Degrease the surface and place the parts of the tape. We seal them (plus to plus, minus to minus). We bring the wires through the hole to the bottom of the panel. We insert the light guide into place and fix it. Place the cover and turn on the power supply. If everything is done correctly, the backlight will shine evenly and as planned.
This is the easiest way to tune the Priora panel.
Manufacturer's modifications
Air intake mesh in frill
To ensure the supply of clean and fresh air to the interior of the Priora, the manufacturer has provided a cabin air purification filter. But since the holes in the frill for air intake are very large, which contributes to the fact that foreign objects and debris get into the filter and render it unusable. In order to correct this ailment, it is necessary to solder a metal mesh into the frill, which will protect the filter from debris. This will extend the life of the cabin filter.
Interior noise insulation
As you know, Russian cars are not famous for sound insulation, so domestic Kulibins do the sound insulation of their cars themselves. In order to make sound insulation in the Lada Priora, it is necessary to completely disassemble the interior and glue all the necessary places such as the floor, ceiling, doors, trunk and engine compartment. Sound insulation is glued in. several layers such as vibration, heat, noise. After which the car will be unrecognizable
Acoustic shelf
In a hatchback body on a Lada Priora, it is best to replace the rear parcel shelf with an acoustic one made of wood. Since the original shelf simply loses its shape and bends at extreme summer temperatures. In addition, a standard shelf creaks quite often.
Installation of the 5th gearbox support
On 16 valve engines, 4 engine mounts are installed from the factory. Two guitars and two props. On 8 valve engines there are 3 supports. Two supports and one gearbox cushion. Most owners of 16-valve cars prefer to install such a support on their engines. This support allows you to reduce the rattling of the gear shift lever, its jerking when moving and simply helps to securely secure the engine in the engine compartment. It should be noted that after installation, some vehicles experience increased vibration at idle.
