Any car cigarette lighter, including the VAZ-2110, was initially designed only for use for its intended purpose. However, over time, “necessary” car gadgets began to appear that needed to be connected somewhere. Since the factory did not provide for the installation of a 12-volt outlet in the car, the cigarette lighter is the power source for vacuum cleaners, refrigerators, televisions, video recorders, compressors and phone chargers. This does not benefit him and quite often he breaks down at best.
At worst, a connected gadget left unattended can lead to a fire.
Which fuse controls the radio?
As protection of electrical circuits for all cars, incl. on the VAZ-2110 and VAZ-2112, low-fusible fuses are installed, which blow out, protecting the electrical network from a short circuit. Depending on the load of electrical circuits, they are distinguished by the rated current strength, the value of which is indicated on them. Not only the safety jumpers are marked, but also the connector sockets in which these low-melting membranes are located.
The VAZ radio fuse with a current of 20 A and marked F4 is located in the compartment on the right side of the steering mechanism. This element is responsible not only for the car radio, but also for the right fog lamp.
Sometimes on the same vehicle models, but of different years of manufacture, the markings of devices responsible for the electrical circuit are different. Thus, a car radio is often connected to the power system via fuses F10 or F4, where F10 is a backup connector used in the event of any breakdown.
Are you a car driver?! Then you can take this simple test and find out. Go to test »
Location
Since AvtoVAZ engineers tried to do everything so that car owners would not have problems replacing relays and fuses, it would be stupid to come up with a clever arrangement. Therefore, finding them is not difficult.
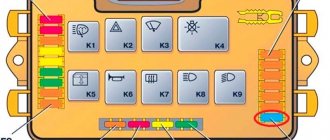
- The main unit is located to the left of the steering wheel;
- You will find the first additional block in the dashboard inside the niche, directly behind the main mounting block;
- The second additional block is located in the same place, only on the opposite side.
We will get acquainted with each block separately so that you do not have any confusion when searching for one or another fuse.
On injection engines with 16 and 8 valves, the location of the MB is identical, so the instructions are equally relevant for owners of both versions of the dozen.
Main MB
Relays and fuses are located here. Let's look at their descriptions in more detail and separately.
Found the main MB
Let's start with the relay.
| Designation | What is he responsible for? |
| K1 | Car lamp operation |
| K2 | Electric windshield wipers |
| K3 | Special relay that interrupts the turning lights when the hazard warning lights are activated |
| K4 | Turning on the low beam |
| K5 | Turning on the high beam |
| K6 | Area for installation of additional device |
| K7 | Rear window heating operation |
Fuse diagram
Next comes the fuses. They are located in the same place, but are designated by the letters F.
Each fuse is indicated with a current rating and designation. This allows you to use a new fuse with parameters that meet the requirements of the equipment connected to it.
| Designation | Rated current | What is he responsible for? |
| F1 | 5A | Lamps for license plate illumination, instrument panel illumination, indicator lights on the instrument panel, left side position lights, luggage compartment illumination |
| F2 | 7.5A | Low beam left headlight |
| F3 | 10A | Left high beam |
| F4 | 10A | Right front fog lamp |
| F5 | 30A | Electric door windows |
| F6 | 15A | Carrying lamp, cigarette lighter |
| F7 | 20A | Radiator fan, horn (horn) |
| F8 | 20A | Heated rear window |
| F9 | 20A | Windshield wipers and washer |
| F10 | 20A | Backup fuse |
| F11 | 5A | Right dimensions |
| F12 | 7.5A | Low beams in the right headlight |
| F13 | 10A | High beams in the right headlight |
| F14 | 10A | Left fog lamp |
| F15 | 20A | Heated seats in the cabin |
| F16 | 10A | Hazard signal, turn signals |
| F17 | 7.5A | Stop signal, ignition switch illumination, interior lighting |
| F18 | 25A | Interior heater, glove compartment light, cigarette lighter |
| F19 | 10A | Reversing light, brake light monitoring |
| F20 | 7.5A | Rear fog lights |
First additional block
Inside the central panel there is the first of two additional blocks provided for the VAZ 2110. You can find it at the bottom left on the front passenger side.
This block provides three fuses. Each of them has the same power rating - 15A.
- The first fuse is responsible for your vehicle's ignition and controller module.
- The second protects the mass air flow sensor, heating sensor, speed sensor and purge valve.
- The third is necessary to ensure protection of the injectors, as well as the fuel pump. So if problems arise with the fuel pump, the first thing we recommend is to check the condition of the fuse responsible for it.
Location of the additional block
Plus, the same block includes three relays:
- Relay number 4 is responsible for the electric fan;
- Relay number five is the electric fuel pump;
- The third relay is part of the ignition protection group on your VAZ 2110.
Second additional block
The second additional block should be looked for already in the driver’s feet, on the right. Behind the protective cover on the console you will find the required board.
There are three more components on it. They are responsible for:
- Immobilizer operation;
- Additional optics (mostly fog lights);
- For the operation of the car's central locking control.
Symptoms of a problem
The fuse is installed in the mounting block using flat rectangular legs clamped with spring contacts. All metal parts of a low-melting device are located in a plastic shell, the color of which indicates the rating of the device.
The transparent shell of the fusible jumper makes it possible to visually assess its condition.
It happens that the power supply to the car radio of a VAZ-2110 vehicle is lost, and the search for a burnt-out device located in the fuse box in the car interior did not yield anything; it turned out to be working in connector F4. In this case, the problem with powering the radio must be looked for under the hood, next to the battery, where there is another unit with these devices and relays. Having opened the block cover, study the layout of these devices on its inside. Having discovered a burnt-out device, replace it.
Buttons don't work
If the buttons on the car radio do not work, although there is power to it, the reason should be sought in poor contact or incorrect installation of the front panel. Buttons may also work poorly if they become stuck due to normal wear and tear. If the volume control stops responding to commands, control is not working correctly. Instead of increasing in volume, the sound becomes quieter when you turn the switch. What to do in such cases:
- Remove the front panel of the car radio, clean the contacts and return the device to its place. When installing, you need to make sure that the device fits tightly into place. There is a click when installed correctly.
- Replace worn buttons and switches. It is difficult to do this yourself; you need to take the car radio to a workshop. Do not press the buttons too hard or twist the knobs after replacement. Careful operation of the device extends the service life of parts.
What to do and how to replace
If the radio fuse on a VAZ has blown, then it is replaced with a new one that corresponds to the same parameters as the burned one. The block contains:
- circuit breakers;
- plastic tweezers used to dismantle and install these parts.
The cost of these parts is minimal and they are sold in every spare parts store. An experienced driver has several fusible membranes in stock. And considering how quickly they burn out in cold or hot periods of the year, which is explained by the maximum load on the on-board power supply system when the air conditioner is running, glass blowing and seat heating, every driver must have a supply of such elements.
The fuse is replaced with a device with the same power; in order to avoid fire in the wiring or other devices, it is not recommended to use devices with either higher or lower power. It is also prohibited to use homemade products instead of jumpers.
When carrying out any work on a VAZ-2110 car, be sure to disconnect the battery, which will save not only jumpers. Although the procedure for replacing this product is simple, it must be performed carefully and carefully.
Check fuses
The most common way to use a cigarette lighter is obvious. It is an excellent way to light a cigarette and, if the driver does not have matches on hand, then a cigarette lighter will be a great help in this situation. But it is also useful for connecting various electrical devices that have a special connector. Their list is quite rich: a mobile phone charger, an electric kettle and much more. He will also be able to provide work for an entire car wash.
The sensor or display does not work
An internal fault in the car radio results in the display not working. The cable connecting the display to the head unit may have come loose. This problem can only be fixed at a service center. You should not repair the display yourself to avoid causing more damage.
For the same reason, the sensor on the radio does not work. If this device is equipped with a control panel, then using the latter you can turn it on, off and perform other operations. Inaccurate installation of the front panel with a display or sensor also leads to incorrect operation of these components of the car radio.
The radio stopped playing, the power is on, the display is on, even the equalizer on the screen is running, but there is no sound at all. Only two speakers (out of 4 possible) of 35 watts each were connected, I connected other speakers to all 4 outputs, none of them even twitched, i.e. There is no power supplied to the wire to the speakers
What could have happened?
The radio is some kind of Chinese, ala Pioneer
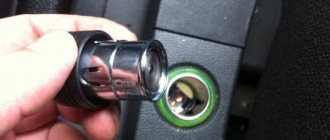
What is a cigarette lighter and where is it located?
To put it simply, the cigarette lighter socket is the simplest socket that has voltage. On such brands of cars as VAZ 2112, VAZ 2115, VAZ 2110, it is no more than 13 volts. Basically there is one nest. But on more modern and foreign-made Toyota Corolla and Renault Logan cars, their number can increase to two or three.
The design of this part is quite simple, so there are no difficulties during its operation.
Replace fuse
Connecting any electrical device is simple and without additional effort. The main thing is that it has the appropriate connector. This process is often compared to plugging a plug into an outlet.
But, like any other device, the cigarette lighter has its own characteristics. It is very important to take them into account when using it. Otherwise, you may encounter problems with it breaking. This is typical not only for domestic cars VAZ 2112, VAZ 2115, VAZ 2110, but also for many other newer ones.
Any breakdown in a car causes a lot of inconvenience to its owner. Even if at first glance it is not significant, and does not affect his overall work. But it may result in a malfunction of another device. Thus, for VAZ 2112, VAZ 2115, VAZ 2110 cars, the cigarette lighter and radio tape recorder have stopped working. They are interconnected, and this is more serious and it will not be possible to postpone solving the problem.
Car cigarette lighter
The socket of this device can be used to connect non-standard equipment:
In general, any household appliance that has a special adapter for connecting to the cigarette lighter socket.
The main disadvantage of this gadget is its unreliability in providing a long-term electrical connection. And also, switching high currents. The design features of the socket and the car cigarette lighter itself do not allow them to be kept in close contact with each other. As a result, due to vibrations of the car while driving, frequent disconnection (connection) of contacts occurs. Which leads to sparking of connections and in some cases can cause a short circuit. The same applies to adapter devices for connecting auxiliary household appliances.
Causes of malfunction
Before starting the repair, it is necessary to correctly determine the reason why the cigarette lighter and radio in the 2114 do not work. The most common one is related to the additional devices that are connected to it. Of course, this may sound ridiculous, since it is used directly for such purposes. But it is necessary to take into account the capabilities of the cigarette lighter. Each of them is able to withstand a certain amount of power. And if you use devices that are much more powerful, then this will cause its breakdown.
Among the main reasons why the cigarette lighter and radio do not work in the VAZ 2114 are the following:
- Connecting very powerful devices to it. For which this indicator exceeds several times the permissible standards for a fuse. It's quite easy to calculate. You can use this simple formula: multiply the maximum current value by the voltage of the on-board circuit. For example, 10 A at 12 V equals 120 W. This value is very important; if it is not taken into account, then repairing the cigarette lighter will become commonplace;
- The fuse has blown. This is a consequence of the first reason. It is checked first in case of problems with the operation of the device. The design consists of several fuses: 15A and 25A. The first is responsible for the cigarette lighter itself and the portable lamp socket, and the second for the unit that controls the heating and ventilation process in the car, the light bulb that provides light in the glove compartment, and the radio. According to the diagram, they are connected through the cigarette lighter. And when it fails, the others also malfunction.
- Oxidation of device contacts. To eliminate the damage, it is necessary to clean them. But first the mass must be reset. If this is not done, a short circuit may occur. This procedure is not difficult to do, so any car owner can handle it;
- Connector oxidation. It is also cleaned and, in very rare cases, replaced with a new one;
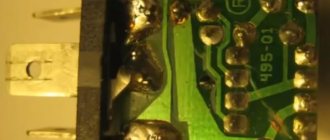
- Shaking the nest. This occurs quite often, especially if the additional device is poorly inserted into the cigarette lighter. Thus, the contact with its walls is weak. This leads to a short circuit and the contacts melt. As a result, the cigarette lighter and radio in the VAZ 2112 do not work. To fix the problem, you will need to clean and resolder the contacts or install new ones;
- The coil in the cigarette lighter has burnt out. There are several ways to fix this problem: installing a new part or repairing a broken one. The second option is used only if the first one fails. For example, a new part is very difficult to find and purchase. The repair consists of cleaning the spiral from contaminants that have formed on it.
The coil itself in the cigarette lighter heats up in less than 25 seconds. If significant changes are observed at a given time, then disturbances have occurred in its operation. It is necessary to correct the situation immediately so as not to lead to other more complex consequences. To do this, the circuit is adjusted by extending or bending the contacts in the device itself. If T
Results
By looking at the photo of the device diagram, you can understand why the cigarette lighter and radio tape recorder work together. This also explains their failure together. Therefore, it is very important to monitor the operation of the main element so that others do not suffer.
If problems arise, you can solve them on your own. But, as practice shows, it is better to immediately contact specialists. They will fix the problem much faster and more efficiently. Especially if this applies to modern cars such as Toyota Corolla, Renault Logan and others. Since they have many nuances that must be taken into account when repairing any part.
Fuse links are installed in the wiring of passenger cars to protect the equipment from short circuits. The fuse for the VAZ-2110 radio ensures normal operation of the head unit and related components. When installing an additional active-type subwoofer or amplifier, it is recommended to connect separate protective elements in the power supply circuits of the devices.
Additional recommendations
First of all, you need to avoid the temptation to solve the problem quickly by replacing the faulty fuse with something that comes to hand that can close the necessary contacts in the block.
For the same reason - in order not to provoke a more serious breakdown (fire, short circuit or melting) - you cannot get by with simply twisting the wires: you should definitely use a soldering iron with solder.
You should be careful when buying a new fuse or, especially, a cigarette lighter - low-quality counterfeits or uncertified products can fail immediately, so they should be checked in the store with a tester under load.
Finally, before starting work on repairing electrical appliances, it is strictly recommended to turn off the power to the car by removing the terminals from the battery. If you are unsure of your abilities, it is better to contact a professional car service center, or at least carefully study the relevant instructions (you can find them for any VAZ model, including 2114, on the Internet).
Functions
A blade-type fuse is a wire designed to carry a certain amount of current. If the parameter is exceeded, part of the element is heated and melted, which allows the power circuit to be broken.
To install the part in the mounting block, flat rectangular legs are used, which are clamped with spring contacts. Metal parts are placed in a plastic case; the color of the material depends on the product rating. The body is transparent, which allows you to visually assess the condition of the fuse thread.
Relay and fuse blocks VAZ 2112: description and explanation
Modifications of mounting blocks and fuses of the VAZ 2112 have changed more than once during the production of the model. Radical innovations were introduced only in 2002 after the appearance of a 16-valve injector.
In 2006, there was only one unit in the cabin, and in 2007 a console unit was added to it. This happened thanks to changes in the shield and gearbox, and the addition of a Europanel. The cover of the main unit became hinged, which simplified access to the fusible elements. Separate inserts outside the mounting blocks, for example, under the brake pad, have been preserved.
Main mounting block
Placed to the left of the steering column in the car interior. To get to it, press a special latch, after which the block goes down.
This is where the main set of fuses and relays is contained.
Console add-on unit
Can be found on the right side of the tidy behind the side trim. The elements are related to the operation of the engine.
VAZ 2112 fuse box pinout
The order of connecting the electrical wiring and the location of the relay can be found in the diagram markings.
VAZ 2112 fuse diagram
With an 8-valve and 16-valve engine, it is equipped with a main mounting block, and since 2008 an additional console has been added. A diagram with element markings is printed on the left side of the main block cover and placed below.
The designations of all elements are presented below. You can find the transcript in the table.
| Circuit breakers | Power, A | What protects |
| F1 | 5 | Lamps for turning on the license plate lighting, instruments, side lights, trunk, left side. |
| F2 | 7,5 | Low beam |
| F3 | 10 | Further |
| F4 | 10 | PTF |
| F5 | 30 | Door windows |
| F6 | 15 | Portable lamp (socket) |
| F7 | 20 | Engine cooling fan. Sound signal. |
| F8 | 20 | Rear window heating element. Relay for turning on the heated rear window. |
| F9 | 20 | Recirculation valve. Cleaners, windshield and headlight washers (wiper fuse). Relay for turning on the heated rear window. |
| F10 | 20 | Spare |
| F11 | 5 | Starboard side marker lamps |
| F12 | 7,5 | Middle left |
| F13 | 10 | Far left. Power indicator lamp |
| F14 | 10 | Left PTF |
| F15 | 20 | Electrically heated seats. Trunk lock lock |
| F16 | 10 | Turn signals and emergency lights. |
| F17 | 7,5 | Interior lighting. Ignition switch. Stop signal. Watch. |
| F18 | 25 | Glove compartment lighting. Heater controller. Cigarette lighter fuse. |
| F19 | 10 | Locking door locks. Relay for monitoring the serviceability of brake light lamps and dimensions. Direction indicators. Reversing light. Generator excitation winding. On-board control system display unit. Instrument cluster. Watch. |
| F20 | 7,5 | Rear fog lamps. |
- K1 - lamp health monitoring;
- K2 - windshield wiper;
- KZ - direction indicators and emergency lights;
- K4 - switch on low beam;
- K5 - high beam;
- K6 - additional relay;
- K7 — heated rear window;
- K8 - rear PTF.
Starter fuse and relay
Installed on the device itself between the engine and the fan radiator. If signs of a malfunction appear, it is better not to delay replacing the element and install a new relay.
Fuel pump fuse and relay
Located in the additional interior installer - No. 3. Responsible for the fuel pump relay No. 5.
Relay and fuse for cigarette lighter
No. F18 is rated at 25 Amps.
Stove
The 25 A element F18 is responsible for protecting the operation of the electrical circuit of the heater motor.
Turn signals
The elements are marked as F19 and are rated at 10 Amps.
Brake lights
Located in the main block - No. F17. Its power is 7.5 A.
Where is the alarm fuse located?
No. F16 and rated 10 A.
Cooling Fan
The F7 element with a power of 20 Amperes is responsible for its protection.
Which fuse goes to the radio?
This is an F4 rated at 20 A.
Window lifters
Fuse and relay for central locking VAZ 2112: where is it located
They can be found in a separate box behind the main mounting block.
Ignition
The main relay is located in the additional cabin unit, where it is number 6.
Reverse
F19 with a rating of 10 Amperes is responsible for the lamps.
Fogs
Protected by three inserts: right - F4, left - F14, and rear - F20. The power of all PTFs is 10 Amps. In case of tuning, you may need to replace them with new ones along with the fog lights. The connection occurs via switch K8.
Lamp health monitoring relay
Marked as K1 in the main block of the VAZ 2112.
Brake
Installed under the brake pedal.
Relay and fuse for injectors
The additional element F3 is rated at 15 Amps.
Fuse for interior light
The F17 element with a power of 7.5 A is responsible for the safe operation of the VAZ 2112 interior lighting lamp.
Number plate illumination
Corresponds to F1 with a rating of 5 Amps.
Generator
A three-level relay voltage regulator is located on the device. It is better to replace the factory element with a new one, since three-level voltage regulation often leads to a short circuit.
Heated rear window
Relay K7 is responsible for turning on. Protects the F8 electrical circuit with a rating of 20 Amps.
Seat heating
It is protected by a 20 Amp F15 insert.
Wiper relay
This is a K2 and without its stable operation there will be no washer supply to the windshield, and the wipers will not be able to do their job.
Charger
They placed it next to the device - one of the few elements of this kind under the hood of a car.
Low and high beam VAZ 2112
It is protected by fuses F2 and F12 (left and right headlights), and the high beam is protected by F3 and F13 (left and right). The first has a rating of 7.5 A, and the second has a rating of 10 A.
Fuse for the dashboard of VAZ 2112
Located in the wiring harness leading to the instrument panel from the battery.
Dimensions
There are 2 fusible elements - F1 and F11, left and right. The power of both is 5 Amperes. Factory fuses require replacement due to the fact that the dimensions often burn out due to their malfunctions.
Heated seats
It is protected by an element marked F15 for 20 Amperes.
VAZ 2112 speedometer fuse: where is it located?
Opening the trunk
This is an F1 and is rated at 5A.
Fuse F6
Responsible for protection against burnout of the car socket. Its rating is 15 Amperes.
VAZ 2112: fuse F17 blows
Most often, this element, which is responsible for interior lighting, fails due to a battery failure. Its power is 7.5 A.
Fuse F19
Responsible for protecting the brake light, reversing lights and dimensions.
Relay K1
An element of lamp serviceability, which in older versions is replaced by a jumper.
Relay K6
This is a reserve item.
Speed sensor
Located on the wiring harness leading to the device.
On-board computer
Fuse element F17 or F19 is responsible for it. In the first case, the power is 7.5 A, and in the second - 10 A.
Specialization : Graduated from the State Automobile University, worked for 20 years at GAZ-56, now I drive a Zhiguli.
Where is
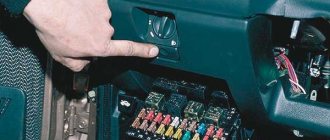
The fuses located in the instrument panel to the left of the steering column casing are responsible for protecting the power circuits on VAZ-2110 cars. The top of the unit is closed with a decorative cover, which is secured with a spring clip. To access the fusible links and relays, you need to press the button located under the rotary control for the headlight range control. The decorative casing folds down along with the mounting plate and the protective and distribution devices. On VAZ-2112 and 2111 cars, blocks are used that differ in the number and location of the relays.
Also inside the mounting block are special plastic tweezers and spare inserts. To replace the fuse, the part should be grabbed tightly with tweezers and then carefully pulled out of the socket. The new part must have an identical value; the use of homemade inserts made of wire or foil is strictly prohibited.
The use of fuses designed for high current strength is not allowed, as this may cause the wiring to heat up and the vehicle to catch fire.
This switching scheme speeds up installation, but is not correct, since there is a risk of overloading the radio or burning out the insert due to the simultaneously operating head unit and cigarette lighter. It is recommended to connect the radio directly to the battery; a 10-15 A fuse is located inside the power cable.
To protect the battery from discharge, the circuit passes through the ignition switch; a cord with red insulation is used for switching.
When the engine is turned off, the radio does not work, but voltage is supplied (through a yellow insulated cable) to save the settings.
The head unit contains a blade-type fuse rated at 5-15 A (depending on the equipment modification). The element is placed either next to the ISO standard connection block, or inside the wiring harness that comes with the radio. To replace an element, you need a player from a standard socket; for this, special hooks are used that press out the spring clamps.
After installing a new element, it is recommended to check the functionality of all devices involved in the circuit section. If the fuse blows again, the cause of the malfunction is a short circuit in the electrical wiring or inside the head unit. A tester is used to check the condition of the wires; it is recommended to send the radio to a service center for diagnostics and repair.
Any car cigarette lighter, including the VAZ-2110, was initially designed only for use for its intended purpose. However, over time, “necessary” car gadgets began to appear that needed to be connected somewhere. Since the factory did not provide for the installation of a 12-volt outlet in the car, the cigarette lighter is the power source for vacuum cleaners, refrigerators, televisions, video recorders, compressors and phone chargers. This does not benefit him and quite often he breaks down at best.
At worst, a connected gadget left unattended can lead to a fire.
The relationship between a car lighter and a radio in VAZ cars
A common problem for all VAZ car models (2114,2115, 2109, 2110 , 21099), this is the same voltage supply circuit to the car player, with output to one common fuse, which is additionally responsible for the power supply:
READ How to remove the door trim of an Opel Astra h
Thus, a failure as a result of a break, short circuit, etc., in the electrical circuit of any device leads to the shutdown of the rest.
Since the tape recorder is equipped with an additional safety device, coming after the main one, after checking them and replacing them, if necessary, the operation of the head unit, like all the above-mentioned equipment, is restored. If only the cigarette lighter (without the player) resumes operation, the cause of the malfunction should be sought in the car radio itself (which is the topic of a separate article).
Cigarette lighter diagram for VAZ-2110
Cigarette lighter connection diagram.
When starting to search for any malfunction, you first need to understand the operating principle and structure of the mechanism or circuit. With the cigarette lighter everything is relatively simple. We look at the device connection diagram and look for the weak link.
Troubleshooting
In any case, the breakdown can be either mechanical or electrical in nature.
Mechanical damage to the cigarette lighter socket is quite rare, although it can be damaged by a poor-quality or incorrectly selected plug. Based on the diagram shown above, the cigarette lighter is standardly connected to one power output from the mounting block with the glove compartment lighting lamp.
This is the first clue - if the cigarette lighter does not work, but the glove compartment lamp is on, the problem is either in the cigarette lighter mechanism itself (spiral, contacts, resistor), or in a broken wire in the area from the power terminal to terminal 25 of the mounting block.
Circuit breakers
Cigarette lighter fuse 25A, marked with arrow
However, fuses are the first to come under suspicion. If the cigarette lighter does not warm up within 20 seconds and the glove compartment lamp does not light up, most likely the 25A fuse F18 has blown. It is located in the mounting block to the left of the driver.
There is another 15 A fuse, which is connected to the cigarette lighter circuit. There is a socket on it and this may also be the cause of the malfunction. This fuse is marked with the symbols F6. In some modifications of the VAZ-2110, depending on the year of manufacture, both the cigarette lighter and the heater motor are connected to one circuit of fuse F18.
Therefore, checking the integrity of the fuse in these cases is also simple - the motor does not spin, which means the fuse has burned out.
Why do fuses burn?
Each consumer of electricity on board the car is designed for a certain power and a certain current consumption, measured in Amperes. If we plug in a video recorder, navigator, or charge a phone into the cigarette lighter through a splitter, it is not surprising that the fuse simply fails. Saving our wiring from overheating and short circuit, it melts, breaking the circuit.
That is why it is important to take into account the current consumption of additional devices - a compressor, a refrigerator and other architectural excesses. Both the power and the current consumed by the device must be indicated on the body of the device. It is highly undesirable to include powerful devices in the cigarette lighter circuit, as well as use splitters and plugs of dubious quality.
This could ultimately lead to a fire in the wiring.
Melted cigarette lighter wires.
It is not for nothing that in many imported cars the manufacturer has completely abandoned the cigarette lighter, and instead installs 12-volt sockets in the front part of the cabin (as is done in the same second-generation Ford Focus).
Checking the wiring
If the fuse is intact and we haven’t plugged any vacuum cleaners into the cigarette lighter, most likely the problem is in the contacts or wiring.
To check the cigarette lighter power wiring, we need to remove the center console by unscrewing several screws. Most often, the contact disappears in the contact chips, which are located to the left of the passenger behind the console casing:
- Unscrew the console cover.
Remove the cover from the passenger seat.
We take out and check the blocks with wires.
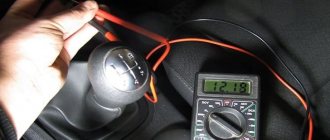
Check the cigarette lighter for a break or short circuit.
Cigarette lighter inspection
Lastly, we inspect the cigarette lighter itself.
It rarely fails, but if it does, we won’t disassemble it, it’s not the king’s business. We buy a new one.
On specialized forums, motorists write that the radios either do not turn on, or do not turn off, or do not play.
First on our list of typical faults is such a nuisance as the inability to read music CDs. Or the discs play, but with interruptions and failures. Here the problem is most often hidden in the drive mechanism. The drive has a huge number of different parts, which means they are all subject to wear. Since the radio in the car is used regularly, this is not a problem, but even a pattern.
Car radio does not read discs
Below is a list of the main malfunctions of cassette car radios and how to fix them. Depending on the complexity of the repair, the user must choose the option: whether to carry out the repair with his own hands or entrust the work to specialists. In any case, the information below will be very useful.
The car radio does not read discs
The main reasons why a flash drive is not readable
Most often, problems with reading information from a USB drive arise for the following reasons:
- The car radio does not support the file system format of the flash drive.
The oldest radio models support only the FAT16 file system, later modifications already work with FAT32, and the newest ones interact with the NTFS format. If there is a discrepancy between the named formats, then problems with reading will certainly arise.
When difficulties arise in this area, you need to familiarize yourself with the technical characteristics of the stereo system and clarify what file storage system format it supports. In the case where there is no documentation, everything will have to be done empirically. You take a USB drive and format it one by one for all systems, record test audio files and check it on your device. This work can be done using a computer. This is done as follows:
- Go to the “My Computer” section and find a removable disk (flash drive).
- Right-click and go to the context menu, where we select “Format”.
- Select the “File system” we need, for example, FAT32 and click the “Start” button at the bottom.
Formatting USB media
- The hierarchy is too complex.
All information could be placed in a playlist that also has subfolders, namely “modern pop - love songs - Basque”, then it is quite possible that the stereo system will not be able to read the most distant folders. This problem can be encountered if the car’s music equipment was released before 2000 or if it is a very cheap model. The solution to the issue is to compulsorily record all audio files in the root directory. This formatting is quite easy to do on a computer and create your own correct playlist.
- The permissible capacity of the flash drive does not match.
Over the years, USB flash drives have increased their storage capacity significantly. Old audio equipment, designed, for example, to read 8 GB of information from a storage medium; larger media will not be readable. Thus, when faced with a problem, you need to check what is the maximum allowable volume and, unfortunately, it is quite possible that you will have to use a flash drive with a small amount of data storage, otherwise the radio will not see the flash drive.
- Incorrect spelling of file names.
Many people, when creating their playlist, name audio files in Russian, but, unfortunately, some radios see Russian letters as hieroglyphs or do not see them at all. In this situation, everything can be solved by simply renaming the files in Latin.
Causes
This disease can be cured. This is done in the same way as in the case of home appliances. It is necessary to disassemble the drive and then clean the lens. In most cases, this is enough to listen to your favorite music on the road again.
- Both plastic and metal tend to “get tired”. Thus, all mechanical parts made of these materials are sooner or later subject to wear.
- Another reason for car radio failure is dirt. Over time, dust and dirt accumulate between the parts due to the operation of the car radio in extremely harsh conditions. In this case, failure of the optical part or various mechanical parts becomes common.
- Another common cause is mechanical failure, related in one way or another to the power circuit. Incorrect connection of the car radio or sudden surges in voltage in the on-board network are the root cause of such breakdowns.
Car radio fault codes
In some cases, it may be enough to simply completely disassemble the CD drive, then carefully clean the laser reading lens itself. The car radio then starts working as if nothing had happened. This ease of repair of car radios can be explained by the fact that during operation, dust settles on the lens, which ultimately affects focusing.
Malfunctions and ways to eliminate them
Before you remove the radio from the car and begin repairing it, read the list of faults typical for audio systems. Removing and repairing a car radio from a car is not such a problem, but before you take it out, you need to know exactly what to repair.
There is no display backlight or the system does not turn on
- Perhaps the problem is the lack of power at +5. If you decide to get the device out and repair it yourself, first of all you need to pay attention to diagnosing the second contact of the CN701 connector. It should have a positive voltage of 14 volts, this voltage should be transmitted to the collectors of the transistors. If there is no voltage, repairing car radios involves replacing transistors or a zener diode.
- There is no power activation signal. Before repairing car radios, you need to check the voltage of + 4.8 volts on the fortieth pin of the IZ901 controller. You should also check for the presence of a pulse on the third contact of the controller.
Testing the multimedia system with a multimeter
The car radio turns on, but there is no sound or noise
Car radios need to be repaired independently or by a specialist if there is no sound volume or if the volume is increased and tracks are played, the sound becomes loud.
There may be several options:
- There is no sound when starting the engine. If the sound disappears even when you increase the volume or there is no sound, this is usually due to the absence of the Stand.By signal. In this case, when the sound has disappeared and is not there, you should check the high-level pulse at +4.8 volts. We are talking about the fourth pin of the IC901 controller. If the sound disappears and there is no pulse, then car radio repair involves replacing the controller. If the sound disappears when you start the engine and increase the volume, you need to diagnose the four contacts of the power amplifiers.
- When starting the engine the sound is loud. If the sound is loud when the volume is increased, check for voltage at the bases; the resulting parameter should not be equal to zero. It often happens that the sound becomes loud when the volume is increased due to zero voltage - if this is the case, then car radio repair will be based on replacing transistors. Also, the sound sometimes fades when the volume is increased due to the Mute button not working - there is a possibility that the problem lies with the controller. If there are problems with sound volume, you need to diagnose transistor Q802.
- Volume problems may be caused by one or more circuits in the amplifier not working properly. If there is no sound, you need to diagnose the entire “path” from the input to the output of each circuit. Repair of radio tape recorders comes down to replacing transition capacitors or circuits.
Does not read disks, flash drive or disk is stuck
Why doesn't the radio read a flash drive or disk after starting the engine? The disk is stuck, stutters, the system does not see the flash drive?
The reasons may be the following:
- The radio does not read the flash drive, does not see the disk, or the disk stutters or gets stuck after starting the engine. Perhaps the device simply does not understand the recording format. In this case, repair of the radio is not required, you just need to burn the disc in a different format.
- If the system does not see the disk when the engine starts, the disk is stuck, stutters or heats up, this may be due to contamination of the optical lens. As mentioned above, problems in the operation of the buttons and the device as a whole after starting the engine can be associated precisely with dirt. In this case, the problem is solved by using a special cleaning disc. The operation of such a disk is carried out in accordance with the requirements specified in the instructions. You can clean the system yourself by blowing out the elements or cleaning it with a cotton swab.
- Another reason may be the lack of laser current; you can get rid of such a malfunction by adjusting it.
- Inoperability of loops and wires. It is possible that during the operation of the car, the screws inside the structure simply became loose, or it could be a leakage of resistors.
Buttons don't work
The buttons don't work - there are several reasons. Firstly, there may be mechanical damage to the buttons. To restore the functionality of the buttons, you need to disassemble the front panel and check the condition of the contacts. Perhaps the contacts from the buttons are simply coming off and need to be re-soldered. If the button is inoperative, it will have to be replaced.
Secondly, the problem with the buttons may be due to a software glitch. The problem can be resolved by rebooting the audio system and returning its functionality to the factory configuration. All settings will be erased from memory. After returning to factory settings, the device must be turned off for a few minutes.
The device is heating up
If the radio gets warm and turns off randomly, there may be several reasons:
- The system heats up and turns off as a result of poor power supply. Lack of power will lead to the radio turning off randomly, or this is due to power failures. When the radio gets warm and turns off, you need to check the power cable - perhaps it is just coming off or broken, then it will have to be replaced.
- The device heats up due to poor ventilation and turns off when it overheats. If the system gets hot, this indicates insufficient ventilation. This malfunction is relevant for Pioneer radios and, as car owners of such systems assure, there is nothing to worry about. But if the system constantly heats up and then turns off, you need to consider additional ventilation.
- Sometimes the device turns off due to software glitches. You can try to solve this problem by resetting the radio to factory settings.
A person who spends a lot of time on the road knows that the radio is an important part of the car. There are many types of such equipment, but any model is prone to breakdowns. Car owners often wonder what to do if the radio does not turn on.
Understanding nutrition
Car enthusiasts often write that the radio in their car does not turn on or, conversely, does not turn off. There are problems with power supply chains here. The reason is an incorrect connection, power surges in the network.
The radio may indeed not turn on or turn on, but some of its functionality will be unavailable. For example, there may be no display backlight, operation in player mode, or no sound.
In these cases, it is usually recommended to carefully check the functionality of the protective fuse, as well as the protective diode. It would also be a good idea to inspect the printed circuit boards. There you need to look for “burnt” tracks or swollen capacitors and damaged microcircuits.
As for the power supply issue, if the connection is incorrect, the poles of the wires may be accidentally reversed. Also, the contacts may simply wear out or short to the housing.
If you replace that fuse and it blows again, then things aren't that simple. You will have to use a soldering iron or take the device to a service center if you do not have basic knowledge of electronics.
So, first the “music box” needs to be disassembled. This must be done from the board side. So, you need to inspect everything carefully. Some car enthusiasts connect the device directly without a fuse. This will sooner or later lead to the radio in the car burning out.
If burnt tracks on the board are visible, they can be restored. Swollen capacitors can be replaced. And then again enjoy music in the interior of your car.
What to do when the radio in the car does not turn on although there is power to it
A person who spends a lot of time on the road knows that the radio is an important part of the car. There are many types of such equipment, but any model is prone to breakdowns. Car owners often wonder what to do if the radio does not turn on.
The sensor or display does not work
If the display on the radio does not work, you need to look for internal faults. The cable connecting the screen to the main modules is often disconnected. Only a specialist can fix the problem. You should not disassemble the device yourself, as this can make the situation worse. Due to the displacement of the cable, the operation of the sensor may be disrupted.
If the sensor on the radio does not work, you can use the remote control to perform the necessary operations. Incorrect installation of the panel may also cause the touchscreen or screen to malfunction. Testing the device in a service center will help you understand why the radio does not work.
No sound or noise
This problem can be caused by several reasons, the most common of which are:
- No signal. In this case, the sound disappears or loses volume. Checking the high-level pulse supplied by the fourth pin of IC901 helps solve the problem. If there is no signal, the controller must be replaced. If the sound disappears when you start the engine and adjust the volume, you need to inspect the amplifier contacts.
- No voltage at the base. In this case, the sound fades or disappears completely when you try to increase the volume. This problem is determined by checking the bases with a voltmeter. If the tested parameter is zero, the transistors must be replaced.
- The Mute button is broken. The change in sound quality in this case is due to a controller malfunction. If you have problems with volume control, you need to check transistor Q802.
- Amplifier chips burn out. If there is no sound, you need to inspect all the cables connecting this module to the tape recorder. Repair involves replacing capacitors and microcircuits.
Does not read the disk, flash drive or the disk is stuck
When using the car radio, the following problems with reading information may occur:
- Inability to recognize the disc. Occurs when the laser head is damaged due to vehicle shaking. Replacing this part helps solve the problem.
- Inability to read flash drive. First of all, you need to check whether there is a light indication on the drive. If it is present, the connector is working. After this, check whether the type of flash drive matches the parameters of the radio. Older devices may not be able to read large storage devices. Problems also arise when the software is damaged. They can be solved by flashing the radio.
- Disc jam. Associated with a breakdown of the motor, pressure roller or sensors. It is recommended to replace parts.
If there is no sound
Modern musical and automotive technology has one weak point. This is a UMZCH microcircuit. This is an amplifier. It often fails due to incorrect connection of the speakers.
If you decide to install the device in a car, you should connect the power last, after checking all other connections. This microcircuit also crashes if there is a power surge in the on-board network.
The power supply of this microcircuit is not stabilized by anything at all. It can fluctuate within significant limits. Some microcircuits want more voltage than the network can supply. Here you only need to replace the microcircuit or go to a service center.
Also, sometimes the radio does not play in the car due to wiring problems. In this case, you need to check the AUDIO fuse. In most radios it can be found in the mounting block. If the fuse is intact, then you need to start the car, and then use a tester to check whether voltage is supplied to it.
If there is voltage, then you need to examine the car electrical system and the correct connection.
The radio is heating up
You can repair the radio with your own hands if it becomes noticeably hot after a short period of operation. Most often, a device with such a problem also turns off on its own. The reason is poor contact between the power cable and the power supply.
To eliminate it, it is enough to check all the contacts and clean them, not forgetting that electronics is the science of contacts.
The appliance may become hot due to insufficient ventilation. Most often, this problem occurs with the Pioneer radio. But it manifests itself in the hot season, especially if the device is installed in a car without air conditioning.
Many repairmen who repair problems with Pioneer, JVC and other original radios begin repairs with a hard restart of the system, that is, resetting the settings to factory settings. This often helps. As experts say: seven troubles - one reset.
